New CNC build.

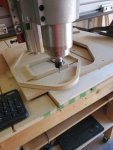
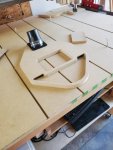
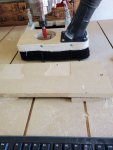
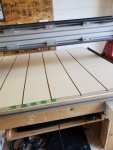
well not really exciting but I made a new top for the CNC the when I have is plywood and I have been screwing stuff into it I picked up some 3/4 MDF and routed T slots in it on 6 inch centers. Tomorrow I will take off the old plywood one and put on the new one.
20200427_171805.jpg
That is awesome. I need to get up to speed on Fusion 360. You are inspiring me.
Leo I am getting pretty good with it I did design the dust shoe for the CNC entirely in Fusion and the program is written. I checked the code this morning before doing the new table top.

I should be able to cut out the parts for the dust shoe since the vacuum adapter came in todays Amazon shipment.
 
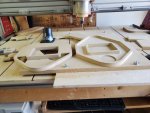
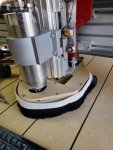
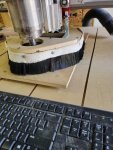
after installing the New table top, I down loaded the program for the top half of the dust boot. The 2 half will be made out of 3/4 inch MDF. Both half will have a 1/2 pocket inside to act as an air passage for the vacuum. The vacuum attachment will be behind the spindle. The spindle itself will fit down inside the front. The square section is there to accommodate the mounting base for the spindle. The boot will attach to the carriage so the spindle can fit indie the boot. The from will have a clear plexi-glass cover so I can watch the cutter. I may install some LED lights to make it easier to see. I have some 2 inch brush with will fit on the outside of the boot. it will have a 2 1/2 inch dust fitting.
20200429_130935.jpg20200429_161430.jpg

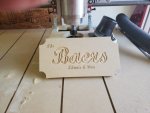
the CNC made all the cuts the design and program were all done in Fusion 360.
 
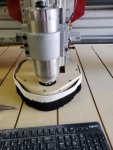
well I spent the morning learning F360. I finally got a handle on engraving. I'll post something on it tomorrow. This afternoon I milled out the bottom half of the Dust boot. I also changed out some 6mm screw on the carriage for longer one so I could use wing nuts to mount the brackets for the dust boot. This way I will be able to adjust the height based on material. Right now I just put a couple of inside corner bracket where so I can get a feel for how the dust boot will fit up under the spindle. The brush for it should be in this week or next and I can finish up this. I still need to cut out the cover for the top of the boot. I have the plexi glass just need to set it up on the CNC and cut it out. I'll do that tomorrow also. One observation is this machine is very powerful. I cut out the bottom boot at a feed rate of 150 inches per minute and did the pocket milling with a 3/4 inch bit and it didn't even hesitate.

20200502_163215.jpg
 
well AMAZON delivered the brush for the boot (It's only been on order for a month) so I can finish up the boot. I plan on making the cover for the front out of acrylic but I don't have any bit that will cut the acrylic they one I have just chip it so I am ordering new one. I made the temporary one out of MDF. It will due until I can get around to making the plastic one. I need screws to attach the brush to the boot and I need to make some extension to attach the L brackets that I will mount on the boot to the carriage. I'll take care of that tomorrow and then I should be able to give it a test.20200511_170447.jpg
20200511_170453.jpg
 
well I got the brackets mounted and the adjustable straps mounted, I can adjust the boot up or down every half inch over 2 1/2 inches.
20200512_163826.jpg
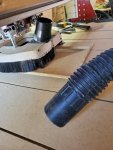
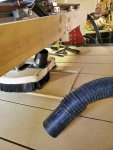
Then I started to put the brush on and discovered that the 1 meter of brush material was not enough so I figured well I can redesign the boot but I need more MDF cause I am out of 3/4 inch and if I order more lord knows how long it will take to get here so I decided to shorten the boot and relocate the hose attachment and see if that will work and well as you can see...

20200512_163854.jpg
I missed it by that much and not there is another problem the box I got mounted on the back on the gantry is in the way so what to do.... well the box will come off next week (hopefully) when the cable chain is supposed to get here, it's just temporary to keep the cables off the work table till the cable chain get here. Now I think I'll order more brush, order a 90 degree hose adapter and while I am at it I'll redesign the boot.

20200512_163858.jpg
Back to the drawing board..
 
Dust Boot Version 4.1

It ain't perfect but it works, I need to get the vacuum hose closer to the spindle. I got some 1 1/2 inch hose that is very flexible if I can get come sort of an adapter I could run 2 lines from a box mounted to the back of the carriage down to both sides of the spindle then I could hook the 2 1/" hose from the vacuum to the to the box. :unsure: If I only had a 3D printer I could make the adapter.... naw Sherrie would kill me, that's gonna have to wait...

20200515_130626.jpg
most of the dust is left over from previous milling. I shoulda cleaned off the table before I did this test.
 
Last edited:
Just testing out the CNC dust collection. I can see the dust collection need more work

"Here's my sign"

I know a couple of dudes with 3d printers, if you wanted to design the part, they'd be happy to print it out for you.
I'm volunteering, by the way, lol.

Brent I appreciate it and may take you up on that right now I got another "Bright" idea I want to try with the single hose.
 

Attachments

  • 20200515_162649.jpg
    20200515_162649.jpg
    43.6 KB · Views: 9
Top