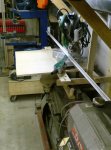
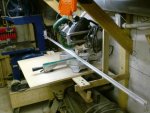
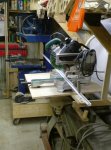
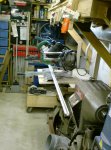
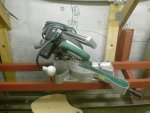
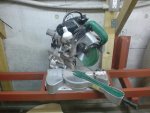
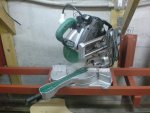
Pull Out SCMS Station.....?

Hi, Stu. I just had a thought of a little different approach that might, (or might not) work for you and (maybe) be easier to do. Instead of a slide out shelf to mount the saw on, what about a SHALLOW (front to back) stand that would fit into the allotted space, but have the legs wide enough apart to fit the jointer under it. Then just use 4 fixed (non swiveling) castors on the legs and you could pull the whole thing straight out to use it and push it back in when finished. With this wider stand, if you make a sunk portion for the saw in the middle, you could have solid support on each side of the saw for the material you're cutting, and even a built in fence on it with movable stops.:dunno:

(hope this makes enough sense for you to visualize it)
 
Bartee, I've got the 3hp 1ph cabinet saw, with the 52" rails, extension table, dado cartridge, dado insert, and extra standard cartridge paid for sitting waiting to be shipped from Vancouver :thumb: This saw is going to dominate the Dungeon :eek:

It will really be the central tool in the shop.

Norman, the idea I have is similar to yours, but the whole unit would slide out, not just the saw, the saw, in a little depression for it, and the wings, would all be one piece, and would slide out, maybe 12" total, so long stuff could be cut, without hitting the lathe, on the right, and Big Blue on the left. The whole deal would be on brackets off the wall, not touching the floor.

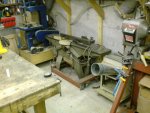
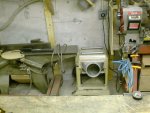
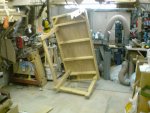
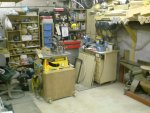
You can see, I'm working with limited space here............

jointer_in_place1.JPG jointer_in_place2.JPG
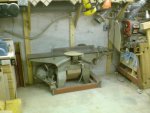
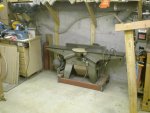
The router table on the left of the pics, will go poof at some point, as it will be placed into the wing of the SawStop.

northend.JPG southend.JPG
The Dungeon is in a real state right now, certainly a work in progress :rolleyes::wave:

Cheers!
 
Norman, the idea I have is similar to yours, but the whole unit would slide out, not just the saw, the saw, in a little depression for it, and the wings, would all be one piece, and would slide out, maybe 12" total, so long stuff could be cut, without hitting the lathe, on the right, and Big Blue on the left. The whole deal would be on brackets off the wall, not touching the floor.

You can see, I'm working with limited space here............

View attachment 27454 View attachment 27455
The router table on the left of the pics, will go poof at some point, as it will be placed into the wing of the SawStop.

View attachment 27456 View attachment 27457
wave:

Cheers!

Yeah, I understand, but what I meant was building the stand exactly like you describe the shelf, All sliding out as "one piece", (saw and shelf) but putting the legs on the ends of it that would mount just past the ends of the jointer tables. I just thought it might be easier AND more solid/stable to use "Legs" than making a slide out SHELF mounted to the wall, and from the Pics it looked like there was room at each end of the jointer for the legs. (It may look differently in person than in the Pics though).:D I'm sure you'll get it figured out though.:thumb:
 
Well Norman, the other problem I'd have with a floor model is that the floors in the Dungeon are really, REALLY bad, they can dip as much as a 1/4" in just 12" :doh:

This was originally designated as a "Storage Room" so almost no effort was made to make the floors flat:rolleyes: If I had it to do all over, I would have poured a few large buckets of leveling compound and then build a wooden floor, but I DO NOT have that chance now..... :bang:

Cheers!
 
Well Norman, the other problem I'd have with a floor model is that the floors in the Dungeon are really, REALLY bad, they can dip as much as a 1/4" in just 12" :doh:

Stu,

sounds like my floor. Makes things that are easy in other shops a real pain! :doh:

Someday, when all my projects are done, I'm going to build an scms cabinet. An actual builtin. I saw pics of a rolling cabinet once: picture a simple box, with the top being a doubled sheet of plywood, with a steel pin in the middle of the right and left side. A planer was permanently mounted on one side of the plywood, an scms on the other. When the guy wanted to switch over, he just flipped the ply over, and locked it in place. The cabinet I want would look like a long bench, with a bunch of portable tools on it: planer, scms, spindle sander. etc. When not in use, they'd all be flipped down, when I needed one, I could just flip up that one tool, and have a bed to serve as infeed and outfeed. I've been pondering it for a long time, since I have so little room left. Not sure of the design details, but this lifting and setting up portable tools every time I need on is for the birds... ;)

Thanks,

Bill
 
It turns out there is a big hump in the floor right in the middle of where the jointer goes :doh:I'm going to have to get one of them concrete grinding disk things and do some floor work :( NOT looking forward to that........maybe I'll put some sort of track down for the wheels under the jointer and level it then put concrete under it to keep it solid, that way the tracks would be smooth and level, and the jointer would pull in and out easily.. :thumb:

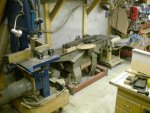
I did get more stuff demolished and hauled out of the Dungeon, which let me do the tool shuffle.....
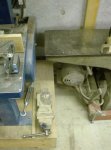
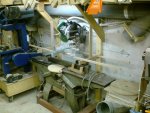
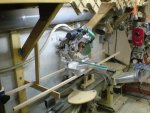
lower_level_tools1.JPG lower_level_tools2.JPG lower_level_tools3.JPG lower_level_tools4.JPG
As you can see, there is NOT a lot of room here to play with, in fact, I had to replace the tall casters on the cart under the thickness planer to get it to fit.
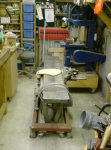
lower_level_tools5.JPG
Here you can see the jointer pulled out in position to use, not a lot of space.

I've also moved Big Blue back into his original home, and the router table is now on the end of the workbench, where the old DeWalt tablesaw used to be.

I've been using the new saw a LOT and I really like it, the blade is NOT designed for a chop saw, I think it is from a regular circular saw, so that has to be replaced, pronto.
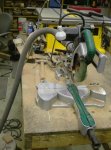
sawdust_mess.JPG
The saw makes a LOT of sawdust that does NOT get caught by the vacuum cleaner, so good dust collection is going to be needed for sure.

It is going to be tight to get the DC hooked up to the jointer and the SCMS. I'm thinking of putting the SCMS on two fairly thin tubes, that will run left to right under the saw, and will support the saw tables on either side, the area under the saw, and behind it will be open, I'll then build a tin pan under the saw, that will slope slightly towards the wall, and put a DC pick up there, as well as some kind of a hood around the saw, to get the airborne sawdust.

The jointer is going to be a bit more of a challenge:huh: I'm wondering it I have to stick to a pipe, for the duct.

the inside of the duct is 15cm (6") so the surface area is 176cm (28"), so if I had a rectangle that was about 20 x 9 = 180 cm (8" x 3.5" =28") with a proper transition, would that work just as well? :huh: :dunno:

Going to be some tin bashing goin on I guess.....

Cheers!
 
Maybe it's the Pic perspective, but it looks like your jointer sits REALLY Low to the floor. It looks like you would almost have to get on your knees to joint a board. :D Is it REALLY that low?:huh: I don't think I've ever seen one with legs so short.:dunno:
 
Maybe it's the Pic perspective, but it looks like your jointer sits REALLY Low to the floor. It looks like you would almost have to get on your knees to joint a board. :D Is it REALLY that low?:huh: I don't think I've ever seen one with legs so short.:dunno:
Remember, I'm in Japan, and this is an old Japanese jointer:D

it is a bit low, but fine to work on for me, I don't do a "lot" of jointing, but I've never had a problem.

Cheers!:thumb:
 
Hey Stu, Reading your thread has got me thinking about how to maxamize space in my garage shop. I've always wanted a scms but couldn't think of a good way to configute it my shop. What is the model of the Hitachi you show in the pics? I can't seem to find it on line. Is it still made? I recall reading about it in a woodworking mag a couple of years ago. I think I could make that design work in my shop. Barry
 
Hey Barry, the space most guys have in their garages leaves me GREEN with envy :D

I'm sure you can improve your set up, I think most of us can.

The saw I have is a Hitachi C7RSH, it is a 7 1/2" saw, and not sold outside of Japan, from what I can see. The only other "Side Rail" saw sold, as far as I know, is the Hitachi >> C12RSH << which was just a little large for my needs, but looks to be just about identical to the saw I have, it's big brother.

Cheers!
 
Stu

What about 2" thick walled square tube welded into an upside down L & lagged into the wall with your torsion box on top of it this would leave the area underneath completely clear no legs. You could also make metal brackets on top of the 2" tube for your drawer glides & mount the torsion box to the glide with a metal fabricated bracket. I don't know the width side to side of your space but I envision 4 brackets & drawer glides with the torsion box on top. You will have plenty of strength heck you could stand on it when its pushed in & it will still be strong when pulled out. 100# glides would do fine & make it so you have a pin that will drop in place on the back side the fence to lock it in place when in or pulled out. You could make it so you have the saw mounted down between the 2 sides with the deck level with the 2 tops & still have room for your sheet metal funnel back & toward the wall.
 
I really got some work done today, sparked up the MIG even :thumb:


mock_up1.jpg mock_up2.jpg
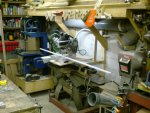
First, here is a basic mock-up that I did, to get an idea of the space I would be working with.The height over the jointer is not set yet, but the side to side and front to back position was very important to figure out.

position_1_folded.jpg
This is the fully closed position, back against the wall, and the saw "folded" so the handle does not stick out into the workshop. You will notice that everything will be within the footprint of the jointer, so I'd call that a success :D

position_1_open.jpg
This is the first position, ready to use, the saw has about 46" of space on either side of the blade, I'm sure that I'll be using the saw in this position most of the time.

position_2.jpg
This is the second position, the middle position. Here I have 46" to the right of the blade, and 94" to the left of the blade, darn near 8'

position_3a.jpg position_3b.jpg
This is the third position, in this position I have 94" on the left and over 96" on the right. :D

I'm sure that I'll have very few opportunities to use the saw in this position, but it really is not a big deal to make this extra capacity, so why not :)

brackets.jpg bracket_close_up.jpg
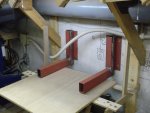
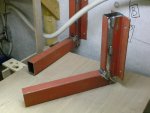
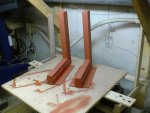
These are the two brackets I made up today, they should be strong enough ;) I've not mounted anything yet, as I have to go and get the steel for under the table the the saw will be mounted on. Once I get that steel, I'll be able to figure out exactly how high up the wall the brackets need to me mounted, I want the table top to clear the table of Big Blue.

I'm going to use some heavy duty full extension slides to make this work, I Hope they are strong enough for the job. I'll put the slides on the outside of the brackets, and then put a couple of piece of angle iron on the bottom of the table to mount the other side of the sides of the slides.

We shall see how it works. :dunno:


jointer_heights.jpg
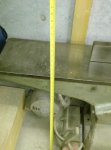
BTW, this is the jointer height, it is at 28", I don't know if that is really low or not, but it is OK for me to use, maybe I got used to it :dunno:

Cheers!
 
It's a new year, so I thought I'd do something different with this welding job...............
painted_brackets.jpg
.......... paint :D

I found out they sell this paint that matches the color on the steel just about perfectly (I spend the few more pennies to buy my steel with a coat of primer on it, only have to clean off the areas where you want to weld). I touched up the welded spots, then said "what the hey", and just brushed the whole thing :thumb:

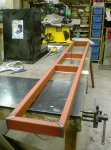
I also got the steel I wanted for the table part of the stand.......
table_started.jpg
I've got a lot of grinding, and then some more welding to do, but now I can figure out the height that I need to put the brackets on the wall. Once that is done, I'll be able to get the table set up, and then start working on the DC for the SCMS and the jointer.

Lots to do yet, but I'm moving forward :thumb:
 
Made some progress today.........

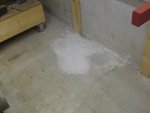
floor_flattened.jpg
I got the floor flattened out, nearly killed one of my cheap little 4" angle grinders :doh: The jointer now moves over the floor much easier :thumb:

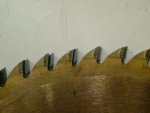
I wanted a good look at the blade that came on the saw compared to the new chop saw blade I bought.........

tooth_comparo.jpg
The blade on top, the copper colored one, is the one that came with the saw, I do not think it is a chopsaw blade, it will sometimes grab the piece of wood, lifting it violently. You can see the angle of the teeth on the bottom blade, the cutoff saw blade is much different.

One good thing about this smaller saw, (190mm compared to 216mm or 7.5" to 8.5") they are about 30% cheaper than the larger blades :D

1st_mock_up_1.jpg 1st_mock_up_2.jpg
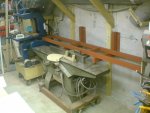
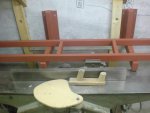
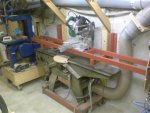
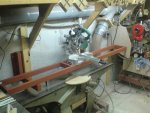
Here is the first mock up, made a couple of discoveries; the fence is in the way of the left bracket :doh: and the piece that holds the jointer fence is taller than the fence by a little bit............. whoops, missed those two points :eek:

2nd_mock_up_1.jpg 2nd_mock_up_2.jpg 2nd_mock_up_3.jpg 2nd_mock_up_4.jpg 2nd_mock_up_5.jpg
Here is the second mock up, this time I put the 6" DC hose in place too.

I might still raise the brackets a bit more, to give me a little more room under the brackets for the dust pan under the SCMS.

I really like this saw, I figure I can quite easily build surround for this saw that will catch most of the dust, because of the design, the saw's footprint is really compact :thumb:

More work to be done, but it is coming together! :wave:
 
:lurk:

I'm kind of surprised that a 90-degree joint like you have on your support is sufficient. No sag? But I freely admit to being ignorant of just how strong that kind of welding is.

Cool to see it unfold, Stu!

How's the leg? Hope things stay healthy!
 
The leg is still not 100%, but it is slowly improving, which is good, thanks.

I would bet you could hang a good 100 KG off of one of those brackets without any real sag at all, this is structural steel, they sell it to build strong stuff. The walls of it are 2.3mm thick, most of the steel you see, the square tube stuff of a smaller size is a LOT thinner, maybe 1.3mm.

The weakest link is going to be the full extension drawer slides I'm using, I may have to bite the bullet and get some really heavy duty ones :dunno:

Cheers!
 
Top