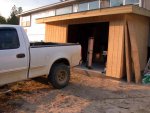
Birth of a shop - The Final Trimester

Well, I was able to get in a good twelve hours of work on the shed today. Actually, about eleven hours of work, and an hour trying to fight the wind as it tried to wrench sheets of T1-11 from my grip, and retrieving parts and tools that the wind decided to send flying...:dunno:

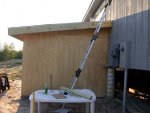
I was able to finish the two knee walls on the shop side of the shed. I also got the two last (almost) full sheets installed on the rake walls. I then applied Z-molding to the top of the sheets on the rake wall, and then cut and installed the angled top slivers of sheets.

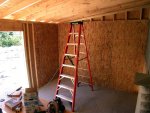
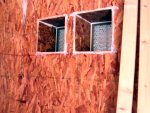
With the exception of the partial sheet I need to cut in the morning to cover the door opening, the shed is now completely sheathed:
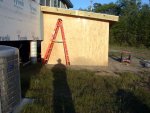
DSCN6228.jpg . DSCN6229.jpg . DSCN6230.jpg . DSCN6231.jpg

(I just noticed that I need to clean the lens on my camera. Sorry about that...:doh: )

Once I was done outside, I went back inside and finished installing the switch and outlet covers that I painted. Well, those that I was happy with anyway...:dunno:

DSCN6233.jpg

Quite a few needed a second coat:

DSCN6232.jpg

Tomorrow I'll put up that last sheet of T1-11 on the front of the shed. Then cut the two sheets to define the opening.

Then I move on to insulating and sheathing the interior walls that will be part of the 'plenum room'. Then I have to build two walls...one to attach to the shop to define the 'back' of the plenum room, and one to be the actual partition wall that defines the right side of that room.

If I have time and energy left, I'll go get four more bundles of shingles and get those installed so the roof will be complete.

We'll see how far I get tomorrow...

Thanks for following...
- Marty -
 
Another two-day-no-post...what's up with that??? :huh:

Well, I've been busy, and I was just too tired to post last night. :dunno:

I started the day yesterday by picking up four more bundles of shingles and getting them installed. The roof of the shed is now FINISHED! :thumb:

(I didn't take pictures since I can only get up on a ladder and shows sections of the roof. Take my word for it...it's done! :rolleyes: )

Once I was finished with the roof, I took off my roofers hat and put my carpenters hat back on...

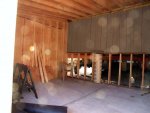
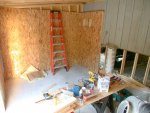
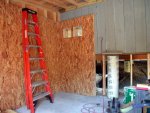
I insulated and sheathed the interior of the rake wall and front wall in the shed:

DSCN6239.jpg

Today I got an early start...but not in the shed. I had 'an errand' to run, which I'll detail in my next post.

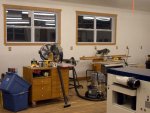
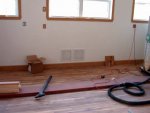
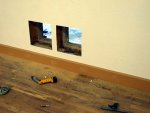
Once I got back from my 'errand' this afternoon, I got back to working on the interior of the shed. I framed, insulated, and sheathed a wall up against the shop to serve as the back wall of the plenum room. Oh, but before I framed the wall, I had to go into the shop, locate, mark, and cut the return air holes in the shop wall:

DSCN6248.jpg . DSCN6249.jpg

Each of those holes are 12"x12". I already have a grille that size in the office, so I used it as a template to mark and cut those holes. 12x12 fits nicely in a stud bay, is the same size as one I already have, and will allow me to keep just the two size filters in stock...12x12 for the office and these two, and the 32x32 for the main air return for the HVAC system.

I'll be running to the HVAC wholesaler in the morning to get grilles and filters to fill those holes...as well as some other 'supplies'.

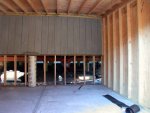
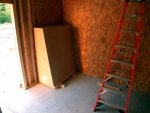
So, with those two holes cut, I could frame the wall that goes up against them. I got it framed, insulated, and sheathed:

DSCN6240.jpg . DSCN6241.jpg

The next step is to 'line' those two holes in the wall with OSB and caulk. And then comes the real challenge. Denise and I have to figure out how to get the plenum out of the shop and into the shed! :eek: :dunno: :doh:

Once the plenum's out there, I can build and stand up the final wall that defines the plenum room. Getting that monster out there is going to be interesting. :rolleyes:

I'll be posting more detail on my 'errand' from earlier today in another post.

Stay tuned...and thanks for following...
- Marty
 
I was planning to post about todays 'errand', but I'm sorry to say it's going to have to wait until the morning. I can't keep my eyes open long enough...:dunno:

Sorry...
- Marty -
 
Sorry about the tease last night. I was beyond exhausted! :doh:

Back to our regularly scheduled program...:p

Ok, so I had to 'run an errand' today...(now yesterday)

Well, it was more of a 'supply run' than an errand. Since I'm almost done building the shed, I'm almost ready to work on the actual dust collection system. I've shared pictures of the plenum and collection-box/drop-box I've built, and how it's all going to go together in the shed. I've also shown pictures of the blower that's going to move the air.

What does that leave for the system to be complete...?

DUCTING, that's what!

And that's what today's run was all about! ;)

I've been searching and shopping for quite a while to find an affordable source for spiral pipe, since that's my preferred material. If I wasn't able to find a source that was within my very limited budget, I was planning to learn to weld so I could use that irrigation pipe Denise hauled back to the house for me a while back.

Well, I'm very happy to report that a source for spiral pipe has been found! I'll be creating a new thread to detail the vendor/manufacturer, discuss their pricing structure, etc. I HIGHLY recommend that anyone considering duct work of any kind look into the company I found before they make any decisions.

I'll come back to this thread and post a link to the new thread once I create it. For now...onto the rest of the story...

(Edit: Here's the link to the thread I created about the pipe vendor.)

So, I designed a piping layout I was happy with and sent it off to the manufacturer I chose. I worked with the owner of the company on a few details, faxed him a copy of my layout and got back a quote that I simply couldn't refuse.

He was offering to MAKE me all the ducting in 22 gauge galvanized steel, and all fittings welded (not stamped) 20 gauge galvanized steel. As a point of reference, Onieda lists 24 gauge (much much thinner) spiral pipe and fittings in their catalogs. The stuff I was going to get was almost twice as thick!

All this happened about a week ago. Monday I got a call that my pipe was ready to be picked up. So I borrowed a trailer and headed to Jacksonville Florida.

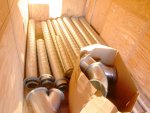
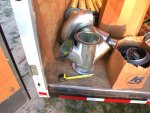
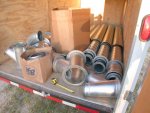
Here’s what I came home with:

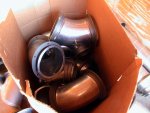
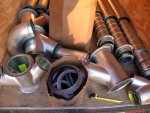
DSCN6242.jpg . DSCN6243.jpg . DSCN6244.jpg . DSCN6246.jpg . DSCN6247.jpg

I placed my big 25' Fat Max tape measure in the picture to try to give you all a point of reference in terms of size. The actual pipe you see in the background ranges in diameter from 10", to 8" and down to 6". There are three 10' sections of 10" (for the main trunk). Then inside those are sections of 8", and finally inside those are sections of 6". You can also see that there are sections of 8" and 6" laying next to that.

In addition to the large fittings you see laying on the floor of the trailer, that large cardboard box is FILLED with more fittings!

When I got to the loading dock and first saw this stuff, the only thing I could say was WOW! This stuff is heavy and thick! The weight of the 20 gauge fittings simply amazed me. This is certainly not HVAC ducting!!!

It's not too clear in the pictures, but there are flanges on the ends of the fittings, as well as on one end of every section of pipe. And here's a picture of the remaining flanges:

DSCN6245.jpg

Instead of the typical slip-together-then-fasten-with-sheet-metal-screws connections, this is industrial piping that uses flanges. They're called "Vanstone" flanges. Here's a link that shows the connections in better detail. (Note: That company is NOT the manufacturer I went with! Their prices were signifcantly higher than my chosen vendor.)

Essentially, the end of the spiral pipe gets bent back to the metal flange/collar that's been slipped over the pipe. A silicone gasket is placed between the two ends, then the flanges on each section are brought together and connected with six sets of bolts and nuts. The resulting connection is very sturdy, and servicable!

The Vanstone flanges do a few things. They allow me to trim the pipe to exact size as I'm installing it. They provide a very strong and air tight joint. They also increase the installation effort, but I think the added labor will be worth it, given the added strength of the joint. (We'll see if I still think that after I've spent a week or so under the shop putting this all together!)

I'll obviously be posting updates as I begin work on the ducting, but I just wanted to give a high level overview now.

(Edit: I forgot to mention, the entire trailer load of pipe, fittings and flanges cost me a grand total of $1090. That's less than half what I was quoted from others that were offering thinner pipe and stamped steel fittings!!)


So, there you have it...my errand from yesterday morning. After a six hour drive, I got back out in the shed and got the walls done I showed in the previous post. I guess that's why I was so tired last night...:dunno:

Well, I'm off to get the HVAC grilles and some more assorted supplies so I can (hopefully) finish the shed today. That is, of course, assuming Denise and I are able to get the plenum out there...:huh:

Thanks for following...
- Marty -
 
Maybe you should have waited and taken the cut pieces of the plenum out and assembled in place?? :D For moving in the shop, can you use 3 or 4 flat furniture dollys? Use your engine hoist and flat strap to raise the plenum up to get the dollys under it? If not, get several pieces of 1" PVC, (schedule 80 is the thickest walled isn't it?) and somehow get these under it to let it roll on. Build a wooden ramp out of 2 X material to slide it down/out the loading dock, onto the pickup bed, back said pickup close to bldg, and use ramp to slide it to the entrance.
Are you going to have to turn it on it's side to get it through the opening of the shed? Again use the furniture dollys to set the plenum on as it comes off the truck bed. The biggest problem I see is the manpower to do the "controlled" drop to the floor if you have to have it on it's edge for this. Maybe some sort of block and tackle from the rafters? You did say you built this thing like a bomb shelter...that was for a reason huh?:D
Good luck and if nothing else, be safe!! Jim.
 
Jim,

The current plan (when Denise can take a lunch break and I'm back from my morning shopping) is for the two of us to drop the plenum down from the sawhorses onto a hand truck. Once on the handtruck, I should be able to wheel it out the front double doors of the shop, down the two stairs, and out to the shed.

Once out there, we face the challenge of getting it up off the handtruck and into position in its new room. We'll deal with that later...:rolleyes: :dunno:

- Marty -
 
I was thinking it was heavier than a hand truck would be safe with. Glad I remembered wrong, that will make things much easier. Hopefully your ground is not as soft from the recent storms as mine is right now. Good for digging, bad for hand trucks with weight on them!:D Jim.
 
Marty,

I haven't posted in our thread in a while. Not because I haven't followed it, I read it everyday. I just ran out of ways to say how impressed I am at what you've accomplished.

Keep up the good work.:thumb: :thumb:

Respectfully,

Randy
 
Marty,

I haven't posted in our thread in a while. Not because I haven't followed it, I read it everyday. I just ran out of ways to say how impressed I am at what you've accomplished.

Keep up the good work.:thumb: :thumb:

Respectfully,

Randy

Randy,

Thanks for speaking up. I'm glad I'm still keeping you entertained! ;)

I'm hoping it won't be too long now when I can call the shop done and start using it...instead of building it! :huh:

- Marty -
 
Ok, so I lost quite a few hours this morning and early afternoon to more supply runs. I had to get grills and filters to fill those holes I cut in the shop wall. I also had to get hardware to put that spiral pipe together. I also had to get...well...the list was long...:dunno:

Once I got back to the shop, the first thing I wanted to do was fill those holes in the wall. Denise was working, so I couldn't try to move the plenum...alone...:eek:

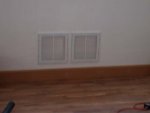
I lined the holes with OSB and then caulked them. Then is was just a matter of screwing the grills into the openings and putting a filter in each one:

DSCN6253.jpg . DSCN6250.jpg . DSCN6251.jpg

The HVAC whoilesaler I deal with didn't have the better quality pleated filters in stock in the 12"x12" size, so I picked up a case of the cheapies for now. I'll order pleated filters when I burn through half the case of cheapies...:dunno:

Once I had those holes plugged so bugs would be kept out, I moved on to mounting the ceiling ledger around the plenum room. Around that time, Denise was done in her office and came out to lend a hand.

It was time to move the plenum. It was her idea to use my truck, instead of the handtruck I planned to use. Turns out she was right, since it went pretty smoothly. We lifted the plenum off the sawhorses and placed it on the floor of the shop. We then stood the plenum up and slid an appliance handtruck I have under it and strapped it in. We then wheeled it over to the loading dock and lowered the4 assembly onto the tailgate of my truck. I drove the truck to the shed, backing up so that the tailgate was inside the shed. We then lowered the handtruck/plenum down onto the slab and put it where it now sits:

DSCN6254.jpg . DSCN6252.jpg

That sure went A LOT smoother than I was anticipating!!! :D :thumb:

Tomorrow I'll work on building that final wall to enclose the plenum. Once built and stood, I'll mount cleats to the walls so I can get the plenum up and mounted in its permanent home. Then I'll move on to plumbing the plenum, attaching the collars and filter bags, etc.

But now, it's time for dinner and a soak....:eek:

Thanks for following...
- Marty -
 
Is the blower going to be under the shop, or in the shed?
And the scavenged irrigation pipe is going to stay in the back forty?

I'm curious to see how you're going to run the pipe. I know the central tools will get piping through the floor. But for the stuff along the wall, are you going to make one hole, and bring the main line up and run along the wall/ceiling (with your 7hp blower I bet that'd be okay) or run the line under the shop and make many holes. I bet I can guess. :thumb:

Reminds me I didn't see any blast gates in that pile-o-pipe.

Hope you're still having fun!

...art
 
Marty,
all of this dust shed work has me convinced that I'm going to need a bump-out for a DC when I get my shop going. Initially at least I'll live with my little one lung Jet DC. It's only a 650cfm unit, but it does collect chips when hooked to one tool at a time. I'd like to do a much smaller version of your DC shed. I'll put the larger (likely a HF like Vaughn's only Blue) DC in one side and a chip box in the other. I've already got the prime location all mapped out. My shop is going to be 9' from the property line. Code requires 6' from that, plus 6' from any existing structure. I'm adding in 3' for the DC bumpout and an eventual lumber lean-to.
 
Well, I had a nice post nearly finished earlier this evening, when I was called to the phone but when I got back and finished it about 20 min later and hit post, it said I was no longer logged in. In the process of logging in, the Post went :wave: :wave: (Bye Bye). This has happened several times the last few days, Soooooooo......I'm not going to redo that post, but will just say, YOU DONE GOOD, and I really like your Duct and Fittings.:thumb: I will say that other than cutting the thicker material, I think you may actually save time on the install, since you shouldn't have to tape and caulk all the seams and joints like you would on most other systems. I assume you are going to make your own Blast Gates, as they are easy to make, (and CHEAP TOO).:D Can't wait to see it all come together.
 
...I'll put the larger (likely a HF like Vaughn's only Blue) DC in one side...
Hey Ned, I'm pretty certain that purple has more horsepower. At least that's the impression I get when other people see my CD. They all say "that really sucks", so I'm guessing they must know their horsepower. :rofl:

Man, that's some beefy duct and fittings you got, Marty. :thumb: I'm guessing you won't be leaving any small tools within a a couple feet of an inlet once you get the whole DC system hooked up.
 
Top