Birth of a shop - The Final Trimester

[size=+1]Marty,
Nice table - Now it just needs a couple cypress Adirondack chairs to replace those metal and plastic ones...

What about it, Denise?[/size]

Jim,

I think for our back deck...the metal/plastic chairs are perfect. They're pretty tough against wet towels.. :thumb: Not to mention they don't give off slivers like the Cypress can... :eek:

I have to admit that Adirondack chairs would look a lot nicer though... perhaps down the road we'll make some... (pencilling that on my "honey-do-list" for a future project).

We'd just have to use something other than Cypress... :rofl:

Denise
 
Now that you have a big slider, you should consider something like this: Arrange the boards as you want them, and tack a scrap (thin plywood, masonite, or a couple regular boards) to the bottom (so the nails don't show when you remove them later). Clamp the assembly on the slider as a unit, and cut the ends - no need to figure the angles for each board. On my slider, the blade is 7/8 inch away from the edge of the slider, so that is a quick way to align where the cut will come on the assembly. The hold-down clamps will probably be adequate, but you could turn the miter fence to match the position of the assembly if you wanted more support.

I would probably do both the front and back the same way, but you could use the rip fence to be sure the front and back were exactly parallel.

Since this is Q&D, I would probably attach the front and back flush to the new cut, and then trim the ends on the slider by aligning the assembly parallel to the side boards


Charlie,

Those weren't the angles that challenged me. It was the obtuse miters on the corners that took some noodling. I had to cut 56.5 degree angles on fours ends. My miter saw won't do that, so I had to get creative.

The angles you're talking about would work doing it your way, but all I did was lay out the boards with appropriate spacers, place the table frame over the boards, draw a pencil line and follow that on the saw. Took just a few minutes and I had perfect matches for all the tapered boards! :thumb:

But, I'm sure learning all sorts of WAY easier ways of doing things now that I have that slider. It's a learning curve for sure, but one that's worth the effort to overcome!!!

- Marty -
 
God, your so organized, it's sickening. I think I'll go clean my shop.

Richard

* W A R N I N G - F O R - R I C H *

Rich, if you're about to read this post, you may want to rethink it and go back to your shop. I don't want to be responsible for what happens when you see what I've been up to!


:rofl: :rofl: :rofl: :rofl: :rofl: :rofl: :rofl:


Yup, I've been straightening up and organizing some more!

In fact, that's what I'll be up to for the next several days. I'm trying to go through all the "stuff" that came with us from Virginia. It's tough, since I don't have the 16' wall of pegboard we had in VA.

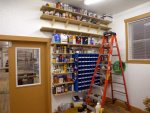
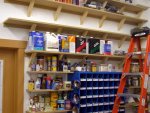
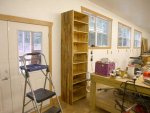
Today, I added four more 8' long shelves in the finishing room:

DSCN6652.jpg . . DSCN6653.jpg

A sheet of 3/4" MDF, and some scrap 2x that I ripped down, and I have some shelves that are strong as can be!

Tomorrow I'll (hopefully) finish moving stuff onto those shelves and finish getting the large (treated wood) bench cleared off. Or maybe not...:dunno:

Thanks for following...

And Sorry Rich, if you didn't heed my warning and read this far anyway! :rofl: :p

- Marty -
 
I think we can start calling it "Marty's Studio & Woodworkers Emporium! :thumb:

You going to stock as much stuff as the BORG or what :D

Looking good!:wave:

Well, with the exception of the nuts-n-bolts bin, all that stuff came with us from our shop in VIrginia.

And you didn't see the large trash can of adhesives and water-based finished that I had to toss because they didn't survive the time in blistering-hot/freezing-cold storage! :rofl:

What can I say...I hate running out of, or not having something I need. :dunno:

- Marty -

Oh I hear you, for me, to get any of that kind of stuff, I have to order in online, and then wait two days to get it, or diver 25 minutes in Tokyo traffic and pay a hefty price for it, or drive 1 hour out to Joyful Honda, my BORG and pay $20 in tolls on the expressways and stock up, I usually take the last option, as I might have to drive further, and pay for the expressway, but the selection is WAY better and the prices are too! :wave:

Cheers!

PS, I sure wish I had a quarter of the wall space you have, heck make that a 1/10th :D
 
Another WARNING for Richard

Richard, I'll warn you right now that this post might just drive you over the edge...:rofl: :rofl: :rofl: :rofl: :rofl: :rofl: :rofl:

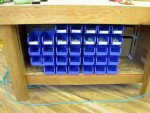
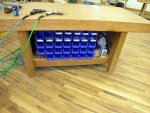
Today Fastenal delivered the bins and holder that I ordered, so I took the time to get them mounted. The bins are standard Akro-Mill bins, and the holder is a chunk of 16 gauge steel with louvers pressed into it. The bins lock under the louvers.

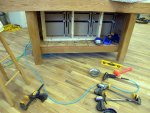
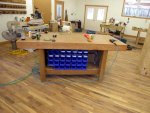
I decided to mount it under my no-longer-quick-n-dirt bench:

DSCN6654.jpg .... DSCN6655.jpg

All I had to do was build and mount a small 2x4 frame in the hole on the back side of the bench. Screwed to the OSB bottom, and screwed into cleats that got screwed into the webbing under the bench top...and it was secure as could be!!! :thumb:

Once I lagged the panel to the 2x4 frame, it was just a matter of slipping the bins onto the tabs protruding from the panel:

DSCN6656.jpg.....DSCN6660.jpg

I purposely set the whole affair in from the edge of the bench:

DSCN6657.jpg.....DSCN6658.jpg

I think it should be okay, in terms of stuff falling into the bins. It's set back beyond the oak overhang. If it turns out that the bins accumulate too much dust/etc. from the bench, covers are available for the bins for (about) $0.75 each. But, I think it'll be fine!

The thing I like the best about this solution...and I looked at MANY...is that I can reach into a bin and pull out a few screws. Or, if I'm doing something that'll take a bunch of hardware, I can remove the bin from the rack and put it up on the bench...and put it back when I'm done.

I'll find out if it works as well as I think it will...:dunno:


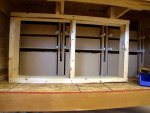
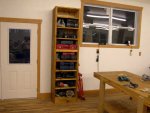
Oh yeah, and that's not all I did today. I also got started building a tool cabinet for all the tools I keep in their original boxes...that until today, lived under the back side of the bench:

DSCN6659.jpg

It's 8' tall, 16" deep, and 24" wide. It's just the right size to house my Sawzall (widest box), as well as my finish nailers (deepest boxes).

I put the whole thing together by cutting dadoes/rabbets for the sides and back to slip together. You'll notice that there's a middle shelf, and it's cleated, not dado'ed. That's because I don't have a large enough dado blade to use my slider. I had to "suffer" with my 6" dado set on the contractor saw:

DSCN6661.jpg

I couldn't run the sides or back by themselves. I had to go into the scrap bin, grab a chunk of Cypress and make an auxiliary fence so I could mount some featherboards to help hold the 3/4 CDX to the table as I ran it over the blade.

I was able to cut the dadoes top and bottom, as well as the ones for the euro shelf standards (I had left over from a job I did years ago). But, when it came to running dadoes through the middle of the long pieces, I decided not to risk it, and just cleated them. I'm planning to 'wrap' the whole cabinet in...surprise...oak flooring, and there'll be a face frame to hide the cleats, so I'm not worried about it.

And before anyone says anything...the main reason for wrapping the cabinet in oak is that it's going between the front door and the first window on the front wall. I was going to just paint it in the trim color, but Denise convinced me that flooring would be a nicer presentation...especially for something so close to the front of the shop.

Well, tomorrow I'll wrap that cabinet in oak...

Then I'll....hmmmm...perhaps I'll merge stock into those new bins on the bench. Or perhaps I'll finish clearing off the treated q-n-d bench.

Or...

Heck, once again...there's SO MUCH to be done!

Luckily, I have a design meeting (tentatively) scheduled for this weekend with the clients for my first commission piece. Once that happens, I'll be really slowing down on this thread, since I'll have PAYING work to do! :thumb: :thumb: :thumb:

Well, as always, thanks for following...

And SORRY Richard! :rofl: :rofl: :rofl:

- Marty -
 
Thanks for the update, I was starting to worry, not about your willingness to work, but rather your willingness to work for other people ( other than Denise, of course). Don't know if you are a "DELLonaire" or what. :) :)I noticed the feeling of not wanting to go to work on someone else's stuff after a vacation( of which I take few) or some time away from the paying customers. Thanks for your conviction to keep us abreast. All is lookin good!Shaz
 
It's really coming together nicely, Marty, and I think your Bin setup in your
q-n-d bench will be quite handy. :thumb: Looks like you're going to have to order TWO Motors though now, one to move that "Lightweight" metal tool box AND now one for the q-n-d bench, (that is, if you ever want to move it after you get all the drawers and bins loaded up).:rolleyes: :rofl: :rofl::rofl:

Congratulations on the upcoming client meeting to get some INCOME lined up.:thumb:
 
Actually, I'm enjoying seeing how organized you are, I'm not, but I do get impressed with people who have a spot for every thing. You do know that neatness is a sign of a sick mind!:rofl: :rofl:

Richard
 
It's really coming together nicely, Marty, and I think your Bin setup in your
q-n-d bench will be quite handy. :thumb: Looks like you're going to have to order TWO Motors though now, one to move that "Lightweight" metal tool box AND now one for the q-n-d bench, (that is, if you ever want to move it after you get all the drawers and bins loaded up).:rolleyes: :rofl: :rofl::rofl:

Congratulations on the upcoming client meeting to get some INCOME lined up.:thumb:

Actually Norman,

My pallet jack easily moves the workbench, and the toolbox is on wheels. So I think I have it covered! :thumb:


Actually, I'm enjoying seeing how organized you are, I'm not, but I do get impressed with people who have a spot for every thing. You do know that neatness is a sign of a sick mind!:rofl: :rofl:

Richard

'Morning Richard,

As I said, I'm 'starting out' organized. I have the time now, and have to get stuff put away, so I'm taking the time to make places. Whether or not things stay in their places, or get returned there, once I start actually working is yet to be seen! :rofl:

Sick mind? Me?

You know me, huh? :bonkers: :biker:

Off to organize some more...
- Marty -
 
Actually, I'm enjoying seeing how organized you are, I'm not, but I do get impressed with people who have a spot for every thing. You do know that neatness is a sign of a sick mind!:rofl: :rofl:

Richard


Actually, I find that I can't work if I don't have a place for every tool, and every tool in it's place. Now where was the last place I found for that screw driver.....Jim.
 
Last edited:
No real warning for you this post Richard. Aside from the fact that my new tool cabinet is up and mounted and about to be filled... :rofl:


But before I get into that, let me say that I took a few hours this morning to work on dust collection. I've been running the system since it was installed, and have pretty much ignored it, aside from sending stuff its way.

Well, this morning...before the brutal heat...(and before I sent about 30-40 squares of oak flooring through the planer)...I decided it was time to empty it and see how it was performing. :huh:

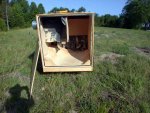
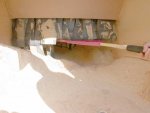
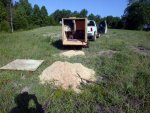
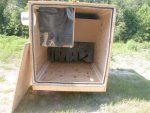
First thing was to hook the trailer up and haul it out into a field behind the shop. Then it was time to open that back door and see what sort of surprise I was in for:

DSCN6662.jpg.....DSCN6663.jpg.....DSCN6664.jpg

Turns out it wasn't anywhere near as full as I expected it to be! :thumb:

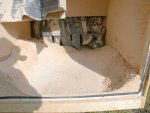
There was plenty of dust/chips in it...probably two to three 55 gallon drums worth:

DSCN6665.jpg

But I was expecting more, given all the work I've been giving those machines lately.

One thing I noticed right away when I took the rear door off is that about 75% or more of the dust was in the front (exhaust) side of the trailer. I think I'll be adding some "turbulence" to the rear of the trailer. It appears that the air has so little resistance when it first enters the trailer, that most of the solids are staying airborn until they hit the baffles and such futher into the trailer. I think a simple baffle near that intake port shoud do it...:huh:

Ok, so with the trailer emptied...by hand/rake/hoe...it was time to truly empty it. I got the leaf blower and stuck it into the output side of things and blew the trailer clear:

DSCN6669.jpg

(I took measurements for a metal frame I'll be having the machine shop build for me so I can tip that trailer! Having to empty it by hand is WAYYY too much work...especially when it's so hot out!!! :doh: )

Next on the list was the plenum. I was REALLY interested to see what made it's way that far in the system...especially since the front wall of the trailer (where the exhaust port is...was covered over half way up with chips.

Well, things looked good when I first went into the plenum room:

DSCN6666.jpg.....DSCN6667.jpg

Didn't appear to be too much in there. Well, there was a little more in there than it appeared. After I used my "bag-shaker" and emptied all the bags, I got a bit more. All told, there was a total of just under two five gallon buckets worth of light fluffy chips and fines in the plenum:

DSCN6668.jpg

I'm QUITE PLEASED with the way the system is working. The bags are starting to get "seasoned" finally, now that some stuff is starting to flow through to the plenum. (Previously, the system was almost "too efficient", since nothing was making it to the bags to help line/season them.)

I think the addition of some 'turbulence' to the input side of the trailer will certainly help things out, since there won't be a "ramp" of sorts at the front/exhaust end of the trailer for solids to leave the trailer.

I think, all things considered, the system is performing beyond my expectations! I think I'll ignore it for a month or so...:rolleyes:


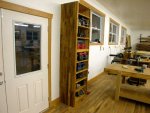
Oh yeah, I mentioned something about getting the tool cabinet done. Well, I did...it's done and mounted to the wall. I opted to "floor" it, as opposed to making panels and attaching them to the sides. Gluing up 8 foot long, 16 inch wide panels would have proven to be too much of a hassle...since the glue on the first few rows would have set before we were able to get to the last few rows. Plus, the glue up would have HAD to be a two person job. I've tried it alone on smaller panels, and it's just too much.

What I did was set the cabinet up on the bench, on some 3/4" MDF "shims". Those shims simulated the fact that the cabinet needed to clear the base moulding. Once shimmed, I simply applied the flooring from bottom (back) to top (front). The shims caused the flooring to extend 3/4" beyond the back, so that it would sit flat against the wall thanks to the notches I cut in the flooring at the bottom. (That sounds more complicated than it was...:huh: )

Anyway, I put the flooring on using 1 1/4" decking screws...about every 16"...with the help of a dead-blow hammer. It came out nice...but not quite as perfect as a glue-up would have been.

Once I had all the flooring attached, it was time for 80 grit on a sander. Oh yeah, I passed all the flooring through the planer before I even started...in an attempt to get it "close" to even. It helped, but I still needed to sand a little. :dunno:

With the sides sanded, it was time for BLO. I let it sit on each side about 10-15 minutes, wiped it dry and then...with Denise's help...muscled that monster off the bench and into place:

DSCN6670.jpg.....DSCN6671.jpg

I'm guessing, but I think that cabinet weighs somewhere in the area of 250-300 pounds! It's two and half sheets of 3/4" MDX plus about 25-30 square feet of 3/4" oak. Whatever the actual weight, suffice it to say...IT'S HEAVY!!!! :doh:


I still need to make and install a face frame...and false fronts for the shelves...but it's just about done! :thumb:

Tomorrow I'll try to get that cabinet done...and then prepare for my client meeting...and of course...do some more organizing!!! :rofl: ;)

As always, thanks for following...
- Marty -
 
So what happened to the shop princess and her brood? And weren't you talking about getting yourself a big ol' shop dog once the shop was up. Or is Tod keeping an eye open for another monster like he's got? :eek:

It's looking real swell the way you keep putting that leftover flooring onto your shop furniture. It's really turning into a very nice living/working environment. Does your house look so nice on the inside? :dunno:

Congrats on the success with the DC system! :thumb:
 
In an attempt to avoid boring everyone, and to keep RIchard from going 'over the edge', I've refrained from posting. I've been busy, but most of what I've been doing is mundane organization and arranging.

I did get the tool cabinet finished:

DSCN6674.jpg.....DSCN6675.jpg.....DSCN6676.jpg

I started to make the face frame and shelf fronts from oak flooring, but I decided it wasn't worth the effort to putty over the end joints that would be showing, etc. So instead, I did some digging and found a few half way decent pine 1x4's that I could rip into framing members. A little Golden Oak stain, and I think it looks ok. It certainly ain't oak, but only we'll know...:rofl:

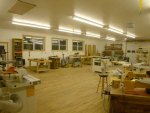
Oh yeah, I also re-organized benches/tables in the shop:

DSCN6673.jpg

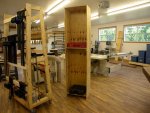
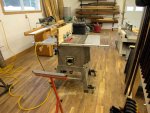
I finally got that disaster of a (pressure-treated) bench cleaned off and moved. I have something in mind for it, so it's been moved to the west end of the shop, behind the jointer.


Oh yeah, I also got the remainder of the 32 bins loaded and labelled on the back side of "the" bench. But I forgot to take pictures. I guess after spending a few too many hours getting that done, I had had enough and didn't want to see pictures of it! :doh:


Let's see...what else...?

Various odds and ends of organization. I cleaned out two of those large blue containers that were filled with various bits of hardware that used to hang on pegboard in our Virginia shop. That stuff got migrated into the parts cabinet on wheels that lives in the finishing room.

I did some other 'stuff'...

And then I attacked something I had been dreading...

When I first installed the boxes for the light switches by the front door of the shop, I made the HUGE mistake of listening to someone at the borg that told me I could 'gang' this certain type of box together to form a multi-switch box. (Admittedly, the single boxes had tabs that locked together, and were WAYYY cheaper than the 5-switch boxes!) Well, I listened to them, bought five of these 'special' tabbed boxes, mounted them together in the wall and wired in my switches.

Well...

When I was putting on the various switch plates, I discovered that the member of the borg was WRONG! My five-switch plate didn't fit! The holes were too close together!!! Turns out, the only way to do this and use a 'standard' multi-position switch plate is to use a SINGLE BOX designed for how ever many switches you need.

I should have known that! :doh:

Well, I had a few choices to deal with this challenge...

I could take five single plates, cut the ends off and try to glue them back together to make something that would look good. (Not likely!)

I could cut open the wall and replace the seperate boxes with the correct single box. But that AIN'T happening! I'd have to cut a hole large enough to access the wiring. Remove the switches, carefully labelling ALL THOSE wires. Replace the box, replace the switches, re-wire the switches, patch the hole.... No way, no how! Wasn't gonna happen!!!!:doh:

I could...there were several other options...none that I liked.

Or...

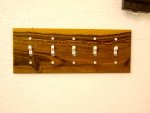
I could try to make a custom switch plate out of wood! :D

That's what I spent a few hours on late this evening...:rolleyes:

I picked a small piece of Bocote I had in stock, since it's a nice dense hard wood...not to mention is has some nice figure.

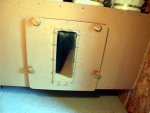
I relieved the back so that it was about 3/32" thick in the center...with a 1/4" border around the edges. Then I scroll-sawed the switch openings, and drilled and counter-sunk for the screws.

A quick coat of oil/poly, and I was in business:

DSCN6678.jpg.....DSCN6677.jpg

I think it came out pretty nice. It's way better than the alternatives! :dunno:

Now I have to make two more of them to cover the other two multi-switch 'mistakes' I made.

Teach me to listen to anyone at the borg! :rofl: :rofl: :rofl:

Thanks for following...
- Marty -
 
Or...

I could try to make a custom switch plate out of wood! :D

That's what I spent a few hours on late this evening...:rolleyes:

I picked a small piece of Bocote I had in stock, since it's a nice dense hard wood...not to mention is has some nice figure.

I relieved the back so that it was about 3/32" thick in the center...with a 1/4" border around the edges. Then I scroll-sawed the switch openings, and drilled and counter-sunk for the screws.

A quick coat of oil/poly, and I was in business:

View attachment 10350.....View attachment 10351

I think it came out pretty nice. It's way better than the alternatives! :dunno:

Now I have to make two more of them to cover the other two multi-switch 'mistakes' I made.

Teach me to listen to anyone at the borg! :rofl: :rofl: :rofl:

Thanks for following...
- Marty -

Marty,
I dunno about you. That makes me want to scroll saw switch covers for my whole house!
 
Hey, Marty, that is One GREAT Looking Switch Plate,:thumb: (but it'll look even better when Denise gets out her "Graining Pens" and does her magic on those White screwheads).:D (I know, "Picky, Picky, Picky, but it's those flat blade slots that make them look bad).:rolleyes::rofl: :rofl: :rofl:
 
Top