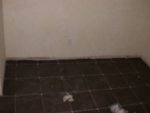
Getting rid of the "Pink Room"

Carol, I tried to get my wife to use the solution, but she said no, she didn't need it.:huh: I believe it was a big mistake. :doh: We're using 6" knives, but still dig in some (mostly me:eek:), and some of the paper isn't releasing with plain water, so it pulls part of the sheet rock paper off. Once we get all of this off, I'll apply a skim coat of mud on the wall, and sand it smooth. I think that will end my problems, even if there are some small pieces of paper left on the sheet rock. Jim.
 
I tried plain water too, Jim. But I wanted to get the job done in my lifetime, so I went and got the solution. I let it soak 45-60 minutes, re-wetted the dry spots and began scraping the wet stuff. Still took the better part of two days. Glad its done.

The texture guy skim coated it as well. It dried quickly and he just went back to where he started and began texturing. Took him way less time to do his part as it did me to get the darn paper off!
 
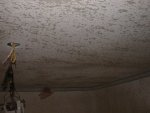
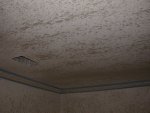
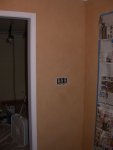
LOML and I worked several nights for an hour or so this week on getting rid of the wall paper remnants. I think we got most of it. I textured the ceilings and walls in the Pink Room (wonder if we'll keep calling it that???:huh:) and the ceiling in the entry mid day today. We followed that up with a short trip out for ideas for paint colors. Looked at 2 model homes for ideas....none there. Dark and mid browns, and very flat paint, I mean no shine to be found. Stopped at Lowes for ideas, already had HD's offerings, and found this one still had 4 24" and 1 50" K=body in stock on close out!!!! $5.00 off:huh::huh: WOW!! I think I'll wait. Got some good ideas on paint and brought several chips home. Back home to do the skim coat on the one entry wall. Now finished and ready for supper.
Here are some in progress pictures to PROVE I did the work I said I did. :rolleyes::D DSCN2065.jpgDSCN2066.jpgDSCN2067.jpg

Most of the texture has dried now. Hopefully the skim coat will dry overnight. I'll have some touch up to do in one corner and some sanding, then maybe, just maybe another coat of primer on everything. Then next week color! Still need to run the power wire for the ceiling fan to be too. Guess I could do that while paint dries. :) Jim.
 
After breakfast this am, used the rest of my 48 pounds of mud in a box, and filled in the corner that didn't want to finish out yesterday. Seems my putty knife kept digging into the opposite side. Couldn't find my corner tool. And I know I saw it last week.:dunno: :huh::huh: Did my knockdown routine of the splattered walls and ceilings to be ready for paint. Watched a little football while everything cured, then started painting when I got thoroughly frustrated watching the Cowboy's game. The first quarter looked like a Jr. High game.
Anyway, I got the entry, and about half the Pink Room walls painted before I ran out of paint. I guess the raw texture sucked up more than the first coat on the painted walls and smooth ceilings. I'll pick up another 2 gallon pail on the way home tomorrow and finish up while LOML is teaching.
We're thinking about either a sand wash paint, the venetian plaster finish, or one that Lowe's had that has granite crystals added to the paint for the entry. There is no texture on the walls at all, except for a little orange peel from the roller. Ceiling will be an off white that we used for the base coat in Glenna's studio, and will use the same in the Pink Room for the ceiling and as the base coat for the walls. She is leaning toward the same glaze top coat she used in the studio, but I'm pushing for something a little different. But we know who will win!!:rofl:
No pictures tonight. They just don't show up very well in the dark. Have a good week! Jim.
 
Well, another weekend gone. The first half of Saturday was spent looking for and at tile. Went to about 9 places, the last of which was the Marazzi show room. We found a tile that was similar to a Marazzi offered by the 2nd retailer we visited. Since Marazzi will no longer sell to the public, we will get it through that retailer. Spending more than we wanted to, but when is that new? :rofl: I started taping off the crown molding after we got home to start painting the walls, but the caulk had sucked in too much, so I had to caulk again. It didn't dry in time to paint last night. Painted this morning, then started doing some research on the tile saws. Joined the John Bridge tile forum, got some information from them, as well as members here and at SMC. Got the HF sliding tile saw this afternoon on sale and 15% extra off with a coupon. I've decided on a blade and will see if it drops on Amazon in the next couple of days. It looks like, according to Frozen Warrior, that it was a couple dollars cheaper on Thurs or Fri. I might see if the Ace Hardware between the house and work has it also. I printed a 5.00 off 25.00 purchase on line today for them. If not, maybe HD will take the coupon. They have the blade at 39.95.
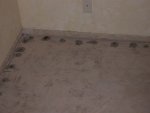
Pictures aren't great, and don't show much. In the second one, you can still see the pink carpet, but trust me...it will be GONE soon. :thumb: :DDSCN2075.jpgDSCN2076.jpg The walls have a slight yellow tint, and the glaze is made with some of the same color paint, and leaves a muted yellow splotchy look. That's what is in LOML's studio now, and since this will be an extension of her studio, she decided to make it the same color. Floor will be a drastic difference though.
Next weekend, Glenna gets to do the Venetian plaster in the entry on Saturday, and the glazing in the Pink Room on Sunday. I will probably remove the base molding on Saturday, and start prepping the floor by pulling the carpet tack strip out, but leave the carpet in place to catch any drips/spills that might happen glazing. I've got the tile pattern set. Drew the room up on the Punch Home! software, and drew in the tile pattern. It also allowed me to see how many of each size tile will be needed. Wish they had this in more than 2 sizes. I really would like to do a 4 tile pattern when we get to the Family Room/Kitchen. Would liked to have done a 3 tile pattern in this room.
Hope everyone had a great weekend. Be safe this week! Jim.
 
Well, not much progress in the pink room, but a little in the entry. This morning started off with me going after the tile and thinset. (Oops, just remembered...it's all still in the van!:eek: ) Got home from that, and turned around and drove to Granbury to pick up the ceiling fan. Stopped at Lowe's to see if they still had the same globes we used in the studio and studio powder room. They did, or something similar, but they were much darker. Will try the Lowe's here to see if they will match better. Looked at small fixed track lights to replace the old closet light. Might have found something that will work, but the only one they had in stock looked like the box had been kicked up and down every isle of the store, so we passed at that point.
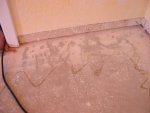
Got back home and waited for a lady from Lubbock to bring in a new dog she rescued from the shelter. Has to be the smallest full grown Irish we've ever had in the house. About 44 lbs. The other male we have here is about 75!! They sure look funny playing together. :D After getting all the dogs introduced to each other, LOML left for a music recital, and I started the venetian plaster in the entry. Got the first coat on. DSCN2079.jpg Will wire for the ceiling fan while Glenna starts the glazing in the "Pink Room" in the morning. Then I'll work on the second coat of the plaster. Depending on when she gets through with the glaze, I might be able to paint the crown molding in both rooms, but may save that so if I splatter any, it won't hit wet glaze or plaster. That's probably a much safer thing to do. Maybe I'll work on ripping out the pink carpet and cutting it into size we can dispose of with the trash. I think that will be much safer. Then I can start scraping the texture material the original builder sprayed all over the concrete. I had thought 4 years ago that the white was the concrete, and something was just weird with it. Now I know what it is. The concrete looks just fine under the texture! :thumb:
OK, now you know what I did today. :wave: Jim.
 
Well, this will be a quickie tonight. Got the second coat of venetian plaster on by about 1:30, ate lunch and watched the second half of the Cowboy game. Finally got all the tile and thinset into the garage. Then waited for LOML to finish up the glazing. Once that was finished, I ran the hot wire for the ceiling fan. Installing that may be a good job for Wed evening. I get off at 5:00 that day. (my one early day off for the week. :huh:)
This picture shows the glazing, left before, right after (during??:rolleyes:)DSCN2081.jpg And this shows the second coat of plaster. DSCN2082.jpg Note that the white splotches are gone? :thumb:
OK, I'm headed to the shower. Hope everyone had a productive weekend, or at least an enjoyable one. Jim.
 
Well, another weekend come and gone. I lost about 4 hours to prospective adopters coming over yesterday and today to look at the rescue dogs. But If we can place 1 or 2 of the ones here, I'll work with it. :thumb:
Came home Friday night and the garage door opener wouldn't work. Hmm, bad remote battery?? Get out and go to the pad on the door frame and enter my code...........still nothing. Look at the neighbor's house and the outside lights that are always on, were not. Uh oh. No power. Walked to the front of the house and LOML met me there to open the door. Power had just been off for a few minutes. I worked on cutting up the carpet and got it out to the garage to be thrown away. By about 7:00, still no power, I said let's go eat and run to HD to look at light fixtures. It will save having to get out Sat. and losing work time. Found a fixture that we both liked, and I put it up when we got home. (Power was back on) DSCN2091.jpg

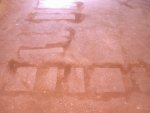
Sat. am I started scraping the pad and the floor. I scraped and I scraped. I have some paint and some texture on the floor, around the perimeter. The texture came up easy....the paint is not all coming up. The guys at the John Bridge tile forum say it all needs to come up. I'll be at this for 3 months to get it all up. I've tried water, helped a little, my angle grinder with a 60 grit sanding disc, sends clouds of dust all over the house-LOML NOT HAPPY AT ALL, the angle grinder with a wire cup wheel on it, leaves black all over the concrete, and finally the edge of a putty knife. It gets it, but time is not on my side for this. I've asked at the tile forum and a note to the manufacturer of the crack isolation membrane I'll be using if it will work. What the guys at the tile forum are afraid of is the moisture from the thinset will release the paint, then the tile will pop up. Since water did help a little getting some off, I believe they are right. The crack isolation membrane would be a barrier between the thinset and the paint, I'm hoping it will work, thus saving me a lot of time. If not, guess the tile won't get finished before the Rescue Christmas Party we are having. :(
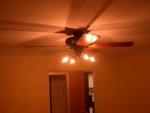
Sat evening, after supper I started installing the ceiling fan. With the wires I found hidden in the wall early on, I decided to do a 3-way light switch so if in the future, this room is turned back into a bedroom, there will already be a light switch by that door. The fan switch, on the other hand, will have to be with the other 3-way switch by the current opening (5' wide, no door) to the room. Got the basic fan motor housing, no blades, up and turned the power back on to check things, and the light did not work, and the fan came on with the light switch. :doh::doh::doh::doh: Turned the power back off and went in and got cleaned up.
This morning, I redid the wiring. Took a little while. The instructions that come with the switches are very basic...basically wrong. :D The wiring diagram I guess is not to be taken seriously because the ground wire terminal is on the wrong side of the switch. :dunno: So I test the switch out, and use a schematic type wiring diagram to wire the switches up. Worked fine that time. DSCN2092.jpg
Back to scraping the floor. I got real tired of doing that, so I alternated it with burnishing the venetian plaster job. LOML was seriously thinking about repainting the entry. Didn't like how the VP looked. I said wait until we see what this last step does. All I can say is WOW!!!! What a difference. The only way I can describe it is seeing what a nice piece of wood does when you stain it. It is amazing how the flat looking wall has so much depth and changes of color. This picture won't do it justice, but...DSCN2094.jpg This is a very labor intensive project to do. I figure this entry that is 6' X 8' with a 4' wide entry door, a 5' wide opening to the Pink Room, a 6' wide opening to the Family room, and a 3' wide opening to the Studio is going to eat up amost 11 hours to do. 3+ hours for each coat of the venetian plaster since you don't paint it on, you use a 4" wide putty knife. Then the burnishing is about 4 hours or so (if you don't count the resting time...it gives your arms a good work out!). I still have 2 walls left to do.
I had hoped to get started with the tiling, but, I've got to either get the remaining paint up, or get some good news about the crack isolation membrane. Maybe tile next weekend?:huh:
So, what did you do this weekend? Jim.
 
Looking really good Jim.

John Bridge:thumb::thumb: They helped me a lot when I did my house in Florida.

Keep after it, it will eventually some up.

Regards,

Randy
 
Hang in There!

Looks like a lot of work, but, from the photos, really looks nice. The specialized wall treatments (venetian plaster, etc) can certainly be a lot of work. Hopefully, the results give you a lot of satisfaction. Having done several houses, the end product and satisfaction of the way it turns out give a good feeling to those who have done the work. On the other hand, not everyone could say they had a "Pepto-Bismol" room in their house. :eek:

I was a little surprised to see that you have a 10-3 w/g going to a ceiling light. That seems to be a lot overkill since 12 ga would handle everything most ceiling fans/light fixtures would require. I usualy reserve the 10 ga for electric dryer circuits or something needing more amperage.

Good job. Anxious to see the "all-done" photos.

Roger
 
Yeah, the 10 guage was the part that was there by the home builder. It was to run both the ceiling fan and the light with 2 different switches in the same box. Still not sure why they thought that 12 guage wouldn't have done that. Maybe they had that left over, who knows. That evidently changed mid stream and they walled over the outlet and took out the ceiling fan box and the closet wall, and left the closet light and switch. It is a mirror image room to the guest room with a full bath and 2 hall linen closets between. I have no idea what they used it for. If it had been made into a dining room, and used the closet area for a hutch, or even a built in hutch, I could understand. But they still would have needed a light fixture in the middle of the room. I originally thought I would get it for my HO trains, and close off the doorway to the entry, maybe put in a back lit stained glass, and open it back up to the hallway. But LOML found a need for it, and that's ok. I still have a shop that I didn't have at the other house.
Speaking of venetian plaster, I have 2 more walls that need to be burnished! Jim.
 
It's 7:00 Sunday evening, and I'm bushed!! I hope I can get out of bed in the morning for work.
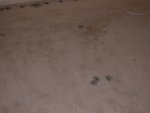
I started out Saturday knowing I needed to finish getting the floor prepped for the tile. DSCN2086.jpg DSCN2088.jpgIt had not been going well. I found some 24 grit sanding discs for my angle grinder hiding in the shop. A quick check Friday evening showed that they worked better than the 60 grit ones I had tried last weekend. So I use some paper and tape and closed off the door way to the rest of the house, rigged up the box fan in the window, opened a window in the Family Room, and turned the fan on the house system to get fresh air into the room without the dust getting into the house. Worked great. Spent the next hour and a half on my knees sanding the paint. Did the short closet wall, and one long wall working about 8" out from the wall on the paint. Did ok, but I went through 2 of the discs, and only had one left, and it wasn't going very easy. So I stopped, went to Lowe's and got a DeWalt diamond cup blade. This was another suggestion I got from the John Bridge tile forum. Got home, put it on and went to work. WOW!! In the next hour and a half, I had the whole floor ground down! I could work for about 5 minutes at a time, then had to stop for the cloud to exhaust so I could see again. I'm not kidding, there was that much dust. So of that 1 1/2 hours work, I was actually grinding for about 25 minutes. Good thing the wife was gone, or she would have had a fit. :D dscn2105.jpgdscn2106.jpg

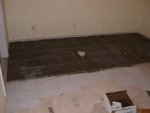
This morning, I went and got a notched trowel and a double plate cover I should have remembered to get yesterday. Installed the cover, and changed the three switches at the front door to the Leviton Decora switches. Eventually the whole house will have these. I played with the placement of the tiles again and marked the floor this time for my starting point. I actually got started tiling about 1:00. I now have about 1/3 of the room tiled. The funny thing is: I haven't had to make a single cut with the new tile saw!!!:huh::rofl: dscn2107.jpg When I took the picture, I saw the haze on the tile at the left front, and wiped it down.
I need something to eat, and then lay down and get my back to unwind. Thanks for looking in. Jim.
 
Jim,

Looking real good. What are you using to wipe the tiles off with? Sponge?

Try using microfiber rags.

Sams Club Link

0060538805998_L4.jpg


I found out about these from the John Bridge forum. They work great, 100 times easier than the sponge. Also, when you grout, they clean up the tile real well.

Here is the link over there that convinced me.

John Bridge Link

Keep up the good work.

Regards,

Randy
 
Well, 5 hours yesterday after my Saturday to work at the real job, then about 7 hours today, and the tile is all down. dscn2143.jpg Funny thing is, I only had to make 10 cuts with the saw. :thumb: Now how did that happen?!?!?!:huh::dunno: Very, very lucky I'd say. Only in the closet area did I have to make cuts. dscn2144.jpg That means 4 of the 6 walls came out right on. I'm still shocked.
Tomorrow night I'll get in with a brush and clean up the thinset off the tile that I missed as I went.
Oh, and the HF tile saw worked great! The sliding tray for the tile was right on 90 degrees to the blade. And Randy, the Hot Dog blade works perfect! Thanks again!! But I'm here to tell you, that saw is heavy!! I'll be watching HD for the MSUV to go on sale. I opted not to get the stand from HF, and just set it on the sidewalk to do the cuts. Not optimal for the old knees and back, but for a few cuts, no big deal.
Sorry the pictures are pretty dark, but the tile is very dark. We're off to have a late birthday meal out. Hope you all had a good weekend. Jim.
 
Randy, the micro fiber towels did good. Not quite as good as the JB tile thread made them out to be, but 10 times better and quicker than sponges.
And with that said, you're probably thinking that the tile is finished. And you would be correct!!! :wave: I've got blisters on the palms of both hands from the float. I wore latex gloves...don't know if that helped or hurt. Kept me from getting grout under my nails.:thumb:
I tried to take a couple of pictures, but they are really bad. I'll have to try again in the morning with some natural light.
OK, if the rain holds off, I've got to get the leaves off the roof in the morning. After that I'll go get some base board and start cutting that, and then paint it. Glad next week is a short week....Wait a minute...I have do drive to OK and back with 5 dogs in the van, then work on Friday....WHAT AM I THINKING????? :rofl: Jim.
 
Top