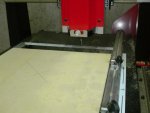
i-Carver

Toni, I asked that exact question, this is the answer I got from Geetech.....

We don’t recommend you to try metal right now with following main reasons,
1. the prototype spindle motor is not strong enough
2. the prototype cutter is not suitable for metal

Also, the cut depth, spindle rpm, and the feed speed are factors of cutting metal.:wave:
We do hope you can try metal someday, for now, please try various woods/plastics first, when you are very comfortable of using iCarver to deal with wood/plastic, then we can try cutting on metals with careful settings on the prototype you have

I hope that down the road they upgrade the spindle motor with something a little more robust :dunno:

We shall see.

Until then, I have a lot do learn :wave:
 
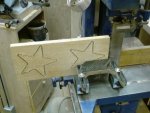
Stu, when you have a piece, like the star, cut all the way out do you have to put a sacrificial piece under it so it can go all the way through the wood?

When you do cut outs, does it leave "tabs" or anything so the pieces stays secure and doesn't want to move when its being cut out?
 
Stu have you made Geetech aware of your posts here? This is good exposure for them and an opportunity for them to see comments from the very target market.

By the way not wishing to hijack your thread but having been to Japan I have always wondered what happens there at this time of year. Is there any form of Xmas commercialisation in the store or Xmas decorations and lights etc. How about a thread on "Holiday Season in Japan from a westerners point of view". Sorry for the hijack.
 
Stu, when you have a piece, like the star, cut all the way out do you have to put a sacrificial piece under it so it can go all the way through the wood?

When you do cut outs, does it leave "tabs" or anything so the pieces stays secure and doesn't want to move when its being cut out?

Yes, a sacrificial piece under the work piece.
Things stay well put, until the very last bit, and they can move a bit, I'll remedy that by using double sided tape, under the pieces being cut.


Stu have you made Geetech aware of your posts here? This is good exposure for them and an opportunity for them to see comments from the very target market.

No I have not, I will once I get things rolling better, and to be honest, I don't want them to worry about it, I know they are taking a leap by letting me have the machine, so why worry them with possible bad pubicity?


Rob Keeble said:
By the way not wishing to hijack your thread but having been to Japan I have always wondered what happens there at this time of year. Is there any form of Xmas commercialisation in the store or Xmas decorations and lights etc. How about a thread on "Holiday Season in Japan from a westerners point of view". Sorry for the hijack.

Yep, in the stores etc, it is extensive here, but this is NOT a Christian country, so it is very fake, and I do not enjoy it at all, in fact I hate it. :(

Stu, what is the set up time IE how long to program the star and how long did it take for the machine to do the actual cut?
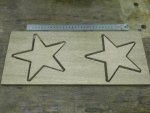
That large star took 12 minutes, main reason why is I am taking very light cuts, no more than 2mm at a time, and really 1.5 is better, as I found out :doh:
 
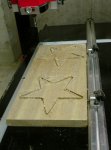
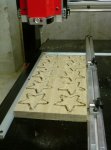
I got some more done...........

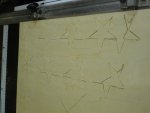
stars_1.JPG stars_2.JPG
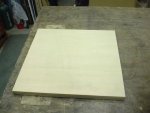
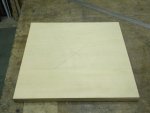
I attached a piece of 5mm thick plywood to a much thicker MDF base, I used about 6 drops of CA glue to do this. It works, but the problem is on the last cut of each piece, the piece can go flying :doh:I used a pencil with an eraser on it to hold each piece on it's final cut, which is not very efficient, but it worked.

stars_3.JPG
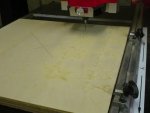
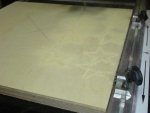
I then marked the center of the piece, to line up cutter.

stars_4.JPG stars_5.JPG
stars_6.JPG
I tried some larger stars, and the first few cut well, then the machine did a :eek: and things go weird :doh:I think the cuts were too heavy. :rolleyes:

stars_7.JPG
Yep, something went wrong, the cutter went way off the top of the work piece, so I'm sure that the cuts were too heavy, and the stepper motors lost a few steps, totally operator error :eek:

stars_8.JPG
I marked out a new workspace, and redid the cut file, the stars a a bit smaller to save time rendering and cutting, as I'm still working on how this thing works :thumb:

stars_9.JPG
Yep, there they are, I see stars!

stars_10.JPG
I put a piece of sandpaper on a board, and sanded the faces of the stars, that took most all of the little fuzzies off the stars.

I can sure see a lot of possibilities for this machine :thumb:
 
...the problem is on the last cut of each piece, the piece can go flying :doh:I used a pencil with an eraser on it to hold each piece on it's final cut, which is not very efficient, but it worked.
...

How much extra design/programming effort would it be to leave a small tab in the last pass to hold the star in place, then cut it free with a sharp chisel? The big CNC machines go all the way through in a single pass, but if you will be doing many passes for a cut, the "last pass" approach may be adequate if the set up doesn't take too long.

...Yep, something went wrong, the cutter went way off the top of the work piece, so I'm sure that the cuts were too heavy, and the stepper motors lost a few steps, totally operator error :eek:
...

Or maybe it is time to suggest to the vendor that the stepper motor approach might be replaced by servos. The cost of servos systems are dropping, and the competitive systems (like ShopBot) have already made that transition.

...I put a piece of sandpaper on a board, and sanded the faces of the stars, that took most all of the little fuzzies off the stars.......

I wonder if something could be done with vacuum hold down. The big CNC use huge vacuum pumps, but they also have huge lateral forces with deep fast cuts. On my DVR lathe, I have used a vacuum pump on the simple vacuum chuck, but I have had virtually equal results with the lower vacuum of a shop vac (Fein). Perhaps something could be designed, similar to the platten used in a vacuum bag, and something as simple as kid's modeling clay to block the grooves at the edge of the workpiece, or where the cuts are coming, giving sufficient vacuum to hold a gentle final cut.
 
For a simple vacuum table, you might try building a shallow box (1" or so) that overhangs one end of the table. The bottom where it over hangs, put in a hole to connect the shop vac. The top side, use a piece of peg board. To help with suction, just lay scrap over the holes that aren't covered by the work piece. Might have to build it in a torsion box design to keep the top from flexing, or have center braces with holes through them inside.
 
Stu, been wondering, if your picture is wider than the machine, can you actually "cut" a picture down the middle and carve the right side on one board, carve the left side on another board then cut a groove or biscuit joint the two boards together getting a wider carving?
 
Stu, been wondering, if your picture is wider than the machine, can you actually "cut" a picture down the middle and carve the right side on one board, carve the left side on another board then cut a groove or biscuit joint the two boards together getting a wider carving?

In theory, yes, but right now, the positioning of the cutter, it by hand, you press Y+ X+ to go right, and forwards, then you press Z- to go down, until you touch the surface of the workpiece. They understand that this is not the best thing, but I will say again, this is a test mule, and they have two or three of them to use for testing, for developing the ones that will eventually go to sale.

They are already talking about a laser pointer etc for the production machines.:dunno:
 
I got the OK to use some different cutters, the conical one that came with the machine is great for the 3D carving, for fine detail, but for other things it is a really slow way to work. I've got a 6mm end mill here and I've orders some more endmills, all have the 6mm shank, but they range in size, 2mm, 2.5mm, 3mm and 4mm. These should make some of the cutting out projects a LOT faster, but I have to do light cuts. :)
 
Well, I had a really interesting afternoon today with the iCarver :doh:

I had a couple of missed runs recently, and I thought I was making cuts that were too deep, and causing the system to loose a step or two, as it turns out, that was not the case.

When I got the iCarver, and I got it running, I would hear this really bad sound every now and then, a kind of growling sound :huh:

As I just recently got the machine, and I'd only heard it run once, at the trade show, where the background noise was enough to make me think the iCarver was quiet, I did not have a benchmark for sounds made while in use.

Today, when I was setting up for another run, I was positioning the cutter over the workpiece, and I noticed that when moved in the Y-axis, the carriage would pause for a moment, then move on...... :huh:

OK, something was not hooking up somehow....

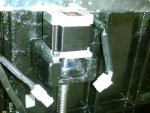
I turned the machine around, and then flipped it up, so I could get at the Y-axis stepping motor, this is what I found......
SN3D0952.jpg
There is one bolt missing, on the right, and the one on the left is very loose. The two at the back were also only hand tight.

Laying under the machine, there is no 4th bolt, so I figure it must have fallen out at some point before I got the machine down into the Dungeon.

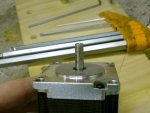
SN3D0953.jpg
This is the stepper motor shaft, thankfully it is not damaged :thumb:

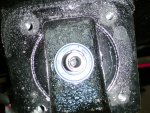
SN3D0954.jpg
This is the inside of the worm screw shaft, it is also not damaged :thumb:

I put a 4th bolt in place to replace the missing one, and tightened everything up, and I tightened the set screw up on the worm screw, everything nice and snug. :D

The machine is SO much smoother now, and a lot quieter.

I then went over the whole machine and tightened up anything that was loose, I found a few. I want to make sure that everyone understands that this is a test mule, or a prototype, it is a one off hand built to test their ideas etc. It is NOT a production machine, and I knew from the get go, that there would be parts that would need to be replaced, and some upgrades etc.

Yes, a happy ending :D
 
Yesterday, after I fixed the iCarver, I did get a run of stars out of it, for the Christmas tree.

I started out with some larger stars, I just wanted to make sure everything was working OK.

I also put a 6mm end mill in the machine, it worked OK, but I'm not so sure how sharp the end mill was, or that it was for wood or not :huh: :dunno:

The results were not the greatest..........

big_stars1.JPG
a bit "fuzzy" :(

big_stars2.JPG
This time around, I did not cut all the way through, instead, I left some of the wood there, and I then sliced the stars out on the bandsaw, this worked well :thumb:

big_stars3.JPG big_stars4.JPG
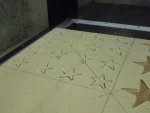
After some sanding, they look OK.


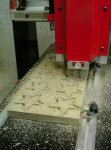
Next up, a batch of 10 smaller stars, this time I set the cutter to cut 18mm deep........

small_stars1.JPG
In progress, you can certainly see the need for a DC of some sort.

small_stars2.JPG
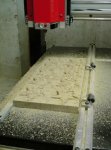
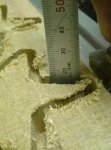
Took 32 minutes, mainly because I was concerned using the larger 6mm end mill (I have some smaller ones on order) so I made 12 cuts to go down 18mm, so it took a while.

small_stars3.JPG
The fuzzies left were not very impressive.....

small_stars4.JPG
The set up of the machine is not exactly 100% accurate yet, I set it for a 0mm over the work piece, and then let the cutter actually touch the work piece, but it still only cut to 17mm, just, not the full 18mm I punched in :dunno: Something to work with Geetech on I guess.

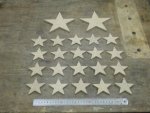
big_&_small_stars.JPG
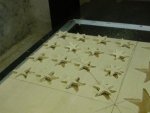
The final results.

The girls will paint these and put them on the tree.

Nice to know the machine is working, now I have to figure out how to drive the software a bit more.

Cheers! :wave:
 
Stu, just before the final cut to cut the stars loose, what about stopping and changing the outside diameter of the project by say .005"? Then the carver wouldn't be "cutting" it would be doing more of a router pass. I know that it is meant to be a one step operation, but it cutting a few thousandths of an inch off at the end for cleanup still has to be faster and more efficient use of your time and polished look in the end especially on difficult and intricate work.:dunno:
 
Stu,

Looks like you're having fun with the i-Carver.

One thing I see you are not happy with, the "fuzzies". I guess you are using a standard "upcut" bit? That would account for the fuzzies. Try locating "downcut bits. That will just about eliminate that problem. Of course, I don't know what size shanks those cutters are available in. (I could have researched it for you but I'm lazy, LOL) I do know that we used them on the CNC router I have and they did a fantastic job. Those cutters even impose a little downforce on the pieces to help hold them on the table. YMMV

I'm watching this thread with great interest. Tell GeeTech they can have a Hawaiian tester if they need one.

Aloha, Tony
 
Top