
Frank Townend
Member
- Messages
- 1,069
- Location
- Alexandria, Virginia
Based on an idea from Larry Marley's Web Site I decided to see if I could turn a Carver's/Woodworker's Mallet from a Bowling Pin.
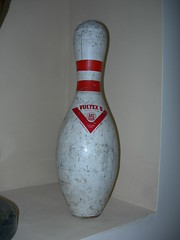
I bought a couple of Bowling Pins from eBay, but was told later you may get them free from a local alley.
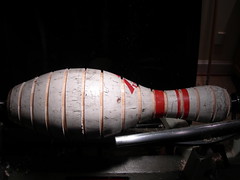
I started out by driving a dowel into the bottom hole for my spur center, then made parallel cuts through the plastic shell with a parting tool.
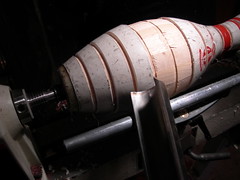
With face shield on, I used a roughing gouge to "flip" off the bands of plastic shell.
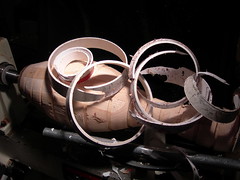
Here are a number of plastic shell "rings". I held the roughing gouge tightly against the tool rest and they popped off rather quickly.
This is what a bowling pin looks like beneath the plastic shell.
As I turned a tenon for my chuck, I cut it deep enough to release the plastic foot.
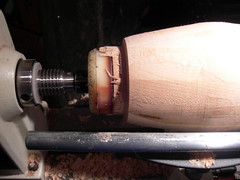
Here is the foot ring, it pops right off. Had I known simply removing enough wood to release the foot would create a nice tenon, I would have followed that path.
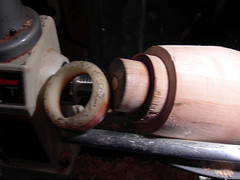
Here is another photo of the foot ring. This picture also shows the dowel I drove into the hole at the bottom of the bowling pin so I could use my spur center.
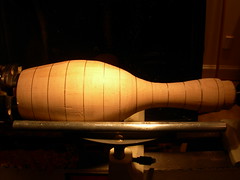
Here I have marked the bowling pin with one inch lines to aid layout of the mallet.
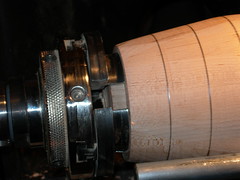
Here it is in the chuck, ready to turn to shape.

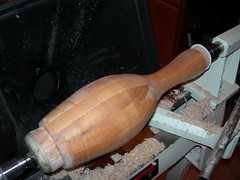
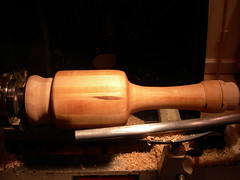
The mallet, starting to take shape.
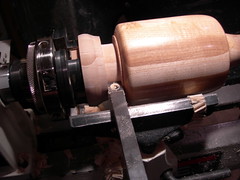
Shaping the handle.
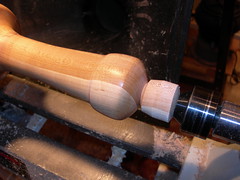
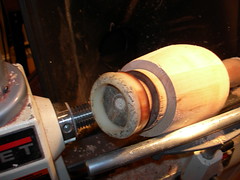
After getting the shape I was pleased with, I used my Ci1 Easy Rougher to prepare to part the mallet from the lathe.

And here is the finished mallet, ready for some serious woodworking.
I bought a couple of Bowling Pins from eBay, but was told later you may get them free from a local alley.
I started out by driving a dowel into the bottom hole for my spur center, then made parallel cuts through the plastic shell with a parting tool.
With face shield on, I used a roughing gouge to "flip" off the bands of plastic shell.
Here are a number of plastic shell "rings". I held the roughing gouge tightly against the tool rest and they popped off rather quickly.
This is what a bowling pin looks like beneath the plastic shell.
As I turned a tenon for my chuck, I cut it deep enough to release the plastic foot.
Here is the foot ring, it pops right off. Had I known simply removing enough wood to release the foot would create a nice tenon, I would have followed that path.
Here is another photo of the foot ring. This picture also shows the dowel I drove into the hole at the bottom of the bowling pin so I could use my spur center.
Here I have marked the bowling pin with one inch lines to aid layout of the mallet.
Here it is in the chuck, ready to turn to shape.
The mallet, starting to take shape.
Shaping the handle.
After getting the shape I was pleased with, I used my Ci1 Easy Rougher to prepare to part the mallet from the lathe.
And here is the finished mallet, ready for some serious woodworking.


 Now, who do I know that has a connection to a Bowling Alley?