Tom, I really like your street grinder, really nice looking.


Actually by putting 11 on the front, which I think most do, your are deviating from the plan. If you don't have a conductor, you need to fill the front with something. I personally love to see the pipes. I think I like it better than a conductor, although making a conductor and figuring ways to make it move would be a fun challenge.

I may have cut my bass A# pipe a little short. I have it adjusted all the way to the end and it just isn't quite right according to the meter. It also makes a second note sound after I blow it a split second. Maybe I didn't get it voiced correctly. If it is length, ,maybe I can glue an inch on the end, or maybe I can make a new pipe.....
 
Last edited:
My brother stopped by today for a little visit. I said, you want to hear my organ. He says ah, okay not real excited but guess he felt obligated to go along with it. I put in a roll and started cranking. When the music fired up he jumped straight in the air, came down and jumped back. You should have seen the look on his face. All he could say was HOLLY COW! HOLLY COW! What a smile it put on his face. It was great!

There ya go Paul thats what its all about. :rofl::thumb::thumb::thumb:
 
I may have cut my bass A# pipe a little short. I have it adjusted all the way to the end and it just isn't quite right according to the meter. It also makes a second note sound after I blow it a split second. Maybe I didn't get it voiced correctly. If it is length, ,maybe I can glue an inch on the end, or maybe I can make a new pipe.....

Sounds like the voicing is off Paul
 
I had an elegant post written up, but it has evidently gone to the great bit bucket in the sky.

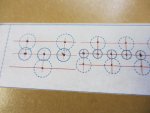
In short, I am wondering if there is any reason why more than 11 pipes couldn't be put on the front of the organ, thus making it a bit less cramped inside the box. It looks like there is room left to right, and a few more than the normal 10 or 11 front pipes are 8 or 9 inches long, so it seems like they should fit.

What am I missing?

John I build most of mine with 17 in front and the 3 Bass in the back. To mount them I just run a straight board across the front and the glue a 1/4" piece of ply on the back of the pipe and hanging down fare enough to screw it to the back edge of the board. By doing that it also give a little thicker place to run the tubing into the pipes.
 
I may have cut my bass A# pipe a little short. I have it adjusted all the way to the end and it just isn't quite right according to the meter. It also makes a second note sound after I blow it a split second. Maybe I didn't get it voiced correctly. If it is length, ,maybe I can glue an inch on the end, or maybe I can make a new pipe.....

Paul, if the stopper is "all the way to the end" it may be leaking. You can add to the length, then put a nice trim piece on the joint. :thumb:
Then re-check the voicing.

Bob
 
Thanks, Paul and Jay, for your advice on pipes. I'll start working out a configuration.

I'm putting together the tracker bar assembly, and am having trouble finding the 1/4 and 5/16 thin wall tubing. Best I could come up with is this refrigerator pipe:
Quarter inch copper.jpg
What do you think? Would it work, or are there better solutions? I got it at Home Depot. They didn't have anything at all in 5/16. Any ideas on better places to try?

The build is going well. Today I finished the cranks, and they seem to pump smooth and straight:
Cranks.JPG
I set the plexiglass in the lid:
Lid with glass.jpg
And this is what the whole thing looks like now:
Overall.jpg
 
Thanks, Paul and Jay, for your advice on pipes. I'll start working out a configuration.

I'm putting together the tracker bar assembly, and am having trouble finding the 1/4 and 5/16 thin wall tubing. Best I could come up with is this refrigerator pipe:
View attachment 75448
What do you think? Would it work, or are there better solutions? I got it at Home Depot. They didn't have anything at all in 5/16. Any ideas on better places to try?

The build is going well. Today I finished the cranks, and they seem to pump smooth and straight:
View attachment 75449
I set the plexiglass in the lid:
View attachment 75450
And this is what the whole thing looks like now:
View attachment 75451

John I get my tubing from Model Airplane shops or at the Hardware store True Value or Ace
 
Looking good John! Looks like it's suppose to. I got my tubing from a well stocked hardware store that carries lots of specialty items. Very similar to Ace. Hobby Lobby or any hobby shop would be good places as well.
 
Well, as I wait for varnish and paint to dry, I been reading the Universal plans and watching the video. I think maybe I'll build the Busker!:eek: There is a whole lot I understand from build the Senior, but there is a whole lot I don't. :huh: It would be a very challenging build for sure. But I see a lot of things I would really like to try. I'm thinking maybe I will try some of the pieces and see how it goes. May start the busker and then build some of the parts for the Universal when I feel I really want a challenge. Surrrrreee looks like it would be fun.........
 
Well, as I wait for varnish and paint to dry, I been reading the Universal plans and watching the video. I think maybe I'll build the Busker!:eek: There is a whole lot I understand from build the Senior, but there is a whole lot I don't. :huh: It would be a very challenging build for sure. But I see a lot of things I would really like to try. I'm thinking maybe I will try some of the pieces and see how it goes. May start the busker and then build some of the parts for the Universal when I feel I really want a challenge. Surrrrreee looks like it would be fun.........

Paul I found the Universal not that much harder to build and it is a lot sweeter organ. I think Tom is going to start a build and I would start one too MayBE.
 
More progress to report...

I got a tracker bar top from Jay, but on a whim I decided to try to do my own, using the alternate method on Melvyns busker organ site.
1. Block with template.jpg
I prepared a block of poplar, about an inch thick. I spent 30 years at IBM doing PowerPoint presentations, so I used that software to create an exact 100% scale template of both the tracker holes and the offset holes that go to the pipes underneath.
2. Pilot holes.jpg
I used a sharp awl and magnifying glass to poke some pilot holes as close to center as I could.
3. Slice off the top.jpg
I carefully drilled the main holes, about a half inch down, using a brad point bit, setting the point of the bit in the pilot hole each time. I then removed the template, and sliced off the top quarter inch. This will be the tracker bar top.
4 Glue base hog holes.jpg
I then glued the base plate onto the block and drilled the offset holes, using the same method. Using a new Dremel bit, I hogged out the material between the main and offset holes, so there was a clear channel from top to bottom.
5. Glue top sand.jpg
I then glued the top piece (the tracker bar) back onto the block and sanded a bit.
6. Install nipples.jpg
I cut the nipples from aluminum tubing purchased at the Busker Organ Section of Ace Hardware, and press-fit them into the block. They seem very tight, so I decided not to use any kind of adhesive.
7. Oval mount holes.jpg
I cut four oval mounting holes in the base, which will allow about an eight inch of movement either direction for adjustment to the paper spools.
8. Install top.jpg
The install went well, and seems flat and secure. I had to grind off a corner of each nut to clear the slopey side of the pressure box underneath.

(sorry about the thumbnails below -- can't figure out how to delete them)
 

Attachments

  • 1 Block with template.jpg
    1 Block with template.jpg
    48.2 KB · Views: 21
  • 2 Pilot holes.jpg
    2 Pilot holes.jpg
    43.4 KB · Views: 18
Last edited:
Sure looks nice to me. I think this would be much easier and full proof for leaks than the card honey comb method. I don't know PowerPoint so I don't know how difficult that part is. Nice work.
 
Top