Hi Chuck.
I hope you heal fast and well s that you can start working on your organ soon.
Take care.

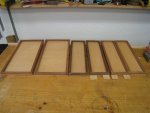
This afternoon I will post some pics to show the stage I am, which in fact is a bit dis-"organ"-ized :D, Bits and pieces everywhere but nothing assembled and working yet.

Hey Jay, I have a doubt about how the reservoir is attached to the bellows, is there a board an between? and what is that outer frame used for?

Toni the outer board is what you use to screw it to the bellows, use seal tape to seal all around the edges and a piece of blackout or bellows cloth to seal between the two bellows. There is a picture on post #122 page #13 on here if this doesn't clear it up I will try to get you a better picture. :D

I am also working on setting up a laptop with video in the shop to use to show things live using Skype. I just bought the laptop and having trouble getting everything set up. "YOU CAN RELATE RIGHT FRANK" (Vista) :huh:

Jay
 
Jay,

When building the pipes, it look like the face piece is glued inside the side pieces, exposing the edges of the sides from the front. To get a cleaner look, I would like to have the face piece extend from edge to edge, building it so the sides are set inside the front and back. In sketching it out, it seems that the interior dimensions are the same and the size of the mouth piece is the same. It doesn’t seem that this would effect the tuning or tone. Am I missing something somewhere?

Also, by “seal tape” would any of these be what you are talking about. http://hardware.hardwarestore.com/28-589-weather-seal-tape.aspx If not, do you have a brand name?

Sorry for all the questions. Maybe I should wait until the plans get here. Are they all answered there, or will I have even more?
 
Last edited:
Jay,

When building the pipes, it look like the face piece is glued inside the side pieces, exposing the edges of the sides from the front. To get a cleaner look, I would like to have the face piece extend from edge to edge, building it so the sides are set inside the front and back. In sketching it out, it seems that the interior dimensions are the same and the size of the mouth piece is the same. It doesn’t seem that this would effect the tuning or tone. Am I missing something somewhere?

Yes Chuck your missing something :D:D :rofl:

If you look at post #174 pg18 you will see what the pipes should look like before the fronts are added then in post # 197 pg 20 I show a completed pipe with the fronts on. You want to build the pipe this way because it is the simples way to make them. John figured this out to make it easy for someone that was not a pro pipe builder and they work GREAT and easy to build.

Also check out post #125 pg 13 where the pipe build starts.
Hope this helps if not keep asking and I will keep adding more stuff. :D

Jay
 
Jay, in the example on post #197 pg 20, the top and bottom cap cover the face of the pipe completely, but in post #128 pg 13, “Use a rubber band . . .” the cap doesn’t completely cover the face of the pipe, exposing the edges of the sides from the front. I would like make my caps so that they do NOT extend the full length of the pipe, but don’t want the side edges exposed.

My reason for wanting to do this is to use curly maple for the face of the pipe with rosewood for the top and bottom cap, for contrasting colors and textures.

I guess if I want to do this, the best thing to do is make one with the face and back inside the sides, and one with the sides inside the face and back, the see if they are the same when tuned and voiced.

Now I understand that is where John is suggesting using a veneer just build the pipe as shown and after you get it voiced then glue a veneer on that is butted up to the part that is shown with the rubber band on it.

Jay
 
I just went to the mail box and MY PLANS ARRIVED! The Bride just got home. I promised to take her to dinner. Oh, nooooo Mr. Bill. Gotta keep The Bride happy so I can play with my organ.
 
Jay,

I signed up for Skype, will you be my friend? I'll get a webcam tomorrow and hook that up. By the way, I had just enough time to finish my Honey Do's after I got off the phone.:thumb:
 
Another one bites the lure!
So far we are:

Carol
Charles
Charlie
Chuck
Dean
Drew
Jay
Royall
Myself
I hope not the be missing anyone, if so please update the list at will.


Hi all, Toni I am just lurking but the bait is getting very hard to resist. The line is being tugged and tugged but for now I am managing to resist. Trouble is I just love the feeling you get when you play the organ. I keep going back to Jays post and just listening to the music. Its got a melody that is just a pick me up type of tune. I hope you all plan on putting up a video at the end of your particular organ playing a tune. This is a fantastic project and again thanks Jay for getting the family going on it.

I will continue watching for now.....:lurk::lurk: Oh by the way best of luck all with the build.
 
Organ Build

Rob, you might as well jump in and be part of the fun. I suspect that you will not be able to lurk much longer without falling into Jay's trap. Just think of how excited you will be when you first turn the crank and hear the music from your own Organ. So, come on and give in now, don't resist, you know you will have to give in sooner or later. We would love to have another victim. :rofl: OH, Sorry I meant participant.
Charles
 
Hi all, Toni I am just lurking but the bait is getting very hard to resist. The line is being tugged and tugged but for now I am managing to resist. Trouble is I just love the feeling you get when you play the organ. I keep going back to Jays post and just listening to the music. Its got a melody that is just a pick me up type of tune. I hope you all plan on putting up a video at the end of your particular organ playing a tune. This is a fantastic project and again thanks Jay for getting the family going on it.

I will continue watching for now.....:lurk::lurk: Oh by the way best of luck all with the build.

Come Rob, come to the dark side of the organ, you'll hear the music much better when you play it on your own hand made organ...
Do not fight... let yourself go my friend... Once the decision is taken the rest just flows smoothly...:rofl::rofl:
 
My first pieces

All right, here are some pics of the bellows and reservoir I'm making.
Just started and made two mistakes.:bang::bang::bang:

I cut the reservoir too long, actually the same length of the bellows, problabky I was looking at the bellows plans when I cut the plywood.

Fortunately, the mistake was in excess, so I cut the pieces to the right length (width was ok) and glued another stick to the end.

Another mistake I made, was to assume that the reservoir had similar concept than the bellows, hence the two parts equal, instead of the bottom open frame.

I think I'm going to leave it like that and make holes to let the air go through.
If I do it properply I won't need to seal the two bellows because they will be sealed by the lower lid.

What do you think Jay?
 

Attachments

  • organ01.jpg
    organ01.jpg
    76.2 KB · Views: 73
  • organ02.jpg
    organ02.jpg
    71.3 KB · Views: 67
All right, here are some pics of the bellows and reservoir I'm making.
Just started and made two mistakes.:bang::bang::bang:

I cut the reservoir too long, actually the same length of the bellows, problabky I was looking at the bellows plans when I cut the plywood.

Fortunately, the mistake was in excess, so I cut the pieces to the right length (width was ok) and glued another stick to the end.

Another mistake I made, was to assume that the reservoir had similar concept than the bellows, hence the two parts equal, instead of the bottom open frame.

I think I'm going to leave it like that and make holes to let the air go through.
If I do it properply I won't need to seal the two bellows because they will be sealed by the lower lid.

What do you think Jay?

Toni your save on the reservoir top will work just fine but you will only need one of them. You forgot to but your holes in and so when you do it now make sure to use a backup board as you need to have good smooth holes for the flap valves to seat on.

The bottom part of the reservoir needs to be made like shown to be able to attach it to the bellows and have the proper air movement check post #122 for pictures

Your making some head way and with the other build your have going on you must be busy as all get out.

Nice going on both projects :thumb:

Jay
 
Top