Chuck Rodekohr
In Memorium
- Messages
- 495
- Location
- NorCal, USA
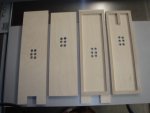
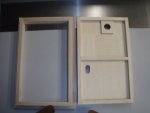
Well, Toni, I was going to keep quiet about my mistake today, but since you manned up, I guess I better also. I cut out the bellows frame, but when I measured for the short pieces, I laid it out flat on the 3/8 side instead of on the ½ inch side, so when I cut the short pieces, I didn’t came up with the proper width. When I dry fit the lids, they were off. Luckily the Titebond hadn’t completely set up so I could disassemble it.
I ripped a bunch of 2” wide strips of Sitka Spruce for the pipes.
Since I'm to STUUPID to download pictures, I have to do it this way.
10 ft. board of Sitka Spruce
http://i214.photobucket.com/albums/cc141/ECRody/Senior 20/10ftSitkaSpruceforthepipes.jpg
Two ft. section jointed on two sides.
http://i214.photobucket.com/albums/cc141/ECRody/Senior 20/2sectionjointed2sides.jpg
Spruce strips ripped to thickness.
http://i214.photobucket.com/albums/cc141/ECRody/Senior 20/Spruceripped2.jpg
I am going to use East Indian Rosewood for the top and bottom caps, so I ripped two strips to thickness, 4’ long. I found some beautiful Birdseye Maple veneer that I will face the front of the pipes with, up to the Rosewood. This picture shows the contrast and texture of the two woods.
http://i214.photobucket.com/albums/cc141/ECRody/Senior 20/RoosewoodandBirdseye.jpg
Can’t wait to get the pipes built and finished to see how it turns out. I was thinking BLO and Wipe on Poly based on what I have read, but have not used BLO before. Would this bring out the best in the woods?
Last edited: