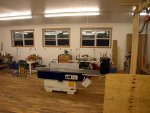
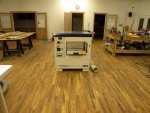
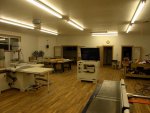
Birth of a shop - The Final Trimester

DSCN1393.jpgGrandpa!!!! :wave::rofl:

Nice addition, Marty! 24" resaw???!!!!??? Mercy! You'll need to devise some sort of mechanism to hold the logs if you plan to use that capacity! Heck, even a slab of hardwood 4' long to cut veneer off of could be too heavy to handle. Can you say a powered infeed and outfeed table? :D Use it in good health! Jim.
 
View attachment 5776Grandpa!!!! :wave::rofl:

Nice addition, Marty! 24" resaw???!!!!??? Mercy! You'll need to devise some sort of mechanism to hold the logs if you plan to use that capacity! Heck, even a slab of hardwood 4' long to cut veneer off of could be too heavy to handle. Can you say a powered infeed and outfeed table? :D Use it in good health! Jim.


You know Jim, I don't know if I'll ever use all that resaw capacity...but...if I decide I want to try, I'll be able to! ;)

I've already begun thinking about feeders and in-n-out-feed tables. More work...:rolleyes:

- Marty -
 
Well, after yesterday's post, this is sort of anticlimactic...and worse still...it's back to trim painting...:( :doh:

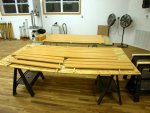
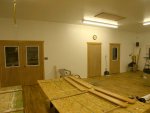
Anyway, I got all the remaining trim for the last five windows routed and sanded, ready for priming:

DSCN5987.jpg

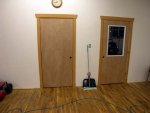
Then Denise came out and we got the first finish coat on all the door trim:

DSCN5986.jpg

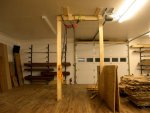
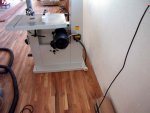
Here's a clearer shot of the gizmo I used to stand that MM24:

DSCN5988.jpg

Oh yeah, and you can see behind my crane that Denise helped me haul down all that mahogany and paduak from the attic so we could stack it on the lumber racks. (It's starting to warm quickly here, and I've been concerned that the lumber up there would start to bake...)

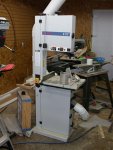
Tomorrow is more trim painting/priming. I also want to get back to wiring...especially so I can get power to my new bandsaw! :rolleyes:

Thanks for following...
- Marty -
 
Hey, I have that same saw!

If you aren't going to bolt it to the floor, get you some casters from mcmaster carr or zambus.com. Expensive, but well worth it IMO.

Kewl Travis,

How da'ya like the MM24?

As for casters, I think not. I'm planning to get nice long bolts and run them down through the floor, with fender washers and bolts under the shop. Last thing in the world I want to even think about is that big heavy saw toppling over! :eek:

- Marty -
 
Today, since I had Denise's helping hands, I decided to get back under the shop and work on the three phase some more. It's SOOOO much easier trying to pull multiple wires through conduit and especially flex, with more than one person.

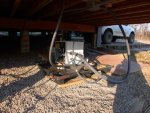
So, here's what we got done. First thing was to run single phase power and control circuit wires to the converter. That consists of three runs of #4 for power, and a run of 18/4 for the control circuits. We got all four stuffed into 1 1/2" flex coming out of the box where I broke out the single phase for the slider:

DSCN5989.jpg

Coming out just under where that 1 1/2" flex enters the converter is my three phase output to the loads which fit into 3/4" flex:

DSCN5990.jpg

I decided to go with heavier wire than recommended...pretty much just because. The doc on the converter said I could use #8, but I decided to use #6. Actually, I wound up running 6/2 romex along with a seperate run of RED #6 stranded, in the 3/4" flex and rigid conduit. The red wire will be connected to the 'manufactured' leg coming out of the converter, and make it dead simple for me to keep track of it.

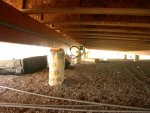
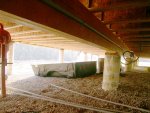
The reason for flex instead of rigid is mainly to allow for vibration from the converter. The reason for the excessively long flex is because the converter is 'temporarily' sitting on one of those super-tough pvc/plastic pallets. We're probably going to pour a pad under the shop for it to sit, once we have everything run and are done with the setting up phase. For now, the pallet, and the extra flex to move the converter onto an eventual pad, works out fine.

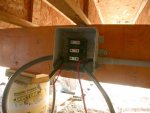
So, once I had the inital run of three phase coming out of the converter, we ran it to the first of two distribution boxes:

DSCN5991.jpg

Inside that 8x8 box is a terminal block intended for 2/0 wire. I'll run my three phase into the left hand side of it, and will have three runs of #6 (6/2 and #6 red) coming off the right hand side. Each of those three runs will go to either a tool or the next distribution box:

DSCN5992.jpg

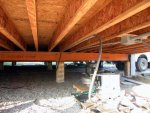
It's a little hard to see, but in the center of this picture, you can sort of make out the 3/4" flex running into a loop just prior to piercing the floor on the way to the bandsaw:

DSCN5993.jpg

I left at least 6' of flex in a loop under the bandsaw, (as I did with the slider), just in case I ever find I need or want to move it. If so, it'll be a simple enough task of pulling the extra flex up through the floor and moving the saw where I want/need to.

And finally, here's a shot of the 3/4" flex coming up through the floor:

DSCN6000.jpg

Denise and I did in fact 'fine-tune' the location of the bandsaw after our initial placement. We wound up moving it a little further towards the finishing room, giving it more clearance from the cross-cut fence on the slider. (I envisioned nasty bruises about hip-high from banging into that fence. :doh:

I still need to connect up all the wires inside the converter housing, as well as make all the connections within my distribution boxes, but that I can do alone. Maybe Monday... :dunno:

Oh, and once it got too dark to work outside/underneath, Denise and I moved back to the trim. Only this time it was far more rewarding than just painting:

DSCN6001.jpg DSCN6002.jpg

Tonight we got our reward for all those days of cutting, milling, sanding, painting, sanding some more, painting some more, etc. We actually got the door trim hung.

We're both pleased with the outcome! :thumb:

We still have to paint a few more parts to be able to finish all the doors (we ran out of room on saw horses.) And then we have to prime, sand, and paint the window trim for the final five windows. But now that we have the door trim off the sawhorses, we have room, so that's priority tomorrow.

Once the doors and windows are all finished, I'll get started making the hundreds of feet of base trim. Oh joy...:doh:

We're getting closer every day...:rolleyes:

Thanks for following...
- Marty -
 
Marty I guess I never noticed before, why didn't you block between your floor joists along the beam lines? I'm surprised the joist company didn't recommend it to keep the joists from potentially rolling over.

Doug
 
Doug,

I just took a quick peek at the archive I have from SMC, trying to locate the exact details, but I was unable to find it (quickly). The bottom line is that there was a definite reason NOT to block the I-Joists. If memory serves me, it had something to do with the use of the simpson hangers, the length of the one-piece I-joists, and the web-stiffeners they spec'ed for over every beam.

If memory serves me...HA! That's funny! I can't even remember what day of the week it is anymore!

Anyway Doug, I was specifically told NOT to add blocks by the engineer that designed the floor system. I even contacted him recently to ask about blocking again...this time under the heavy equipment in the shop. He actually came out to visit me, and after looking over the install, seeing the additional layer of 3/4" t&g oak, he again said NOT to even think about blocking.

Hey, they're the engineers, I'm just the laborer. No blocking for me! ;)

- Marty -
 
That really surprises me, then again I'm no engineer. When I built my last house I had a similar system except they speced 1 1/8" plywood. I had blocking everywhere with special nailing etc. It might be too that we are in earthquake country too.

I would be curious to know what your engineeer designed for your live load and dead load? Did he recommend putting really heavy equipment over the main beams?

The shop is looking sharp, keep up the good work.

Doug
 
Hi Marty and Denise,
It is a wonderful place you are working to create. It is quite handsome the way it is. Your progress is relentless and you never cease to amaze me as a reader with the diversity of your work. Is this electical saavy you have relatively new or is that something you picked up and tinkered with since your youth? Then too, I guess I start wondering about "who is this guy and where did you get the persistance to push the way you do?" You are a real inspiration and you can see from the viewings of your thread "BLANKET" that your journey is greatly respected. Thanks from all the folks, like me, that often don't even know what to say, we just LURK.
Shaz :wave:
 
Doug, I'm guessing it may be a while before Marty and Denise knock off for the day. Thought I'd pipe in with a little info from the beginning of the original thread over at SMC. From Marty: " Floor:
As I said, this is going to be an engineered floor system, using Trus-Joist “I-beams” and “LVLs”. The floor has been designed for 150lb/sq ft live load, and 20/lb/sq ft dead load. A standard residential floor is 40/live 20/dead, so this is about four times stronger. I’m not sure it would handle the load of a shop full of Dev’s caliper of equipment, but it’ll be plenty strong enough for my needs. It’ll be topped with 7/8” T&G Advantech sheathing, which will add to the strength and rigidity. I’ll be adding fiberglass insulation between each truss in the floor. I’m also planning to run hardware cloth across the underside of the trusses in hopes of keeping out a majority of the critters. (Thanks Frank for the idea!)"

Now it is possible that something changed after the initial set of specs, but at least it will give you an idea, and Marty can update later and say if these numbers are still correct or not. Jim.

Thanks Jim...

As I mentioned, the engineer was here last week (or was it the week before? :huh: ) He originally designed the floor with 150 lb/sqft, and that was with 3/4" advantech. I upped that to to 7/8", AND THEN added the layer of 3/4" t&g oak to the mix. The engineer said he had no way of 'guesstimating' what the actual capacity is of the floor as I've built it. But he did say "it's way up there" :rolleyes: !

As for placement of equipment over beams, etc, that was one of the very first things I asked of him. His comment was, "you have nothing to worry about ANYWHERE on this floor". That's also when he told me I didn't need (or want) blocking under the tools. Nor did I need to put 2x12's under the feet of the tools to 'spread the weight'. He told me there was no need!

I liked hearing that! :thumb:

And after having four units of flooring (4,000 lbs each), two units of 1/2" OSB (4,000+ lbs each), the 1,600 lb slider, and untold additional weight, all slid together as I was moving things around finishing the floor, I tend to believe the engineer!

Like you Doug, I'm no engineer...but I beleive what he tells me! ;)

- Marty -
 
Hi Marty and Denise,
It is a wonderful place you are working to create. It is quite handsome the way it is. Your progress is relentless and you never cease to amaze me as a reader with the diversity of your work. Is this electical saavy you have relatively new or is that something you picked up and tinkered with since your youth? Then too, I guess I start wondering about "who is this guy and where did you get the persistance to push the way you do?" You are a real inspiration and you can see from the viewings of your thread "BLANKET" that your journey is greatly respected. Thanks from all the folks, like me, that often don't even know what to say, we just LURK.
Shaz :wave:

As always Shaz, thanks for the kind words. Now quit making me blush :eek:

:rofl:

As for my 'electrical savvy', it's a combination of new and old. I've always done small simple stuff in all the houses I've owned. And I even dabbled in some more complex stuff. But this project is BY FAR the MOST COMPLEX thing I've ever attempted! It not only encompassed wiring the entire structure, but adding three phase to the mix is a real challenge.

All I can say is I read alot. There's a HUGE amount of information to be had for the asking on the web. I also have a book or three on electricity that I refer to. Plus, the three phase is being done with a little consulation from the converter company (and of course our own tod evans! Thanks again tod! :thumb: )

I seem to have done a good job wiring the shop, and I'll soon be finding out if I've done a good job wiring up the three phase...he says with fingers crossed...:rolleyes:

Anyway, my breaks over...Denise is hollering to me from the yard. Yup, today is YARD WORK DAY! :doh:

That means there will be no shop update later. Hey, it's only fair. All the hours she gives me in the shop, I can stop the shop for a day or so to help her in the yard...:thumb:

- Marty -
 
The MM24 is more machine than I would ever imagine. I got a carbide tipped blade with it, and now do all of my rough cutting with it along with resawing. The only negative is the dust collection I would consider fair. I still would buy it again.
 
Ok, so I haven't posted in almost two days....sorry...I've been busy. And this time, I've been busy in the shop, not with annoying (but fee-based :thumb:) consulting , nor with (non-fee-based :doh:) yard work!

I spent the better part of two days getting the three phase system wired and working. It was a bit more complicated than I had planned, since I wanted/needed something a little different and out of the ordinary.

Recall that I placed the phase converter under the shop. Recall also that I mentioned 'control circuits' and wires for that circuit. I'll show you in a minute what that's all about.

In the mean time, here are a few shots of what I did under the shop to distribute the three phase power:

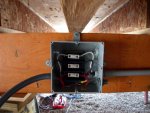
DSCN6003.jpg DSCN6004.jpg

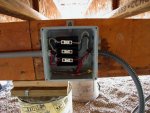
That's the first of two distribution boxes I put under there. Inside the box is a very large terminal block that's made to accomodate big honking 2/0 cable. I know it'll have room to handle a few runs of 6 gauge, plus I know it can handle a large current draw safely.

Three runs of #6 wire (and a ground) enter on the left, and get connected to the terminal block. The other side of the block is where I pull power from. THe set of #6 wires you see there now are actually feeding the second distribution box, since that one is closer to my new MM24, and that's where I needed power. You can also see that there are other fittings coming out of the right hand side of the box. Room for expansion...;)

I ran rigid EPVC where it made sense, mostly on straight runs. And I switched to water tight flex whenever I needed to maneuver around...going under beams, turning corners, etc. I also terminated the feeds up into the shop through the floor with the water tight flex.

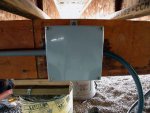
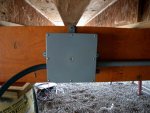
And here's the second distribution box:

DSCN6005.jpg DSCN6006.jpg

Notice flex coming into the box (from the first box), and rigid leaving the box. The rigid continues on about 10-12' before I switched back to flex so I could go under the beam. I then went back to rigid towards the rear of the shop, and finally back to flex to enter up into the shop and to the bandsaw.

Flex is almost twice the cost of rigid, and rigid makes a cleaner install where it makes sense. Even with the cost of the fittings, I wound up saving a few bucks doing all my switches. It was a bit more work, but I'm happy with the end product...and the savings.

Ok, so now I had my three runs of #6 (and a ground) up to the bandsaw. It was time to work on powering up the converter.

As I said, I wanted/needed something a little different. Since the converter is under the shop, I needed a way to turn it on from up in the shop. What I came up with is pretty kewl, works like a charm, and made for a very clean install!

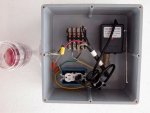
The converter I got is a Kay Industries MA2-AW. The "AW" stands for "Automatic Wired". What it means is that there's a control circuit that I can close remotely (connect two wires), and the converter will start. The way I chose to 'connect those two wires' was with a remote control from up in the shop. All it took was a contactor, which I had, and a remote control unit, which I also had (from the HF DC I was using in VA). I mounted the whole affair in a 12x12 molded junction box, which I hung from the ceiling of the shop:

DSCN6009.jpg

You'll see that I added a light to the mix...with a red bulb in fact. The way I added that little bit was to tap into the output side of the contactor within the phase converter. I added a five amp fuse inside the converter, and ran the switched hot leg up to my box on the ceiling.

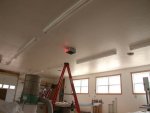
Now when I hit the remote control, it energizes the contactor up on the ceiling, connecting the two control wires together. Once those two wires get connected, the phase converter starts. And since I tapped into the output side of the converter, my light bulb lights ONLY when the converter is producing power:

:thumb: DSCN6008.jpg :thumb:

I'm really pleased with the way it all came out. There was quite a bit of nervous trial and error, and I did in fact blow a lightbulb (or three), until I determined that the Shop Fox remote I was using a) had the neutral and hot legs reversed inside the remote (hot was white, and black was neutral! :doh: ), and b) the Shop Fox remote leaves the hot side live, and opens and closes the neutral leg only. :dunno:

Anyway, now I can click a button on a remote and have three phase power, and have a red light lit to confirm it! :D

That's not all I got accomplished today, but that's going to take another post, since there are more pictures.

Stay tuned...
- Marty -
 
Wow! There's more???! That was a bunch, especially most of it crawling around and laying on you back, or at least sitting hunched over. I'll wait up for post #2. Jim.

Marty, did you fall asleep at the computer??:rofl::rofl::rofl: I'll catch you in the morning.
 
Last edited:
Ok, so now that I had three phase power run to the bandsaw, I wired up the bandsaw, clicked my remote, and pressed the button on the bandsaw. I didn't bother taking a picture, since I still haven't gotten any blades for the saw, but it was pretty rewarding to hear the 7.5 hp motor fire, and hear that lower wheel spinning (in the right direction first shot :thumb: )!

But wait, that's not what this second post is all about.


This one involves a tractor trailer backing up to my loading dock...:rolleyes:


Yup, time for a few more tools to arrive...:thumb:


As any of you know that have followed this adventure for any length, one of the things I keep professing is that I'm doing everything within my power to do this ONCE AND DO IT RIGHT. To that end, you've noticed that I've invested in a few good quality tools. I believe in the Quality of MiniMax and I think this post will help prove that point...

I had my hands full today, so there aren't anywhere near the number of pictures I would have liked to have taken. But here are a few...

Here's a shot of my new Formula F1 16" Jointer loaded into my 'crane':
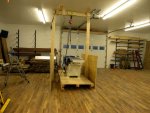
DSCN6035.jpg

I wished I had gotten a picture of that beast hanging from the crane, but I was far too nervous to stop and grab the camera! That things weighs just under ONE TON, almost twice the weight of the bandsaw, and I wasn't very sure of the capacity of the straps and such that I was using to hoist it up off the pallet. I was concentrating on getting it lifted, getting the pallet out from under it, and getting it safely on the floor. Another thing that made it pretty challenging was the fact that the jointer has 'hook holes' in three places, where I needed to attach straps and lift. There are two holes on the rear of the machine, and one on the front. Given the weight, and the top-heavy nature of it, rigging and hoisting was far more complicated than the bandsaw. Luckily, it went and up back down safely without a hitch:
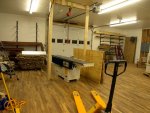
DSCN6036.jpg

So, with the F1 safely on the shop floor, I moved it out of the crane with my pallet jack.


And then I loaded the crane back up...:rolleyes:


I didn't get any before pictures, again because of the nerve wracking nature of the process, but here's a shot of my new SP1 20" Planer sitting safely on the shop floor:

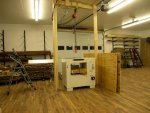
:D DSCN6039.jpg :D

Getting that off the pallet was just as challenging as the jointer was...more so infact, since the way it sat safely 'inside' the pallet, it had to be lifted about 6" up off the pallet before the pallet could be slid out from under it. And since it also weighs in at around ONE TON, I did everything I could to make the process go quickly and error free.

Here's a few shots showing the new equipment placed 'roughly' in their new homes:
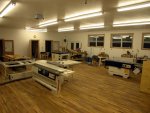
DSCN6044.jpg DSCN6045.jpg

DSCN6046.jpg DSCN6049.jpg

I'm sure glad I built the shop as big as I did! :rolleyes:

I have my work cut out for the next few days. Both of the new machines are covered in cosmoline, and will require a few hours of cleanup to get them ready. Once they're cleaned up, I need to get back down under the shop and get three phase power run to them. (Now you see why I built in room for expansion under there...:thumb: )

Before I call it quits for the night and go soak in the spa, I want to add one important item to this post...

I mentioned above that I (obviously) believe strongly in the Quality of MiniMax. Well, that's not the only thing about MiniMax that I believe in.

I've heard folks mention the good customer service they've recieved from various vendors. Well, let me tell you...

MiniMax understands the meaning of customer service and knows how to deliver it!!!

Here's a picture to show what I'm talking about:
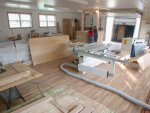
DSCN6016.jpg

That shows the truck backed up to my loading dock. It also shows Denise looking over the paperwork with the driver while they both lean on the new jointer. But more importantly, it shows TWO JOINTERS and TWO PLANERS sitting in the shop. There's one each sitting behind that sheet of plywood towards the left in the picture.

It turns out that the jointer and planer arrived at the same time as the bandsaw, but both were damaged beyond repair by the freight company! :doh:

I can't say enough about the FANTASTIC support I recieved from both Dain and Jim at MiniMax. After a few phone calls, an inspector from the freight company was in the shop examining, documenting, and photographing the damage.

A few days later, replacement equipment shows up, and the damaged machines are hauled away.

My hat's off to the folks at MiniMax for turning what could have been a nightmare into a relatively painless experience!

Thanks Dain!

Thanks Jim!

I believe I've made a wise investment with MiniMax! :D

(Oh, and in case you didn't think about it, that's a WHOLE LOT OF WEIGHT on my shop floor in that picture. It handled it without a blink! I think I done good with the build! :thumb: )

Well, as always, thanks for following. Thanks for allowing the gloat. And thanks for listening while I praised a company I believe in.

Off to the spa...
- Marty -
 
Wow! There's more???! That was a bunch, especially most of it crawling around and laying on you back, or at least sitting hunched over. I'll wait up for post #2. Jim.

Marty, did you fall asleep at the computer??:rofl::rofl::rofl: I'll catch you in the morning.

Sorry Jim,

I had a bunch to type and pictures to post. I think you see what took so long... ;)

- Marty -
 
Marty I'm not quite sure I understand how the phase converter works? Can't you wire your 3 phase tools so when you turn them on the converter comes on? Or does the converter already have to be running? Maybe you could explain in a little more detail when you have a chance.

But of course I know your going to be busy commisioning your new equipment. Congrats on all the heavy metal, your going about it the way I did. Go big and be done with it.:thumb:

Doug
 
Top