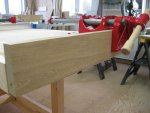
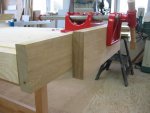
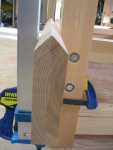
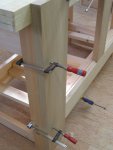
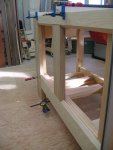
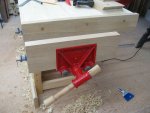
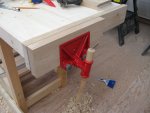
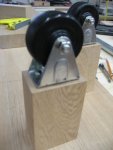
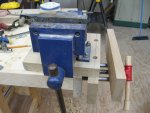
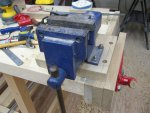
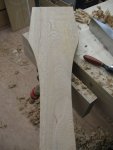
Recession/Depression low cost workbench...UPDATE June 13 2010 progress report

Rob

A kanna is a Japanese plane. When you've pulled one down a piece of Port Orford cedar and hear the whisk sound and see the shaving it's something to behold.
 
Well actually, I had forgotten about Larry's sander, was only thinking of the opportunity to actually learn how to use, set up, sharpen, etc, a hand plane. But I see Larry politely ignored me, so will look elsewhere. :rolleyes::eek:
 
I very much doubt Larry would refuse you a lesson in planes Jonathan. He would be only tooo happy i am sure to bring over some spinny guys from the vortex to the flatwork world.:rofl: Not that i can speak for him but judging by his prior comment i would be prepared to bet on it.:D
 
Well actually, I had forgotten about Larry's sander, was only thinking of the opportunity to actually learn how to use, set up, sharpen, etc, a hand plane. But I see Larry politely ignored me, so will look elsewhere. :rolleyes::eek:

This time a year he is in gathering mode(food).

Rob, the bench is lookin real good. I am at this point useing to saw horses and a few slices of ply.
 
How did I ever miss this thread? Looks like a great bench! :thumb:

I know I've already picked up a few tips I'm going to be using on my dining room table build...
 
Ok most of ya know i had a little distraction with planes along the way building this bench. So i played hooky today and went out to get some progress on the workbench.

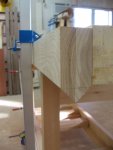
1) I have cut the ends of the top with a router. Did not have a bit long enough for single pass so had to cut both ends and flip and cut again.
2)Milled and glued up cheap ashglued up ash for rail.jpg i bought and cut to size and put the 45 in for the deadman rail. This is for the Roubo tweeks that this cheapo bench is getting.
3) Bought the LV tail vise screw for the leg vice
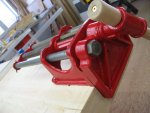
4) Painted the old viceVice all painted and mounted.jpg yup sorry guys I know ya all said to leave it alone but i told ya all this was a Canadian Bench and as such would have bling and the Red of the Canadian flag in it. :D I just love it the way the new rattle cans spray.
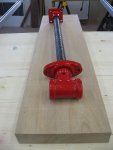
5) Had to spray the leg vice screw as well to matchRepainted LV vice screw for leg vice and chop.jpg.:D;)
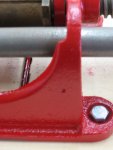
6) Then after going for quiet a drive a week or two ago i found a place that had the bolts I wanted for mounting the vice. View of the vice face bolts.jpgThis was one thing i was committed to getting this baby bedded down so if something is going to move its the whole bench thats going. (Hangover from the old school days when those bench vices we had oh boy the were hanging by a thread). So I cut a slot you can see here and took a piece of flat barView of the slot underneath and the lag bolts.jpg (now sprayed red:D) tapped it and put it in the slot.
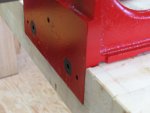
After recessing the vice rear jaw into the workbench I then clamped it in position and drilled the perfect fit holes all the way through to the slot to accomodate the countersunk cap screw 3/8" by 4.5 " long bolt. Now some might say thats enough but nooooo not for my liking after all i am a "if in doubt build it stout" kinda guy and this vice aint going nowhere less i let it. So onto the 2 inch lag bolts at the rearView of the slot underneath and the lag bolts.jpg.
Now shes mounted solid and deserves capping with this Brazillian Oak.Future end vice rear jaw.jpg
Then the outer jaw will be cut from this piece of Oak you can see clamped in the jaw.End vice with rear and front jaw.jpg

Well she is all glued up after todays session and the top is now fixed to the legs (touch wood it all works out).

Next session i will cut the leather hide i got from Tandy Leather in Barrie ( thanks to Don Braer for that tip what a great store.. Canadians take note its in our back yard).

Cut the outer jaw to size and glue the leather to it and then mount the end piece that is covering the vice rear jaw as well as recess the front face into the front wood jaw and mount that.

Then it will be on to finish the leg vice and deadman essentials.Lower deadman rail.jpgRoubo add on this will be one side of leg vice jaw.jpgShot of the deadman and rails.jpg

Lastly i will add the bench dog holes to the top and make some benchdogs as well as finish the walnut trim( Oh yeah Mr. Merlau your walnut is in there for sure;):thumb:)

Final thing will be to cut out and recess the maple leaf in the center of the work surface. But thats a way off for now.

At present i have to say i am sorry now that i used HD pine. Its all soft junk. Nothing like Southern Yellow.

But i guess this is not the last bench i make.:D

Next time i will spring for Maple:)

Comments suggestions welcome.
 
That's really turning out quite nice! :thumb::thumb:

Makes me want to build another bench one of these days, but, I have yet to fully break my old one....
 
That's a good looking bench Rob, you've been hiding it for too long:).

I like the detail of painting the vises red, I guess that's the Canadian accent you wanted to give to it.

BTW That vise looks really strong

I have a question, the sliding deadman you've made, have you put some sort of wheel or sliding pad such as teflon embedded on it? or just waxed it?

And a complain if I may, I'd like to see a complete pic of the bench, but I know that you're doing it on purpose to keep the interest alive;):D.
 
Update 13 december

First thanks for the comments guys.:thumb: I am glad someone is following along.

Toni the deadman i have no special rails just cut 45degree from either direction and then planed the top edge away so the deadman will "run" on the edges rather than bind in the groove. Seems ok to me but i have not full mounted it so any advice anyone has that has done this please shout before its too late for me.

Well after an afternoon and evening in the shop yesterday i made some headway on the workbench.

Trouble with this project is its a little chicken and egg scenario. So there are always detours i have to take to get something done.

Yesterday was no difference.

Got the tail end bench vice progressed to I would say 85%. Yup i want to round over the edges of the outer jaw and then line the two faces with leather.

Here are progress pics with vice open vice with jaws open.jpgand closedvice with jaws closed.jpg.

Then I started prep work for the leg vice.

Had to build some rollers (yeah i want some little bells and whistles :D;)) Leg vice rollers.jpg. Making these involved a little detour cause since i now have used my "original workbench" as a lathe stand, my mechanical vice has been out of action causing a great deal of frustration. So i used a little of the thick scrap offcuts as is to make up a vice mounting block to enable me to drop the mechanical vice into the tailvice and use a hacksaw to cut off the mounting wings of the casters.
mounting the mechanical vice.jpgMechanical vice secured.jpg

Then i popped the caster axle out and drilled mounting holes under the wheel keeping the footprint smaller.:)

While i had the wheels out i put them on the lathe to flatten out the shinny rubber which is very olval on the top. Strike one for the spinny guys.:thumb: Larry thats something you cant do.:rofl:

Well then i got to starting on the chop and the board that gets mounted against the leg to take the leg vice screw.

Heres the chop looks like i thought i had more pics but again forgot to take them.:dunno:
leg vice chop wip.jpg

Well I am getting close now soon it will be a good user.
Did also mount the top rail of the deadman to the edge of the bench but have no pic. Will get that next update.

What has been a pleasure is this tail vice and its quick release action. Oh it was so great to be able to have something that holds your work secure instead of using clamps. And the pain of using a mechanical vice that you need to turn and turn to open, well that aint there anymore.:D:thumb:

Again i did not make the progress i would have liked but as Glenn said eventually you dont need all the detours cause you have taken them before and solved their cause. I am looking forward to that day even more.:thumb:
 
Apologies for thread-hijacking, but can someone recommend a very cheap surface for a small workbench (roughly 2' x 4'). I've heard that a 1/2" layer of maple ply over 1/2" of something cheap works reasonably well - thoughts?
 
Looking good so far Rob, you must finish it soon or you will not make any project:D!

A suggestion that probably is not needed, you still need to make some sort of retractable bench dogs on the vice jaw and some dog holes on the bench surface, they will help you a lot for planning and assembling pieces.

I guess that you had them in mind but wanted to see the bench and vice mounted.
 
Last edited:
Nice progress Rob....keep going.

I'll be starting on my NFWB this coming weekend hopefully.

Joseph

Cheap and stable workbench top - Go to the borg and get 2 of the 3/4 mdf 2x4' handy panels and then drill and counter sink a series of holes in one sheet (countersink on both sides) and screw them together. While your at the borg get a 2x4' piece of 3/16" hardboard for the top surface and then stick it to the mdf with double sided tape.
 
Top