Recession/Depression low cost workbench...UPDATE June 13 2010 progress report

Update Janurary 23

Well progress has been made and i have been promising to update this thread but not getting round to it. So here is the latest .

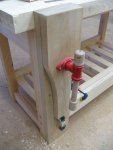
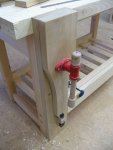
Leg vice cut mounted and working with new maple handle turned in my shop on my crappy lathe.:D

leg vise closed 1.jpg This is it closedleg vice closed.jpg

Leg vise open

leg vice open 1.jpgleg vice open 2.jpg

Opening width 12 inches here is proof
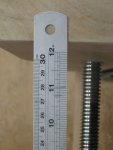
Max opening width 12 inches.jpg

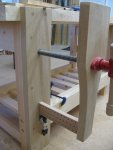
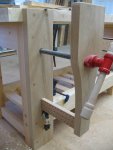
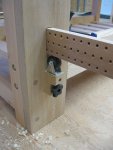
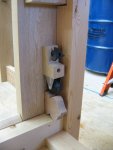
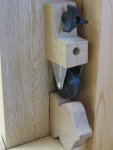
Runners and rail at the bottom

leg vise rail and wheels.jpgrear shot of leg vice wheel runner.jpg

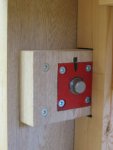
How i mounted it at the rear just as advised by many on the forum. Glen it was you who pushed me over the top to do it properly.:D

vice screw mounting rear shot 1.jpgclose up of wheels.jpg


Then i got hold of some nice leather and have finished the jaws on the bench vise
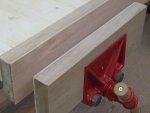
bench vise faces cover with leather.jpg


Thats it for now i still have the edges to do and the deadman and its rail to add.

Getting there but today i also wanted to have some fun for a change and make something at last. See my handle thread.

Leg vise works with one finger. Thanks to Lee Valley. For those that dont know i sprayed it with rattle can red. Thats my bling.

More to come when i get round to finishing the rest.

Thanks for following along.
 
So you call this a leg vice. Is that so you can clamp your leg to the bench and you wont fall over?:rofl::rofl::rofl::rofl:
Looks good Rob:thumb:
 
Thank you guys for all the compliments. I have to say it was inspired by many of you.

Ken the leather was found as a result of Dons advice (Don you have been so helpful to me and I am not sure you are aware of just how much so). Don put me on to this company I live about an hour from their store in Barrie Ontario and took a drive there one day. Oh boy i spent the afternoon there looking and wanting and talking with the owner. Then i bought a whole side of cow.:rofl: Cost about $70-90 Canadian cant remember exactly since it is sold by the sq/ft. Its going a long way at the moment cause i have already cut strips and redone LOML chair for her dressing table which had what we called riempie (hide but not rawhide) woven in slats across it. Have quiet a bit left.:thumb: Not sure if i will put leather on the leg vice though cause if i do i would have to do the whole face of the bench where a long board would be clamped. :dunno::huh:
Stu your extension to the Saw Stop and your leg vice were a huge help as was the book by Chris Schwartz.

The journery aint over yet. Still have the following to do.

Put a adjustable stop block at the end. This will be held in place by hanger bolts which i will thread into the end and then slot a piece of ash to go over and a couple of round knobs to hold it in place. I reckon that will allow me to put a flat board on the bench for hand planing and be able to adjust the stop to any thickness of board off the bench.

Then there is the corner next to the leg vice to be finished and then the opposite side edge which is getting a piece of old Larry. Yup gotta have a piece of special chocolate on the bench. Was gonna use chocolate all round but its too precious to do that with so i am only sparing a small piece for trim.

Then the final item is to make a huge template of the maple leaf on our flag and cut that out in the top and fill the recess with some red wood. I need some help here cause i want it to match Macks pen with the maple leaf on it. I have seen those kits Mack uses when in the raw they look purple but when it comes time i will find out how to make it go red and what die or method is used to pull it off.

At that point the bench will have an unvailing party with hopefully a few friends present. Not the NN of course:rofl::rofl:

So there is a ways to go but its getting there.

I do think one has to balance building a bench with doing other things. Making a tool is really great but you never seem to get any output. Making some handles in a batch yesterday really gave me a great boost. Oh and i loved making some noise for the NN. Pity my shop is so sound prooof.

Stay tuned for the next episode. This wont be like Neds shop it will be finished.:D;):rofl:
 
That's a great-looking bench, Rob. :thumb:

I was thinking about you and your NN last night while I was working in the shop. I had the stereo playing loud enough recognize the songs over the sounds of the compressor, pneumatic sander, dust collector, and overhead air filtration unit running at the same time. At 3:30 AM. :D

I guess I'm fortunate that my neighbors are tolerant. They say they can't hear my noise when they are in their houses, but I'm sure they can if they're outside. I periodically check with all of the nearby ones just to make sure the noise is not causing a problem. I don't know that I'd have the patience to deal with someone like you've got. :rolleyes:
 
Rob, like everyone else has said, great bench and thanks for showing us the process! :thumb:

Vaughn, I've found myself doing the same with the noise and thinking of the NN...I'm not out there quite as late/early though! :D
 
Rob,

Great looking bench. Excellent job and wonderful detailed write-up. :thumb:

You're going to drag alot of us right in behind you. :rofl: Just the little nudge I needed. :D

Thanks,
 
Rob I am confused, the leg vise looks like it opens parallel to the leg. If so, what are the little holes for at the bottom? I was under the assumption a leg vice opens like a V, and if you needed more room at the top you moved the bottom open/out more.?? Man it looks nice!
 
Rob I am confused, the leg vise looks like it opens parallel to the leg. If so, what are the little holes for at the bottom? I was under the assumption a leg vice opens like a V, and if you needed more room at the top you moved the bottom open/out more.?? Man it looks nice!

Jonathan I had originaly not understood that myself. But you soon find out that if you tighten up a object in the top it racks in at the bottom. So the little holes are for a peg that you slide across to stop the rail sliding in thereby preventing the racking in of the vice and keeping the jaws parallel to the face. You need to move the peg each time you use the vice but its a one time setup per clamping. Once you get the width set you leave it there for that specific object.
I still have to make this peg. Just a steel pin and a handle something like a burnishing tool for scrapers.

Okay, I understand. I was imagining the peg going through the holes on the inside of the bench's leg. It goes on the outside? No, it still goes on the inside. But I understand the logistics now.
 
Update June 13 2010 Bench End Stop

Well i am busy catching up on a bunch of posting so here goes.

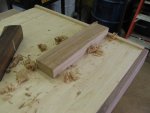
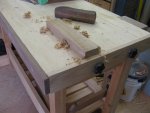
Done some more work to the bench. This time adding the end stop piece which is secured to the end of the bench using a couple of hanger bolts and then a couple of star knobs 5/16. End stop can slide up or down so it can be level with the bench or up for planning.

Bench end stop top view.jpg Workbench end.jpg

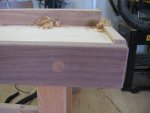
Also as i said this bench has a lot in it, so you can see the one side all decked out in Michigan chocolate. Now my buddy is as close as my bench.:D:thumb:

Workbench end stop side view with MI Chocolate trim.jpg

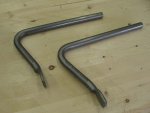
Also a small tool gloat after the rave review Stu gave these and given their price i settled on getting these for my bech. A couple of hold downs from Gramercy purchased from some real good guys to deal with Tools for working Woods.

New  hold downs gramercy.jpg

Soon after a couple more additions i will be done. Hopefully before the end of this year.:rofl::rofl: Hey you dont laugh Tom, and Jonathan I am getting other stuff done along the way.;):D:thumb:
 
Top