SHOW us yur finishing room

larry merlau

Member
Messages
18,741
Location
Delton, Michigan
those of you that have the nicety of having a spot specailly fer finishing. i would like to see how ya got it set up. lighting be it winders or candles? and the layout of the fan or table area and finish storage. am dreaming daily of havn one so am curus of how or what to hav
 
yeak thats not good

but i dun it this wknd da sam way. i like lacqyer it makes me look better and feel great :wave: steve even came over and shared in the trip.
 
I use mostly waterborn products and will finish in my basement shop, When I get to spray I will probably move to the garage unless spraying HVLP creates very little overspray then I might be able to stay in the basement but the furnace & hot water heater are down there.
 
Larry, I normally just spray in the garage (shop) which limits the winter time finishing I can do. But my son moved out recently (cute girlfriend beats dad anytime) so I'm using his old room. (temporarily)

I got several very large cardboard boxes and with the help of duct tape, made a finishing room in the corner of the bedroom. It's almost completely enclosed. To protect the floor, I'm using a large piece of linoleum that was left over from a kitchen job.

The HVLP has such a low over spray, it hasn't been a problem. I'm using waterborne finishes so the fumes are not bad. And I can keep good control on the temp and humidity.

Son came home yesterday and saw what I did to "his room"....."It's MY finishing room now son!!!! But you can always sleep over there in the corner next to the cardboard box if you need a place to crash"...:thumb:
 
Don't want to brag, but...

About two years ago, LOML got tired of shutting down all other projects just to get a project finished, so we tacked on a 12x20' finishing room to the back of our shop. There is a door to/from the shop and another door to/from outside for taking things out of the room without moving back through the shop and taking the risk of nicking something.

First is the north 12' wall, left-hand side as you look at it. Shop rags and a wall-mount hanger for 5 gallons of lacquer thinner. Note the HVLP guns hanging from the wall.
MVC-014S (600 x 450).jpg

Next, the north 12' wall, right-hand side, with a roll of brown paper hanging on the wall.
MVC-015S (600 x 450).jpg

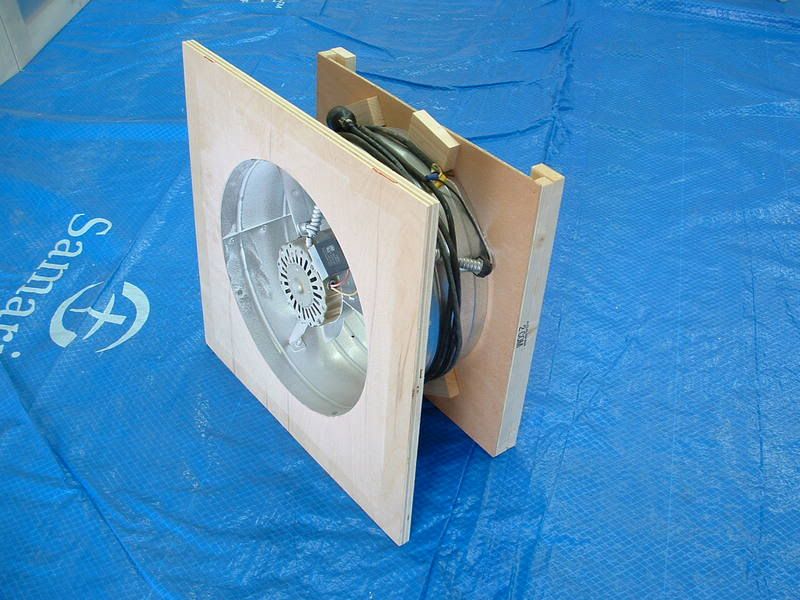
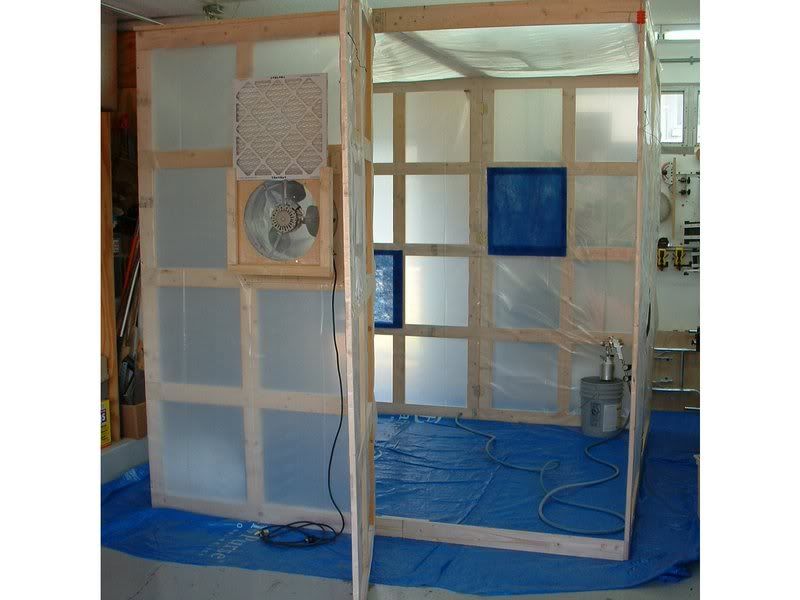
Exhaust fan high on the wall
MVC-016S (600 x 450).jpg

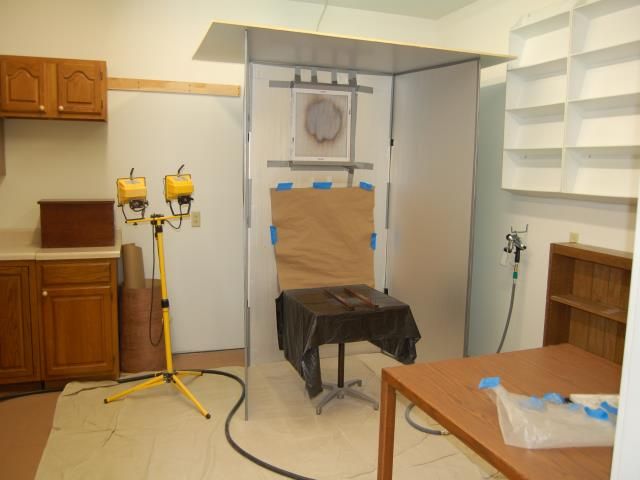
Reel for sprayer air tubing above a work/designing bench - the PVC for the air gun comes through the wall - about a 25' run from the 5hp compressor.
MVC-017S (600 x 450).jpg

Lower cabinets -right
MVC-018S (600 x 450).jpg

Lower cabinets - left
MVC-019S (600 x 450).jpg

Corner cabinet on south 12' wall for storing my craft-show stuff.
MVC-020S (450 x 600).jpg

Tall cabinet where we store our plaque blanks - outside door to the right, door to the shop on the left
MVC-021S (450 x 600).jpg

And last but not least, door into the shop.
MVC-022S (600 x 450).jpg

We have 3 4-foot 2-bulb fluorescent lights, plus two west-facing skylights in the room. The door from the shop is a steel entry door with some good weatherstripping on it, so we don't get a lot of dust into the finishing room (if we remember to keep the door closed). Floor is concrete with rubber interlocking floor matting. Hubby put plywood on the wall above the workbench on the north wall above the cabinets so he could hang his HVLP guns, etc. up there. Workbench is made of some maple gym flooring we were given (but that's a whole 'nother story).

Nancy
 
Wow, Nancy, that's a very nice set up you guys have. I still have to move the cars out of the way in the garage in the winter and outside in warm weather!
 
thanks nancy

for showing your room with pic's, now for some questions..first why skylights on west side? isnt the south side more light giving? and are you happy witht he skylights? also is that fan sufficient to exhaust your fumes? what or how did you heat that area? nice looking setup. the kraft paper must be to proteck the table top from the coatings?
 
first why skylights on west side? isnt the south side more light giving?

The orientation of the building pretty much dictated that the skylights face west. The roof of the finishing room is tied into the roof of the main building at the peak and slopes down to "normal" height (you can see that slope in the picture with the fan). The skylights are those bulbous ones that stick up beyond roof level so there is light that comes in from the south as well. Since much of hubby's work takes place in late afternoon, the west light is good.

and are you happy with the skylights?

Yes. We have two of the same skylights on the house--been there for over 11 years, and never had a leak.

also is that fan sufficient to exhaust your fumes?

Not totally. I think if we were to do it over we would probably go with a larger CFM fan, but since all we spray is lacquer (and I'm one of those who doesn't mind the smell), it's sufficient for now. It will probably be replaced with something larger in the next year or so, as we are going to add another room to the back of the shop using that as a common wall, so the fan will have to move anyway.

what or how did you heat that area?
We have a 80,000 BTU gas furnace in an attached lean-to on the other end of the shop building that heats the shop and the adjoining laser shop. The main shop is about 20x35, finishing room is 12x20, and the laser building is 12x20, and there are times when the heat drives me out.

nice looking setup. Thank you.

the kraft paper must be to proteck the table top from the coatings?
Yep. That table is a folding ShopBoss base, and hubby built a tabletop for it from 1/2" BB ply edged with hard maple. It (and the other two just like it) goes with me to my craft fairs, so we don't want it messed up with (any more) lacquer, so we use either the Kraft paper or cardboard to protect the top.

Glad you like it.


Nancy
 
That's all there is so far. Some cut up wood, a roll of plastic and an explosive fan. I am going to spray water based products so should be OK. I mostly want a clean place to spray and also have a simple system to keep the overspray off of my stuff.
 

Attachments

  • dscf0006.jpg
    dscf0006.jpg
    102 KB · Views: 70
This one is mine...a very simple room!

Wanted to share, to let you know that your booth does not have to be very expensive:

Some foam insulation, a 2,200 CFM explosion-proof motor behind it, blowing to the outside; the room is 12' X 15':

Finishingroom-spraybooth-1.jpg


The "booth" was stitched together using stick-on Velcro strips, to make "hinges" that allow opening or closing the sides, to adjust the opening to the work piece, and to increase or reduce the flow over it.

The little table in the booth rotates in such a way that the work piece is always between you and the exhaust fan. The piece of kraft paper under the exhaust filter is the area onto which I spray to adjust the HVLP spray pattern. The canvas on the floor protects the vinyl flooring, but it IS a dust catcher!

Thanks for looking!


.
 
Last edited:
Here it is, move out the planner, jointer, and hang the tarps. The blower hose actually goes out the door behind the tarps when in use.
 

Attachments

  • sprayb1.jpg
    sprayb1.jpg
    50.2 KB · Views: 56
I am putting my temporary spray booth up again so I thought that I would show you what I am useing. It is just 1x4s covered with 4mil clear plastic. Each side is composed of two 4'x8' sections joined with three hinges so the structure is 8'x8'x8'. The top is also covered with two 4'x8' sections.

Spraybooth1.jpg


Here I am just starting to join the first two corners. I leave each section bent at the hinges so that they will free stand. After the corners are joined I can straighten them out and screw on the next section.

Sprayboothfan.jpg


I am just using a plain old attic gable exhaust fan. I have been using it as an exhaust fan for the booth as I have been using it with water based procucts so have not been woried about explosions. Now I want to use some non waterbased stuff so have turned it around to use it as a blower and keep the electic motor out of the way of the fumes. It worked great as an exhaust setup so I am hoping that it will work just as well as a blower setup. Charlie Plesums suggested this so I am sure that it will work fine.

Spraybooth2.jpg


All set up and ready to spray. I left the fan filter up to show the fan. Needless to say I will push that down before spraying.

Dryingrack.jpg


I was tired of hunting down stuff to set my finished stuff on until it dried so I finally built a drying rack. Not very fancy but should do the job. Better than nothing, that is for sure.

It sure would be nice to have a seperate finishing room but I am doing the best with what I have. It waste a lot of time sometimes.
 
I reckon my entire finishing set-up cost me less than £1500 ($3000). Spray booths come up regularly from companies closing down and go for pennies - taking them down is such a messy job.

9761b482.jpg


I'm lucky enough to have a 500 sq ft space to put it in seperate from the main shop.

Drying racks are simply pairs of rows of clip-on shelf brackets fixed to the wall.
 
Allen Bookout.....
THANK YOU THANK YOU THANK YOU.

Being space challenged, I've been using very large folded up cardboard held together with duct tape. I've been wanting to "upgrade" but still need something foldable.....and you're pictures made the little light bulb inside the noggin go off...or is that on??? Either way....Nice work and thanks for posting.

How much room does your booth take up when it's folded and in storage?
 
Top