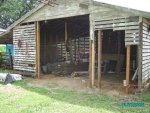
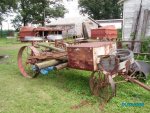
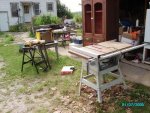
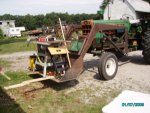
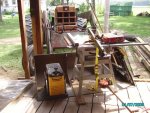
Jonathan's Shop

You amaze me Jonathan.:thumb:

Oh and by the way I knew you was just playing with me.:D

Seeing you cover the walls whats the plan for the electrics? and are you going to wrap the outside and cover it?

What about vapor barrier or should i not ask?

Enjoy.:thumb: I think using the Peers for the floor is a great idea.
 
Insulated

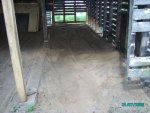
Brought in sand (from my sand pile outback from the pond we dug and the pile we shoot into when target practicing!). Dry, deep sand, actually spent about a half hour tamping with a homemade heavy pipe and 10"x10" square piece of metal welded on the end of it. :eek::huh::dunno: Man there had to be a better way or this fat ole man was going to be seriously bedridden by the time this portion of the job got completed. :(

East wall.jpg
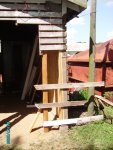
Here is a photo of the East wall with the 4x4's framing both the garage and service entrance doorways.

East wall rebuild.jpg
Utilizing some of the old boards so my wall thickness will stay consistent, put on some old boards to get everything to line up.

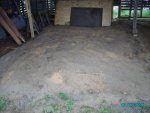
Sand-center in.JPG
Sand dropped in and raked.

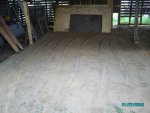
Sand-center compacted.JPG
Compacted sand. :thumb:

Sand-North compacted.JPG
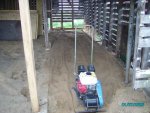
Sand after running the compactor over it.:thumb::thumb:

Sand Compactor:lifesaver.JPG
Tools are great! And man was this a lifesaving machine! :thumb: I had it rented for four hours, played with it for a half hour as it only took 45 minutes max to do this job and that was going each direction and diagonal from all four corners!

South wall insulated I.JPG
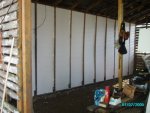
So now I am insulating. This is a shot of the South interior wall. All done.

South wall sheeted.JPG
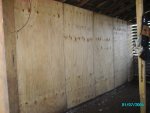
After insulation, need some sheeting. 1/2" plywood. That is what I have been hoarding and buying at bargain prices for a while. :rolleyes:

I do have more pictures so will continue on the next post. See you there!:wave:
 
Sheeting continued

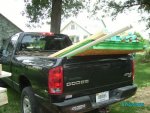
Load of lumber .jpgSee what happens after you go to the lumber yard! You see stuff you just gotta have! :D After sheeting the North and South walls I had to move the pile of lumber leaning on the West wall and happened to notice only three sheets of plywood left. :eek: So, off I go to town again. My lumber yard owner knows I am quite the economical shopper (cheap!). He takes me to a pile of 7/16 underlayment and sells it to me for $7.00 a sheet. I told him I needed some 2x4's, he asked how many and how nice they had to be. Long story short, I bought the mismatched pile of 30 2x4's for $1.00 each. :thumb: Might have to throw one or most of another in the wood stove, but hey, heat is heat also!

West wall insulated.JPG
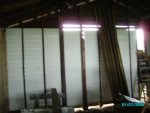
West wall insulated up to 8' high. Waiting until the floor gets in to run my rolling scaffold to finish the higher portions. :thumb:

West Wall Sheeted.JPG
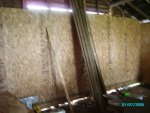
Well after insulating, sheeting came next. I went with the underlayment, prefer the grain of plywood, but for the savings, will not complain or worry about it.

Floor.JPG
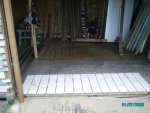
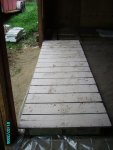
Floor!! First pier in, leveled, notice the vapor barrier :thumb:. This is from outside the garage door opening on the East wall.

Flooring II.jpg
This is another photo of the first pier installed, shot taken from the service entrance doorway.

Floor III.JPG
Once we got the hang of leveling the piers and connecting them (can't find a shot of that, will have to take one tomorrow and post it out of sequence. :doh:)

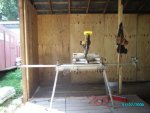
SCMsaw.JPG
I moved in the SCM saw as I just prefer it when cutting rough cut boards to length and squaring ends of boards. :dunno: (First I have used it all summer, was starting to feel withdrawal pangs! :eek::rofl:)

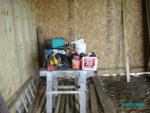
1st Workbench.JPG
My FIRST workbench in the new shop!!!!!!:thumb::thumb::rofl::rofl: Pretty fancy smancy don't you think?? :D Well I can tell you, pretty darn serviceable! :thumb::thumb:

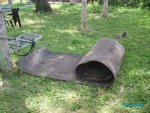
Conveyor belting.jpg
This is a shot of the rubber belting (actually conveyor belting from a local coal electrical generating station). They feed coal into the plant on it and replace sections as needed. Rumor the past couple of years is they quit offering it for sale. I have a few rolls of it laying around. :) I am going to put this down on top of the piers as they have 1/4" gaps between the boards. Thought about pulling all of the nails and putting the boards tight together as I do have enough extra piers left over, but think this will be an excellent flooring, great on my ole legs, and when skinning a deer or hog will clean up easier than a wooden slat floor.

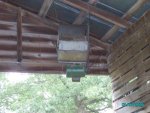
DC (dust creator).JPG
This is my DC!!!!!!! Dust Creator that is!!!!!! :rofl::p We used this building for a couple of years for tieing the girls 4H calves thru the day in here. Used this blower to keep them cool and keep flies off of them. Those calves used to meet us at the gate in the mornings to get thier halters on and get in there under the blower! It has a bird's nest packed in it something fierce. Tomorrow going to spend some time on a ladder and get it working as it is warm in the ole shop with the wind not blowing through any longer!!!!!:dunno::doh::rofl::rofl:
 
Last edited:
You guys made a LOT of progress over the weekend and Monday, and it looks like the Piers are working out well for the floor and the rubber should give a pretty good cushion. I am curious about one thing though, and that is why you are doing the insulation and interior wall sheathing before you dry in the outside walls, (or doesn't it rain up there)?:D I would be afraid the insulation, studs, etc would get wet if it rains, and then might or might not be completely dry when you sheath the outside which would trap moisture in there and I don't think that would be good.:huh::confused:
 
You Making great progress there Mr. Green (this name becomes even more relevant the more i see. Its either Mr. Green or Mr. Recycling :D)

I am as confused as Norman. Here is my question. So you showed us the vapor barrier on the floor, but what about the interior walls prior to putting up the plywood.

I gave up on the outside. Guessed you farmer types are just going to leave it open to the elements.:rofl:

I thought i had learnt that in NA you build a wood frame building with a wrap of at least tar paper on the outside and vapor barrier and tuck tape over the inner insulation before covering. But hey i suppose farmers are immune to the building codes being outside the city limits.:huh::dunno::rofl::rofl:
 
Great work Jonathon! I love all the stuff you are reusing. :thumb:

The fact that the local lumberman knows you're looking "on the cheap" is even better. I bet there are times he's ready to toss some things and then thinks, "Naw, Jon Shively can use it for something" :rofl::D Best part is you, can and do!
 
You guys made a LOT of progress over the weekend and Monday, and it looks like the Piers are working out well for the floor and the rubber should give a pretty good cushion. I am curious about one thing though, and that is why you are doing the insulation and interior wall sheathing before you dry in the outside walls, (or doesn't it rain up there)?:D I would be afraid the insulation, studs, etc would get wet if it rains, and then might or might not be completely dry when you sheath the outside which would trap moisture in there and I don't think that would be good.:huh::confused:
Yes, it was and always is great to work with a positive energetic person, really helps that he is going to marry my youngest daughter this coming May! Enjoy his company and his abundant energy, don't remember having that kind of energy. :huh::dunno: We get rain in August. Generally a very hot and dry month. The insulation is styrofoam, just like a cup, so it runs off. The exposed wood has been exposed for the past 60 years, so didn't see that the next couple of weeks would make a difference. :dunno: The sand in the pictures, well we have at last count over 24 cats on the farm and guess what happens to new sand piles? :eek: That is why the grandson's sandbox has a lid! :thumb: The aroma in the new woodshop was getting,,,,,,, let's say, "RIPE". :eek: All about priorities. :rolleyes:


Stuart Ablett Jonathan, it is looking great, you are certainly making progress
Not as much as you with that there grill/smoker combo :thumb::thumb:. Stu, don't know how you do it in that there dungeon. Seriously, how long do you stay down there looking for smoke after welding? I would be a nervous wreck. Actually, wouldn't do it. I am a chicken. Thanks for the encouraging words.

larry merlau wont be long now and those kitchen cabs can be finished
Now see, that is why Lou Ann doesn't get to read this. Posts like yours can get a guy in trouble!:rofl::rofl: Actually, yes, really looking forward to making a nice kitchen we both appreciate and will use until we die here. Might not be what all would like but we are creating many visions.

allen levine making progress, starting to take shape as a wood shop.
Thanks, the saws and planer and working in there today, was a great feeling. Able to spin a 2x6 6' long was awesome!!

Rob Keeble You Making great progress there Mr. Green (this name becomes even more relevant the more i see. Its either Mr. Green or Mr. Recycling )

I am as confused as Norman. Here is my question. So you showed us the vapor barrier on the floor, but what about the interior walls prior to putting up the plywood.

I gave up on the outside. Guessed you farmer types are just going to leave it open to the elements.

I thought i had learnt that in NA you build a wood frame building with a wrap of at least tar paper on the outside and vapor barrier and tuck tape over the inner insulation before covering. But hey i suppose farmers are immune to the building codes being outside the city limits.
Mr. Green here Mr. Rob. :rofl::rofl: Didn't you see the styrofoam insulation? Those are the whit panels between the studs behind the plywood. :rolleyes: Otherwise, same answer as Norman, cat poop! :eek::doh::dunno: The eventual exterior wall covering is still in some of the pictures, get the floor done, the air compressor comes in and then "BLAM" exterior wall covering is GOING ON!!!!!!!!!!! :thumb::thumb::thumb: Nope, no open to the elements for this guy. Am already planning a 10' porch type roof to the East so I can work on rough projects or extra large projects or spray on nice days under a roof/shade. Codes? Didn't the Indians break the secret code??? :huh::dunno::huh::dunno::huh::dunno::rolleyes::rolleyes::D

Jeff Bower Great work Jonathon! I love all the stuff you are reusing.

The fact that the local lumberman knows you're looking "on the cheap" is even better. I bet there are times he's ready to toss some things and then thinks, "Naw, Jon Shively can use it for something" Best part is you, can and do!
Thanks Jeff. When my maternal grandfather died, he had shelves of cans full of bent nails needing to be straightened. Remember always going to a can and getting nails and straightening them before building something with him. I am not quite that extreme. I do buy new screws!:rofl::rofl: My local lumberyard owner is also a very good supporter of my woods and welding classes in the school. He is on the board and had his son years and years ago. It is going well and have hit it hard today, should be posting pictures this evening yet.


Thanks all for the comments, questions and concerns. :rofl:
It is kind of funny, I did learn to put in the multiple quotes in this post without contacting Vaughn!! :thumb::thumb:
I find myself chuckling or thinking of how this will sound or what the picture title will be after I shoot a photo knowing it will be posted. :type:
Today worked outside, then had to work inside as it rained. Was great having room and the tools available at home! :):)
Thanks for looking and talking, be posting later tonight hopefully. Till then, :wave::wave::wave:!!!
 
New Shop's first sign

I am going to commission from my good friend, Pete Simmons (a FWW member) through his work, http://www.laserimagearts.com, a wooden sign that says, "This ain't the Yankee Work Shop and you ain't Norm Abrams!!"

Those of you that have watched "Quigley Down Under" will recognize where I found the original idea of that sentence. Actually I think a FWW member has the original quote as a byline.

Cool or what????????? :dunno::huh::rofl::rolleyes::wave:
 
My original "wood bin" (wood bin #1)

A couple of years ago I started using my mint tubs as wood bins. Two of them sit by my outside wood stove and I stack my winter supply of wood in them, around them and against them. :p Two tubs are in the woods and the little calves use them for summer shelters. The cows don't like the noise of the metal floor as I didn't cut them out. I did cut the floor out of the wood sheds by the woodstove but left it on the ground and raised the tubs up one cement block so air circulates. Anyway, this wood bin in the first photo is the first wood bin stacked and stickered with my primo rough cut stash!
Woodbin opened.jpg
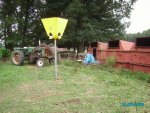
In the foreground is a basketball bucket that you throw the ball in and you never know which hole it comes out of (four possibilities). When my oldest daughter saw it at an auction she wanted it, let her bid a $1.00 on it and she got it after the auctioneer made sure I knew she was bidding and it was okay with me. She was in first grade I think then. We played as a family around that for nights. Anyway, then you see Ollie (the Oliver tractor) and then the wood bin with the fancy blue door is where we are going.

Woodbin (what's behind door #2?).jpg
Okay, now we are in front of the blue door. Quite fancy don'tcha think?? Two dollars worth of clamps at the bargain store across the road provide the latches! :rofl::rofl::rofl:


Woodbin left side.jpg
Open the door and here is what is on the left.


Woodbin right side.jpg
More of the same on the right.


Woodbin left side after.jpg
The left side again after removing some wood.


Woodbin right side after.jpg
The right side again after removing some wood.


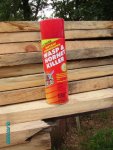
WHKiller.jpg
Dang gone wasps. Two stings on top of little finger! :eek: So, the spray comes out! :dunno:


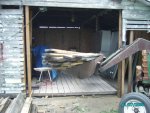
Garage door reason #332.JPG
Then this is the load I took to the wood shop. See the reason for the garage door? Large loads arrive!


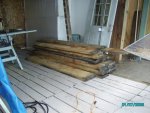
Flooring board pile rough.JPG
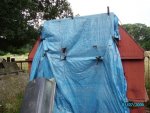
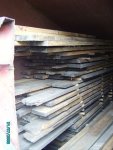
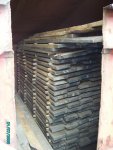
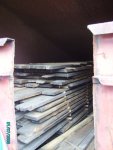
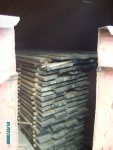
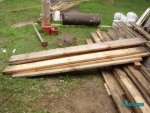
This is the pile of lumber I took out of the wood bin. These are the actual floor boards. Being hidden from the sun and exposure to elements from the sawmill, they are better in appearance than the pile under the blue tarp you saw behind the wood shop when it was a corn crib. That pile is going to be used for the floor joists.

Okay, enough pictures for another post, see you over there, :type::wave::wave::wave:.
 
Oh Oh there goes the wood for the kitchen cabinets.:wave:

Hey Jonathan them there managers must be getting pretty tired of leaning on that fence by now. We aint seen them fed or watered. I know they dont get pay but hey man you should feed and water the hired help.:rofl::rofl::rofl:

Oh and as to the styrofoam insulation, from what i have learnt and I will ask Norman to help me out here, my Home Depot construction book says that the vapor barrier is to separate the hot from the cold climate and keep the moisture on the outside. So since when did the styrene type do that action???? Aint you gonna have mold on the back of the sheeting that you put up in the shop once you decide to cover the outside?

Dont get me wrong i am try to learn the neccessary from the unneccessary. I mean i could have saved myself a ton of work on my shed if i could have left that vapor barrier out. And at the cost of tuck tape boy i could have bought some new toys for the amount i used on the ceiling alone.

So whats the scoop with the styrene. I used the roxul insulation and its also water proof.
 
Ramblings for Rob

Rob has asked some questions about my little farm, Larry has toured it and it has changed some since then. But at this time, I have to take water back to the feeder calves so took the camera with me the other morning and here is some of the views I see while doing this chore (really not a chore).

Ollie II.jpg
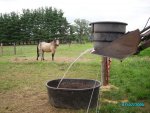
First picture is of the water trough in the bucket and filling at the barnyard.


Backyard to the NorthWest.JPG
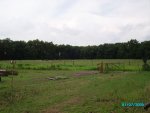
Second picture is from the seat of Ollie while the trough is filling in the barnyard. We own forty acres and it is rectangular in shape and if you drew an X from corner to corner, our buildings sit in the center of the X. We have forty feet of hardwood trees on our West boundary. Neighbor's woods to the North, we have a small woods that sticks out into the North pastures and it has a sand hill on it. My parent's were building a home there, there was a construction problem, hopefully somethings will come to fruition and they will get construction completed next year and they will live on our farm for the remainder of their lives. Currently they live in the home I was raised in and that is about 17 miles to the North, doesn't seem like much, but 13 years ago with Dad's bout with cancer, it seemed to take forever to do anything for them without the extra time to just visit. So this was offered to LOML parents as well as mine.


Bugger I.jpg
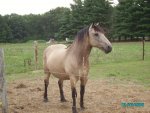
Third picture is of the horse we just repurchased. We raised this horse, used him as a breeding stud and I farmed with him. He got violent with a mare and I traded him for a pair of mini mules for my youngest daughter to drive. Well, the girl that bought him gelded him and is now heading to college so he has come home. I rode his grandmother in 4H, own and ride his mother, own his full sister and use his nephew as a stud currently. (you'll see him in another shot). Don't think he was used hard or much, we are starting him pretty much from scratch. His name is Bugger (like what comes out of your nose), yeah, I named him, from the day I found him in the pasture, I thought he was a pretty Bugger!! :dunno:


Watering feeder calves.jpg
Okay, here is my high tech way of watering. I don't remember as I haven't used this formula for years. But if memory serves me correct, for every three feet of rise I get a pound of pressure? Think that is correct. The bucket is about four feet high, no hard core calculations, that is what it takes to get it over the top wire of the fence. That fence, it is HOT! :eek:
We had problems of animals crawling through the wires. The old inexpensive fence chargers that tout they are good for 15-25 miles are only putting out .5-1 joule. This new charger puts out 15 joules and man does it hurt and man does it keep the stock in the proper pastures!:thumb:


Feeder calves I.jpg
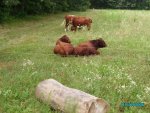
I turned West from the feeder calves water trough and here they are lazing in the pasture and on the other side of the fence is one of many logs laying for eventual use either at the bandsaw or in the stove.


Wood I.jpg
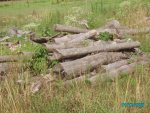
We are now heading South and on your left is a pile of red pine logs that I need to get to the sawmill as they are to be my wife's kitchen cabinets. On our right and I didn't take a picture of is a larger pile of slab wood from red pines as it is what I burn in the summer to keep my domestic hot water heater hot.


Wood II.jpg
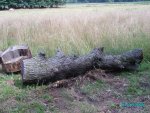
On down a few more large logs destined for :dunno::dunno:.


Pond.jpg
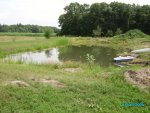
Then here we are at the pond. Only a little over an acre now in size, I dug on it some this summer with a rented hoe. Fun place to hang out with the family. The large dirt pile serves as our backstop for our shooting range.


Stud filly mare.jpg
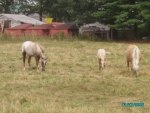
Turn left at the fence, heading back North, on our right is the App horse (stud horse, KW is his name). Girls had a classmate die in an auto accident and this colt happened to be born during the mourning period so he got her initials. In the middle is his first get, a nice palamino filly, Erica is her name, Eric found her this spring. (foal is generic term if you don't know the sex, filly is an immature female, colt is an immature male). Far right is the mare (mom) Carla. She is all that is left of my team of three I farmed with. Hopefully she is bred back to KW as he will be gelded this fall as soon as the flie season is past (less chance for infection).

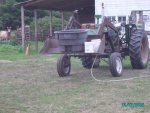
Fencing wagon.jpg
Back up by the machine shed heading into the barnyard, and that is my fencing wagon built from an old manure spreader. All of my fencing tools fit in the steel box and it is weather tight, two spools of high tensile fence in the back above the rear wheels and you can string a lot of fence with this rig. The steel wheels stop people from wanting to borrow it! :thumb:

Okay, that is the little tour of the West half of the farm. Another day will get some shots of the East side of the farm and post them. One more thread of pictures yet tonight of today's work. Oldest daughter came out with a camera and took some shots of me working! :eek::huh::dunno::rofl::rofl: See you at the next thread :wave::wave:.
 
Busy Day!

Okay, had to move some equipment to the new woodshop. Nope, not tired of open floor space, needed to do some work! So the first picture is of the equipment coming out of the garage and getting ready to be put in Ollie's bucket. (didn't think I was carrying this did you???:huh:)
Moving day.jpg


Ollie loaded.JPG
Here is the stuff in Ollie's bucket, glad it is just around the corner of the garage and in the woodshop, don't think I would want to go farther than that with this load loaded like it is. :rolleyes::rolleyes:


Garage door reason # 445.jpg
Who was it asked why a garage door? See the need?? :eek: I tend to bring stuff in in batches! :p


Floor boards.jpg
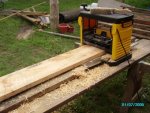
Here is a small portion of the floorboards before planing or maybe after the first trip through the planer. I can't remember. It was cloudy, muggy, hot, humid, and I just beat the rain. :thumb:


Floorboards Planed.jpg
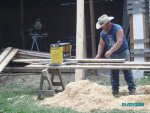
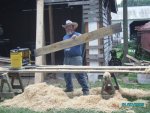
Some of these pictures are self explanatory. Just shot them so you can see the pretty wood, great planer in action (I have run hundreds of board feet through this building my house and planing rough cut for interior walls and shelves.)


Floorboard remains.jpg
Well you know what you get after you run some boards through a planer don't cha????? Yep, if all goes well, shavings. Even though they got rained on before getting cleaned up, the pigs will enjoy and spread them tomorrow in their pen. Pure pine shavings, nothing to hurt the livestock. Now had I run any cherry or walnut through, burn baby burn that pile of shavings. A handful of dried wild cherry shavings will kill an adult cow or horse. Deader than a mackerel in less than 24 hours.


Planing III.jpg
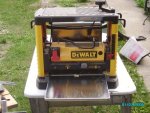
Again, another shot of a great little planer in action. I highly recommend this planer. I built my two story 24x24 addition out of rough cut lumber, all of the interior walls upstairs and the girls shelves that go floor to ceiling and divide their rooms ran through this planer. It has been a real workhorse.


Planing I.JPG
Yup, Fina (rhymes with china) caught me in action. Used to being alone except for the dogs.


Planer.jpg
Can you tell I like my planer? When you spend money on tools and something works as hard as this has without trouble, it is topnotch in my book!!:thumb::thumb:


I am smiling.jpg
I titled this picture, "I am smiling" cause that is what Fina hollered to me. Nope, didn't hear her, just caught her movement and looked that direction. Oh, completely off of the subject, did you know over the whine of a planer with ear protection on you can still hear a huey helicopter fly overhead treetop high? (searching the area, woods, ditches and cornfields for cultivated hemp).


Did get some other work completed, but camera is in the woodshop. Will try to get them tomorrow as well as some more work and pictures. What kind of clear finish would hold up best in your opinion on the pine boards for the floor, I really don't want to paint them. Might just leave them as is also. ??????? Until next time!
 
Last edited:
Vapor barrier

Good points Rob. My eventual exterior siding will be quite the vapor barrier! :eek::huh::dunno::p:rofl::rofl::rofl::rofl: I will just make sure and had planned on making sure the horizontal wood on the exterior shell as well as the styrofoam are dry before applying the exterior wall treatment.

Didn't anyone ever tell you you can't believe everything you read???:eek::huh::rofl:

Also, ignorance is bliss, I know, I live my life that way. :doh::eek::huh::dunno::rofl::rofl::rofl:
 
Last edited:
Jon, I don't know what would be the BEST finish for your floor, as it depends on just how much MESS you anticipate making when you carve up the Deer in there. :D I agree totally with you on not using "Paint" on it though. My two choices would be to just do a coat or two of of Boiled Linseed Oil and then Wax it when it is cured, OR use a good Floor Varnish. Will the Rubber Cushioning Belts go Under the flooring or on top of it?
 
Looking good Jonathan, quite the spread you have there, I'd just about kill for that much space :D

Looks like Ollie is a handy guy to have around :clap:

Careful what you put on the wood, if you plan on walking on it, some finished get quite slick when cold.

I've vote for something simple like BLO or even just mineral oil, you could even apply it with a simple pump sprayer.

Norman, I think that Jonathan is putting the rubber mats on top of the wood, so they could be dragged out and washed off :dunno:
 
Jon, I don't know what would be the BEST finish for your floor, as it depends on just how much MESS you anticipate making when you carve up the Deer in there. :D I agree totally with you on not using "Paint" on it though. My two choices would be to just do a coat or two of of Boiled Linseed Oil and then Wax it when it is cured, OR use a good Floor Varnish. Will the Rubber Cushioning Belts go Under the flooring or on top of it?

The nice pine floor will be on each side (South and North sides). The center is floored with the piers and the piers are going to be covered with the rubber belting. My deer will actually be gutted in the field and the hogs we butcher are gutted outside also. There is some dripping when skinning, but a simple wash down and rinse and push out the garage door opening should do it. And yes it goes over the top of the pier as they have little gaps and would be losing a lot of stuff over the years and might prove cold! Question, what is this wax you talk of after the BLO? What happens if I do only the BLO and not the wax?


Looking good Jonathan, quite the spread you have there, I'd just about kill for that much space

Looks like Ollie is a handy guy to have around

Careful what you put on the wood, if you plan on walking on it, some finished get quite slick when cold.

I've vote for something simple like BLO or even just mineral oil, you could even apply it with a simple pump sprayer.

Norman, I think that Jonathan is putting the rubber mats on top of the wood, so they could be dragged out and washed off

Stu, you are welcome anytime. Your girls would enjoy my girls and my girls could get them some time in the saddle riding the horses I haven't shown in pictures yet. Yep, very fortunate and proud to own this farm. It isn't a large farm by any standards, but it is ours and we are working on making it better than it was when we purchased it.
You know it with Ollie. A real backsaver to be sure!
Okay, I read both Norman's and your post about BLO and was in town so bought a gallon. Norman talks of wax, is this required? I did not buy the sprayer, did buy another paint roller. Should I throw some sand on top before it dries so it isn't slippery when wet?
The rubber belting will go from East wall to West wall (garage door opening) so will wash them, but not remove them much. But you do have the correct idea!

Thanks for the heads up on the BLO, let me know about the wax you talk of. LOML was home today (day off for her) so took her and mom and dad for breakfast, mowed the yard, put a new blade on the table saw, trimmed the floor joists, and took Lou Ann out to supper. Got to do two days work in one day tomorrow to catch up!
 
The nice pine floor will be on each side (South and North sides). Question, what is this wax you talk of after the BLO? What happens if I do only the BLO and not the wax?


Thanks for the heads up on the BLO, let me know about the wax you talk of. LOML was home today (day off for her) so took her and mom and dad for breakfast, mowed the yard, put a new blade on the table saw, trimmed the floor joists, and

took Lou Ann out to supper. Got to do two days work in one day tomorrow to catch up!

Jon, when the BLO fully dries/cures, the nice grain popping coloring it gives will fade and disappear, but buffing something like Johnsons paste floor wax will preserve that color for a time, AND mainly, it will give SOME protection to the wood and keep dirt from embedding into the wood, AND make cleanup MUCH easier. (Just borrow one of the schools floor buffers and scatter a little wax around and spread it with the buffer and buff it out good. When it gets worn off and is no longer giving that protection, just throw a little wax around and repeat the process and it is quick and easy to keep those qualities renewed and give protection to the wood).

NOTE: When applying the BLO, mop it around and wait a few minutes for it to soak in, and then remop the dull areas but BE SURE to wipe off ALL EXCESS before you let it dry for a day, and then if necessary, (which it probably will be), add one more coat using the same process. IF you don't wipe off the excess before letting it dry, you will have a sticky, goopy MESS in places AND it takes forever to dry. (Remember Marty when he didn't wipe his floor down before letting it dry during his Shop Build)?:doh::bang::bang::bang:

PS: DO NOT forget to hang all mops, rags, etc OUTSIDE, (and NOT in a pile), to air out as they dry, so they don't heat up and catch something on fire.:thumb::thumb::thumb: (and """DON'T""" use the LOYL's MOP to apply the BLO either).:eek::eek::eek::D


Incidentally, HOW did MY Wife, LOU ANN get all the way up to your place to go out for supper without ME knowing about it?:huh::huh::dunno: Kinda looks like I "Might" Not have been paying enough Attention to her and her comings 'n goings lately as I should have, huh?:rofl::rofl::rofl::rofl::rofl:

(Hope YOURS isn't Red Headed too).:rolleyes::rofl::rofl::rofl::rofl:
 
Last edited:
Top