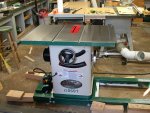
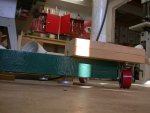
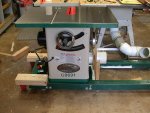
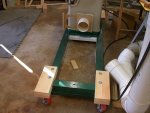
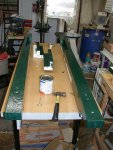
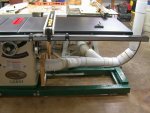
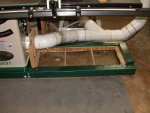
Looking for something that will work for this..Now mobile base build.

Thanks Alan! It's good to see that I'm not the only one who over builds things!! :thumb::thumb: :D:D:D
I'm still in a waiting mode...waiting for some warmer weather!!:( I need it to be in the 60s for about 4-6 hours to get this thing painted. I should have the quart of the Hammerite paint tomorrow evening, but the high Sat is supposed to be 49 to 50. They've missed it by 3 degrees a couple times this week, but I don't think they'll miss it by 10 or more. If I could just get the well that the saw sits in painted the green, I could paint the rest of the base later. Might have to look into just painting it with some dark green latex so it won't show around the base, and save the Hammerite for the part that is exposed. I'm sure I don't have any dark green. Had some Kelly green 15 years ago...think that would still be good??:rofl::rofl::rofl: I do have some high gloss black....Guess I'll make a decision on Sat. Jim.
 
Picked up the Hammerite green paint to match the trim on the saw...still too cold to paint this weekend. :(:(:( So yesterday, I slept in, then prepped the caster assemblies to go on the base. Got those drilled and test fitted.dscn2538.jpgdscn2537.jpg Had a small issue with one lining up perfect, (just redrilled it and it worked fine), and one where the screws holding the T-nut in were damaging the threads on the bolt. None of the others did this, but I ground the heads down, reinstalled, and it was fine.
Several of the leveling feet were hard to turn to adjust. I think threading not only in the T-nuts, but also in the wood was too much. So I pulled them all redrilled the holes with a 1/2" bit (1/2" threads on the feet). One wouldn't come out. Ended up snapping the mounting threads....yes, 1/2" mounting stud!! Looks like something went wrong with the T-nut, or some wood got down in the threads and created a problem, because the threaded portion of the T-nut mushroomed and there is a roll of what looks like metal almost completely around the end of the nut portion. Really bummed me out. Had to order another leveling foot (got 2 to have 1 extra) and some more T-nuts.
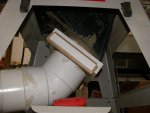
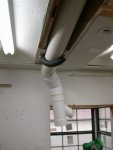
So I worked on the cyclone ducting today. Got most of it done. I finished up the down tube that will service the two table saws. dscn2542.jpg I have the contractor saw hooked back up, except for the overhead pick up, which I will wait and remount on the new saw when I get it placed and know where to mount it. dscn2541.jpg Then I put in the pipe going back to the west wall that services the multifunction cabinets. dscn2540.jpg I have the 4" plumbed now that will go to the planer, just didn't get another picture.
I need some warmer weather!!! Long range for next weekend says low 40s.:bang::bang::bang::bang: 100% chance of snow flurries tomorrow, and 30% chance of ice pellets on Thursday. I just can't win. Jim.
 
Just wait, Jim. In a few months it'll be too hot to work in there, too. :p

Hey, you might not have gotten your painting done, but you still made progress. :thumb:
 
That's true, but I'm just achin' to get this thing where I can run it through it's paces. See what it will do. I've done all the measurements and adjustments. I sat in front of it for about 45 minutes today trying to figure out how to move the fence over...and I haven't even made a meaningful cut with it yet!:huh: :D Yes, I know it will happen. I just didn't think we'd have this cold of weather for this long of a time. I'm to the point that the first day it hits 60, I'm telling the boss I'm sick.:rofl: Jim.
 
It finally hit 60 degrees today!!! I got 2 coats on it. Now to wait the 14 days for it to cure. :huh: DSCN2559.jpg
This is some thick paint! 20 minutes after brushing it on, you'd look back and it had runs in it. Wasn't that way 3 minutes after brushing!!!:doh: And by that time, you couldn't go back over it as it had already skimmed over, and doing so destroys the hammered look. I wonder if part of that could be the humidity, which is very high today. Or it may just be this type of paint. It doesn't look like it is going on that thick, but the paint doesn't flow like latex house paint does either. I'll get the saw on it and come warmer weather, I'll scrape the runs and put on another top coat and see if that helps. Oh, and I had kept the paint in the house right up until I went out to paint today, so I know the paint wasn't cold. It did go on the cast iron extension a little better for some reason. Only got one light run on it.
On a brighter note, the color is a perfect match for the saw's trim. I think it will look nice once I get the saw on it. Hope everyone is having a great weekend! Jim.
 
Looks like you nailed the color. :thumb: I've used the oil-based hammer finish paint before, and you're right, it's runnier than latex. I didn't have much problem with runs, but I suspect I was applying it in warmer temps and it was setting up faster.
 
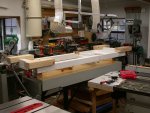
Well, a week later than I wanted, but here it is. DSCN2579v2.jpg I was able to get the saw on the mobile base by myself...Or should I say I got the mobile base under the saw. :thumb: I tilted the back of the saw up, slid 2 pieces of 2X4 under the back edge, then did the same for the front, only used 4X4 pieces under it to gain some height. I had mounted the two cross pieces that the saw sits on to the back portion, so slid it under the saw some, knelt down and pushed up the back edge of the saw with one hand, and pulled the 2 pieces of wood out, then pushed the base forward. Put some wood under the cross pieces so that 3 sides of the saw were supported by the base, pulled the front pieces of wood out and bolted the front piece of the base to the cross pieces. At that point, the saw was on the base, but I had to do 4 lags from underneath for the cross pieces at the ends. That was slow going, but not hard. Really simple to do. Then I had to stop and get cleaned up and eat lunch before guests came to visit rescue dogs. After that I went back out and installed the casters to see how that worked....SMOOTH!!!! I like!
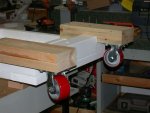
More pictures...This one shows the lag bolts holding the long section to the cross pieces. The lags are 7" long for the 1/4" on top, and 8" for the 3/8" ones on the bottom. DSCN2577.jpg Wider shot of the base. DSCN2578.jpg The next few show the casters bolted on to the base.DSCN2580.jpgDSCN2581.jpgDSCN2583.jpg DSCN2582.jpgAnd this one shows the saw after rolling it close to it's final destination and pulling the casters off. DSCN2584.jpg
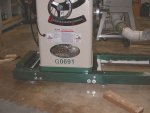
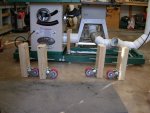
It rolled very smoothly. I'm very happy with the outcome. I did have to take the dust floor loose and shim under one corner of the saw. It wanted to rock from the right front to the left rear in the pit of the base. 2 pieces of Laminate did the trick. I need a 45 degree el and cut some pipe and I'll be good to go on the dust collection. Then move the overhead guard so it will be in the right position for this saw. I cleaned the top again, and put a thick coat of Boeshield on it to let dry overnight. I'll buff and wax that tomorrow, and start remounting the rails. Not sure If I'll try to move them down or not. May play with it a little to see, but will probably not do any modifications until after the saw is out of warranty, just in case. Who knows, I may decide that this is all I need and leave it alone!?!
Oh, and the color is a little darker than the factory, but in the same family. I'm thinking it is partly the difference in brushing it on like I did, and spraying on what would have to have been a thinned version at the factory.
Thanks for all the ideas and support along the way! Jim.
 
Ya done good!:D:D

What's the table height with that rig? Looks to be around 40 to me. I'm 5'9", and mine is at 37". I find that to be comfortable. I'm guessing you're taller...
 
Jim, I'm 6'2", but the height of the saw will only be 36 3/4". I'm fine bending over slightly. I like to be able to see where the cut will hit the wood before cutting, and so it works well for me. Every horizontal surface in the shop is at that height except the work bench that is built in, and I haven't gotten the bandsaw raised yet. It's about 34 1/2". Jim.
 
I have a converse opinion on casters... Most say to use the proper size so the equipment will move around easily, then use locking casters to keep it in place.

I undersize my casters so that it takes some force to get the tool moving. (after all, we are not running a race getting the equipment to a work station) With limited difficulty I can move my equipment from a storage mode to center of attraction. And it will stay put. No locking needed.

That sounds like it would work fine. I am not sure I would like that on my Dad's old Belsaw planer because it is so heavy, also I am able to roll it up onto or across 1/2" interlocking anti fatigue mats. Otherwise I would have to remove the matting to move the planer.
 
Looks real neat Jim great idea:thumb: well executed. I quickly looked through this thread to find out what you had planned to put next to your saw, but could not find out. Can you fill us in on whats going to the right?
 
I have 2 options planned for my base which will be made of metal tube one is locking casters that lock for the wheel spinning & for turning. The other is welding on all thread connectors for levelers that I have already tapped out to get rid of the little stop inside, with a nut on a foot such as you have or a round headed bolt & with a socket handle & socket I can set them down as needed. Or even a T handle on top of the threaded end the bolt it won't be backed off the floor very much anyway.

Why not a all thread connector welded to a steel plate screwed to the side of your 4x4.
 
The extension table that came with the saw had 2 damaged corners. I'm planning to make a shallow (2.5" maybe) torsion box top to put in it's place. I'll use 1/2" MDF on this one. I'll cover it with high pressure laminate and continue on. Nothing fancy. I have a separate router table, so nothing like that needed in the extension. The contractor saw will sit perpendicular to the right side of the new saw. I had hoped I could butt the left side extension of the contractor saw against the back of the cab saw, but the ducting on the floor is going to be in the way. So I'll have to build a short "bridge" between the 2 saws. I'll bolt it on to the contractor saw like a short extension. Jim.
 
Bart, I actually have a hole on each end with 2 t-nuts embedded in the wood for a 1/2" all thread to go through to lift the end of the base up to put the casters on. But it looks now like I won't need it. The casters don't lift the base up as much as I thought it was going to, so the 2 bolts that hold each of them on works fine for lifting the base up when screwed onto the base. I like the bigger surface of the leveling feet for the saw to sit on. And they are working great. Jim.
 
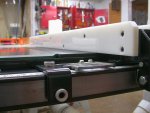
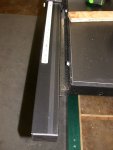
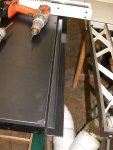
I had a great day in the shop. Reinstalled the rails and fence. Got the bottom of the fence about 1/16" above the table top. DSCN2594.jpg Put on the slick tape I bought for the plastic buttons to ride on. DSCN2595.jpgDSCN2596.jpgWorks pretty good. Took the damaged extension table apart, cut the raised portion off with a carpet knife, and turned it around to the back side to use until I get the new one made. Got the DC hooked up this afternoon DSCN2590.jpgDSCN2591.jpgand made a few cuts. Only one speck of dust in the cabinet after I got finished, and I think I brushed it through the throat plate after the cyclone was turned off. I really like the set up. Finally at the end, I went ahead and made a platform for a piece of 3/4" ply to sit on. DSCN2597.jpg I will build a cabinet on top of this to keep tools and blades in, and to store the casters in. The top will have an open space for my Jointech Smart Miter to slide into for storage. The factory legs won't work with the mobile base. Wood doesn't line up where the legs mount. I'll adapt something from the cabinet to work, or will build something when I get the new extension table made. Need to move the overhead guard over to work with the saw. Then I'll need to decide what's next. Probably to build the dust hood for the SCMS/RAS spot in the multi purpose wall cabinets. Thanks again for help spurring ideas and for coming along on the ride! Jim.
 
Top