Designing and building a mobile shop cart and tool support

Feb 3rd Update (part 2 of 2)

04) There is a double layer of ¾ inch MDF on the top with a rectangle cut out of the middle of the top one of these.
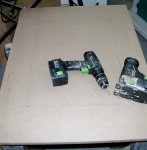
Mobile cart 12 -Preparing to cut rectangle out of the top layer of MDF -small.JPG

I wanted to preserve the cutout so had to be quite careful making the cut. I did this by first drilling a couple of small holes right on the line near a corner then using a very small jigsaw blade to make a plunge cut. Here is the first such cut:

Mobile cart 13 -Starting the cut into mdf by drilling holes then plunging small saw blade -small.JPG

05) I have a profiler attachment for my Festool linear sander that makes it very easy to sand the dowels (which were recycled from a previous life):
Mobile cart 14 -Sanding dowel handle with special profile on Festool Linear sander -small.JPG

06) I attached a layer of ¼ inch hardboard on top of the MDF. The idea is that this can be replaced in the future when it gets beat up. The plans suggested that I do this using double sided tape. I did try this:
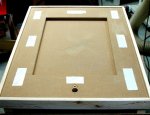
Mobile cart 15 -Double sided tape experiment -small.JPG

but, it did not work very well; I subsequently screwed down the hardboard from the top surface with slightly countersunk screws.

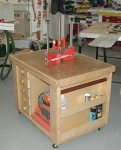
07) Here is the cart with the insert that will be used when the cart is being stored and when it is being used as an assemble table, etc.
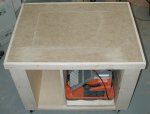
Mobile cart 16 -Cart with table top insert -small.JPG

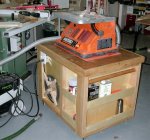
08) Here is the cart with the spindle sander insert:
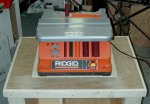
Mobile cart 17 -Cart with sander insert -small.JPG

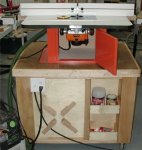
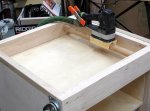
09) Here is the cart with the partly completed router table insert:
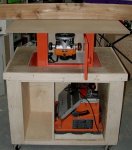
Mobile cart 18 -Cart with router table insert -small.JPG

The wood on top of the router cabinet is just there to give me a feel of the location of the table top and the fence.
 
Feb 11th Update (part 1 of 2)

I finished the cart this week.

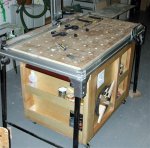
First of all, here is a picture of the finished cart stored under the Festool Multi-Function Table;

Mobile cart 99 -stowed -small.JPG

Now, I will continue the description of the construction steps picking up with the numbering where I left off at the end of the Feb 3rd update.

10) Locking slides were installed for five small drawers:

Mobile cart 19 -Installing drawer slides -small.JPG

The small chuck adapter on my drill came in very handy here..

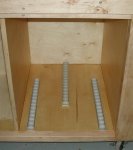
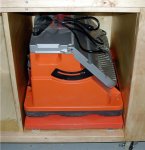
11) Lee Valley had some roller strips on sale this week for $3.50 (Canadian). I bought some to try them out in support of the sander insert:

Mobile cart 20 -with roller strips for sander -small.JPG Mobile cart 21 -sander on rollers -small.JPG

They make the sander really easy to slide in and out. I went back and bought 17 more roller strips.

12) The cart was finished with two coats of Spar Urethane. The top had an extra coat of urethane followed by three coats of Johnson Past Wax.

Mobile cart 22 -Top is finished with 3 coats of  Urathane the 3  coats of wax -small.JPG
 
Feb 11th Update (part 2 of 2)

This post shows several photos of the finished cart.

13) Here is another photo of the cart under the table:

Mobile cart 23 -Finished cart parked under the Festool MFT -small.JPG

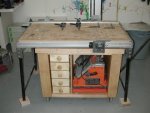
14) Here the cart is being used with the work table insert:

Mobile cart 24 -Finished cart used as a work table -small.JPG

Notice that shelves have been installed at the end of the cart. There are also shelves at the other end and on a portion of the other side.

15) Here is the cart being used to support the spindle sander:

Mobile cart 25 -Finished cart used as a sander-support table -small.JPG

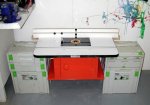
16) And here is the cart being used to support the router table:

Mobile cart 26 -Finished cart used as a router table -small.JPG

Notice the electrical installation. I couldn’t find a 20 amp power bar so I had to wire up my own. The cord holder was constructed as per the plan for the cart in Shop Notes.

17) Here is one of the drawers that has been customized to hold router bits.:

Mobile cart 27 -Finished cart drawer with some router bits -small.JPG

18) I still need to build a spot to hold the router table top when it is not in use. In the next week or so, I will build a cabinet in the spot shown below:

Mobile cart 28 The router top will be stored in a cabinet I will build here -small.JPG

This cabinet will extend the bench and will be used to store the router top, some Festool systainers, and some other tools.

added on Feb 19th: Refer to the thread http://familywoodworking.org/forums/...ead.php?t=2244 to see what I built.

19) This picture showing the router cabinet in more detail.

Mobile cart 29 Closer view of the router cabinet -small.JPG

One good thing about the Triton router is that the hose from my Festool vacuum fits the router’s below the table dust port. The result of this happy combination is almost no dust within the cabinet.

20) The fence that came with the Busy Bee router table clamps to the table but I found that the clamps did not hold the fence well enough. This appears to have been solved by gluing a narrow strip of sandpaper at the underside sides of the table where the clamps now have a non slippery surface to adhere to.

Mobile cart 30 -I glued a strip of sandpaper under table to stop clamps from slipping -small.JPG

21) And the final picture shows the back of the router table, fence, and cabinet:

Mobile cart 31 -Back view of router table top -small.JPG

I still have to make some sort of alteration in order to be able to hook up the router table’s above the table dust chute.
 
Last edited:
Great job Frank. Lots of utility in the design. It will be heavy when all tooled up.. 300 plus lbs perhaps. You may need air brakes if that cart ever gets on a roll! LOL
 
Dust control

Here is a photo showing my dust control set up for the router table:

Router table dust control -small.JPG

The hose coming out the side of the table is a small (about 3 ft long) section that a group of us bought from Triton USA. It threads into the dust port on the router. I fit the other end into a hose connected to my Festool vacuum. I connect the router wire to the electric box on the back of the table and that box to the vacuum. Then I operate the router with the switch on the box. Since the vacuum is in automatic mode turning on the switch activates both the vacuum and the router.

The dust control is the best that I have ever experienced with a router. :) Notice that the port on the back of the router fence is not yet connected to anything. Next winter I will experiment with tying it into the dust-pick up system as well.
 
That came out great. I had tried to think of something to do with those LV roller strips. Your idea is cool. That's a great use of space under the MFT and keeps the other flat surfaces clear of 'stored' tools.
 
I have a new tool to use on the cart (minor gloat)

I have a 16 inch bandsaw (an ACM Star 400), but it is a pain to change the blade to a small width, so I don’t bother. But, there are many small jobs that I would like to do with a bandsaw. So, I decided to purchase a small tabletop bandsaw.

After some time researching, the saw that I cose was the Craftsman 10 inch saw. The reasons for this are:


  • • The weight is right (about 70 pounds including the plywood base that I added). This is enough to make the saw stable but not too much for me to easily lift on and off the table.

    • Almost all of the 40 or so reviews on the Sears US web site are favourable

    • A fellow member of the Canadian Woodworking forum, Zhi Tian, forum is upgrading, and he offered me his old saw for a good price.
Zhi delivered the saw about a week ago and I have installed on a base so that it can share my mobile cart and tool base. I’ve also installed a smaller blade, tuned the saw, labeled all the knobs and such, and given it a good workout. Here are a couple of pictures of the saw on the cart:

Craftsman 10 inch bandsaw -1 -small.JPG Craftsman 10 inch bandsaw -2 -small.JPG
 
Looks like that is going to work great Frank.
I know what you mean.
I keep a 1/4" blade on my 18" and I don't look
forward changing it out for the bigger blades.

DT
 
Nice saw, Frank. I've looked at that myself a few times when I visited our local Sears store. As mentioned, I see you already have it "organized", with labels for various adjustment points...:thumb:

Oh, I was reviewing your "Shop 2" thread again just now, and noticed the "infamous screwdriver" link doesn't work... I don't believe I know the full story there. Can you help?
 
Top