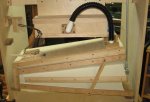
New Organ Build Topsy 3

Hello Group,

I have bitten the bullet and purchased a set of the Topsy3 Drawings, and would like to make some modifications so would like to bounce a few questions off you all if I can.

I have been contemplating building an organ for many years now and always wanted to build a Wurlitzer 105 having first seen and heard this wonderful instrument and instantly fell in love with it. But knowing my limitations in woodworking, have decided to start off with something more modest, so have decided on an organ based around Topsy 3.

I do have a good woodworking shop, with commercial sized machines and after a few trial pipes were made decided that if at all possible I wanted to dramatically increase the thickness of my pipes to 1/4" wall. Now as far as I am aware, being a complete novice in this regard and relying on a few things I have read this SHOULD not have any effect on the note produced as the note is generated by the column of air in the pipes vibrating, and wall thickness has very little effect- Is this correct?

If I could do this it gives me what I see as a few advantages...

Not so fiddly for my clumsy fingers.

Much stronger & easier construction.

As the overall case size will increase with the increase in pipe dimensions this will give me a larger size which appeals to me.

Your thoughts would be much appreciated.

Thanks

Ian
 
Now Ian....you cant just waltz in here and start asking questions with out an official Howdy Doody! :D :rofl: :wave: :welcome:
Ok now that thats out of the way....Glad you joined the forum. Good group of people around here.
I have not built the Topsy 3..... however I have built the Senior 20 organ. You are correct that the outside deminsion of the pipes will not adversly affect the tone of the pipes. It will make your organ much heavier though.
 
Welcome and glad you decided to start out simple!:eek: I'm a newbie to the organ world, struggling through a Senior 20, repeat, struggling... So, no answers from me but I can give moral support and a lot of hurrays! and 'atta boys. Please keep us posted and share lots of pictures of your progress. If you need any advice on how to make a mistake, I'm your guy.
 
Welcome Ian It should not make any difference on how the pipe plays in my opinion but I will do some checking with my go to guy that will give me the right answer. It will be much heaver and larger organ and the way John has them laid out and advised thickness every thing just fits and some of it is pretty tight.
I dont think you will find it that hard to build pipes with thin wood and they will be strong enough once they are in place and braced they are very strong.

Also can ya put up where you are located
Thanks
 
Thanks Guys,

I have now filled in my details and a (very) short bio. I had a look at you web site Jay & will be in touch. With regard to the increase in pipe wall thickness-My first job was as a Blacksmiths striker, and I have spent the past 35 years either restoring or working on all sorts of steam equipment but mainly locomotives where everything is solid and heavy, and generally requires a fair degree of brute strength to repair so I guess I just have a general aversion to small and fiddly things :)

Ian
 
Yep, and the more good questions get asked and answered. Makes it better for all. Wish there were more Senior builders now, or better yet I would have started two years ago when more people were actively at it.
 
Well I've started and now have all the components for my acompaniament pipes cut out, and one pipe mostly glued up but have already run into some problems that i'm sure someone will have the answers for.

Try as I might I cannot see anywhere in the plans, DVD or writen text the distance apart to put the two bottom shelves. In the DVD John just states that he has marked the position on his jig but I can't seem to find a reference to how far apart these should be, and is this dimension critical.

Secondly, I am wondering about the inner lip that sits on top of the top shelf- I am assuming a hard close grained timber such as ramin or hard maple would be be suitable, but again there does not seem to be a dimension. I can see that the width would be critical, but what about the depth- in drawing #6 in the plans it appears a little under half the internal depth of the pipe.

I have spent several hours looking through posts on here and reading the instructions etc but can't find these answers. (but the upside was that I did find many useful tips and much information that will I hope make things so much easier down the track, so it was not wasted time- in fact I think everybody should be encouraged to take a few days and read all the posts before starting, as a lot of things suddenly become a lot clearer for me today)

Best wishes to all

Ian
 
Ian - Glad to see someone is at the sameplace as I am on the construction of the Topsy 3. First of all I am going to make a change to the construction, I will make the inner and the lower lip as one peice 1/4" thick. As for the distance from the bottom I will look at the plans for the Busker Junior. I will try to get the info to in the next few days as I live in New Jersey and we Just had 100 year storm, I still don't have power at my house, they say it could be a week or more ( I hope this is one of the times the power company got it wrong ) I think the distance was 22 mm but I will get back to you as soon as I can. 22 mm from the bottom of the pype to the top of the inner lip.

ed
 
Well I've started and now have all the components for my acompaniament pipes cut out, and one pipe mostly glued up but have already run into some problems that i'm sure someone will have the answers for.

Try as I might I cannot see anywhere in the plans, DVD or writen text the distance apart to put the two bottom shelves. In the DVD John just states that he has marked the position on his jig but I can't seem to find a reference to how far apart these should be, and is this dimension critical.

Secondly, I am wondering about the inner lip that sits on top of the top shelf- I am assuming a hard close grained timber such as ramin or hard maple would be be suitable, but again there does not seem to be a dimension. I can see that the width would be critical, but what about the depth- in drawing #6 in the plans it appears a little under half the internal depth of the pipe.

I have spent several hours looking through posts on here and reading the instructions etc but can't find these answers. (but the upside was that I did find many useful tips and much information that will I hope make things so much easier down the track, so it was not wasted time- in fact I think everybody should be encouraged to take a few days and read all the posts before starting, as a lot of things suddenly become a lot clearer for me today)

Best wishes to all

Ian

Hey Ian did you figure it out. I found my plans and what I did was take a measurement off of the full size pipe drawing and use that measurement for all of that type of pipes. I also used hard maple for the lips
 
Last edited:
Secondly, I am wondering about the inner lip that sits on top of the top shelf- I am assuming a hard close grained timber such as ramin or hard maple would be be suitable, but again there does not seem to be a dimension. I can see that the width would be critical, but what about the depth- in drawing #6 in the plans it appears a little under half the internal depth of the pipe.

Ian

Ian, et al,
I used the wood stirrers from Starbucks. Nice thin piece of "hardwood" just cut to length.

Bob
 
I have complete phase I after covering the bellows 2 times . It looks goods to
me but I would appreciate and comments and suggestions.

Is there anyone out there working on the TOPST 3 ?
Complete Bellows 1.jpgComplete bellows 2.jpgComplete bellows 3.jpgComplete bellows 4.jpg
 
I completed the Accompaniment pipes for the Topsy 3 and have been looking at drawing # 8
for the Melody Pipes, does anyone share my confusion with this drawing. The full size cutting guide
does not have note G and in the NOTE column on the chart there is no F# but it is in the configuration of the decoder board (page 29 and the chart on page 25). I don't know if I am having a senior moment
or is there a problem with the drawing? I hope someone can help me with this confusion.
 
The lower F# pipe is missing from the table, but as shown in the cutting list, its dimensions are the same as the F pipe. On the other hand, the top G pipe is included in the table, but is NOT needed - it is the MIDI note used for the Snare Drum.
 
Top