- Messages
- 20,152
- Location
- Springfield, Missouri
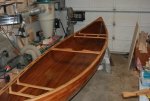
Coming along nicely! 

They should have countersunk as well as dome head.")
 So its a sandwhich. There are ways to deaden the sound a bit with pacing it with insulation or if doing it on the ground outside you can fill it with some water. Me I just like to tick off the entire neghborhood until 9.
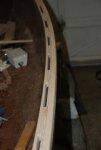
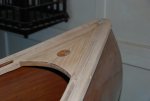
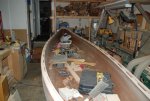
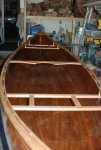
  One of the pics is of the old deck with the laminations of mahogany and oak that make up the ends of the canoe for added strength. it is staring to take shape again thoughthere is still lots of work to do. I have to make up plugs for the holes and then the gunwales will get oiled, I did oil the side against the hull before screwing it on. I just used a watco natural oil for that at this time. oils will be recoated a few times as it is easier to fix than spar varnish. Been the missing link.
 I spent a while checking their online cat and no such thing. Do they call it something else?
Drew thanks for those pictures it makes it much clearer. BTW i really have to thank you for the picture of the deck. Of all the info i have assembled off so many sites and pictures this is the one that is missing.
This is the first time i have seen how the front tip comes together with the deck. It has eluded me continuosly. Now it makes sense how the whole thing ties togther.
You going to use a bunch of 600 paper on that size surface.
BTW did you say you can get threaded brass bar from your Lee Valley store???
 . Oh well better late than never. Now I have to start on the kayaks.
 To purty to use!
I know how you feel. I'm trying to get my sail boat ready to use that we haven't touched in several years. It'll be ready to go just about the same time the snow starts flyin...
Yea it is late getting this done but when I started it I was not working then work got in the way of finishing it. Darn work