scott spencer
Member
- Messages
- 953
- Location
- Rochester, NY
Okie dokie....thanks for the insights.


 I aint knowledgable about this stuff. Just suggesting it may be better than rattle can. The difference in look and feel between a good poly finish and a hand-rubbed lacquer finish is like the difference between Ikea furniture and a Steinway piano. Also, since he's already got lacquer on it, he might run into problems trying to get poly to adhere to it.
 ...and sprayed quite a few coats on. So, YMMV
Some guy named George Utley said:Lacquer is unlike varnish, polyurethane or paint in one important respect: when it dries, it’s still the same material you had in the can, without the solvents that made it liquid. All the others change chemically as they dry...ordinary lacquer doesn’t. This is important to know because the solvents in the second coat of a lacquer finish will dissolve the first coat...the third coat will affect the previous two, and so on. The more coats you apply, the easier it is to wind up with a mess, and the longer the drying time between coats. This is true whether you’re using a brush-on or spray application.
...
The more coats you apply, the longer the whole finish takes to cure. Hardened lacquer (like shellac) dissolves when you apply new lacquer on top of it, so as the finish gets built up thicker, it takes longer and longer for each subsequent coat to cure....
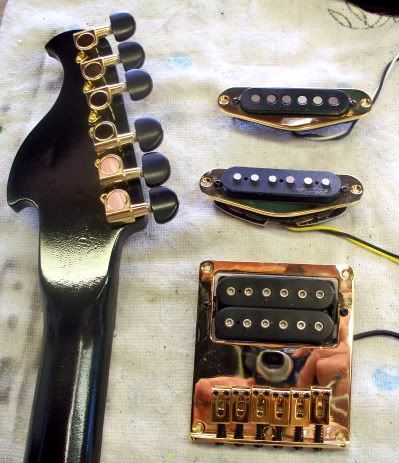
(true story....after predicting a screw up if I didn't walk away, I was back at it in about 2 hours....I taped off the green front of the headstock to protect it from black paint, and proceeded to paint the back of the neck. When I removed the painters tape, the clear lacquer came off with it! . I got a little miffed at myself, so after a couple hours of paint drying time, I turned it over (face up) sanded off the face of the head stock and started the dye process all over (it's a small area so we're only talking about a few minutes, but geez!). Got done with that and found that I had cotton towel imprints all over the back of the headstock paint, which was apparently softer than it had first felt to me! 
 . The great Kreskin correctly predicts yet another disaster! Still working on the "restoration", but I'm optimistic, plus I have plenty of obliglations the next couple of days that should force me to keep my paws of the darn thing!


 . I won't be rubbing out the finish for a couple of weeks anyway.
, but I suspect that some of the issue may be with the original Rustoleum "Special Lacquer" spray, or at least my habits with it. I didn't think too much about it until I tried the Minwax and Deft spray on lacquers, which behave and smell much differently than the Rustoleum. The Rustoleum smells and dries more like poly....never having used spray on lacquer before, I assumed it was normal. The Minwax and Deft smell strongly of acetone, and dry much more rapidly....dry to touch in a few minutes. I can't say that one is better than the other, but for my application and my habits, the Deft has left the smoothest coat, goes farther per can the Minwax, and was the cheapest of all 3. The new clear coat has much less of the "orange peel" effect than the Rustoleum left. Though it'll still benefit from some rub out, this little debacle may turn out to be a blessing in disquise. I've not seen the Rustoleum lacquer before, but now I know to stay away from it. I've done a few turned pieces finished in lacquer over the past week, and I'm slowly learning that using light coats is one way to make the rubbing out easier. I used to tend to get impatient and want to get the finish built up quickly, but then I'd end up messing things up and having to spend more time fixing problems.
. I won't be rubbing out the finish for a couple of weeks anyway.
, but I suspect that some of the issue may be with the original Rustoleum "Special Lacquer" spray, or at least my habits with it. I didn't think too much about it until I tried the Minwax and Deft spray on lacquers, which behave and smell much differently than the Rustoleum. The Rustoleum smells and dries more like poly....never having used spray on lacquer before, I assumed it was normal. The Minwax and Deft smell strongly of acetone, and dry much more rapidly....dry to touch in a few minutes. I can't say that one is better than the other, but for my application and my habits, the Deft has left the smoothest coat, goes farther per can the Minwax, and was the cheapest of all 3. The new clear coat has much less of the "orange peel" effect than the Rustoleum left. Though it'll still benefit from some rub out, this little debacle may turn out to be a blessing in disquise. I've not seen the Rustoleum lacquer before, but now I know to stay away from it. I've done a few turned pieces finished in lacquer over the past week, and I'm slowly learning that using light coats is one way to make the rubbing out easier. I used to tend to get impatient and want to get the finish built up quickly, but then I'd end up messing things up and having to spend more time fixing problems.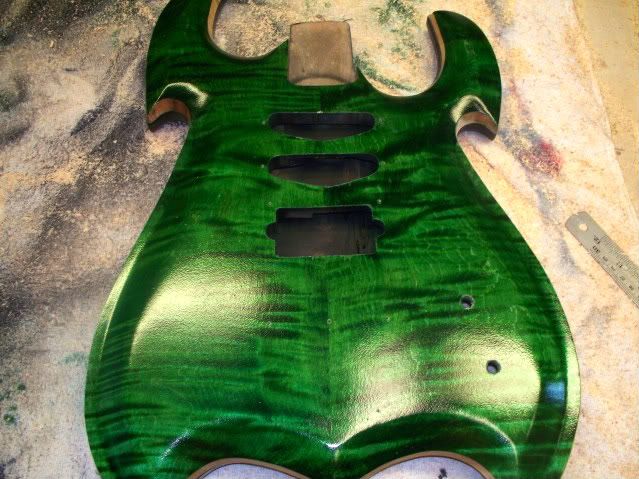

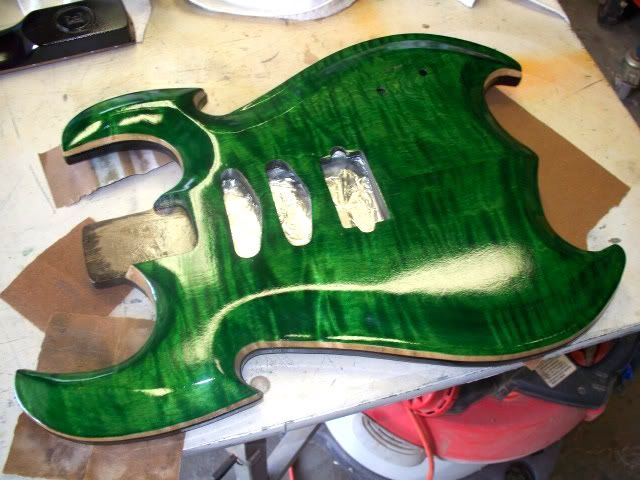
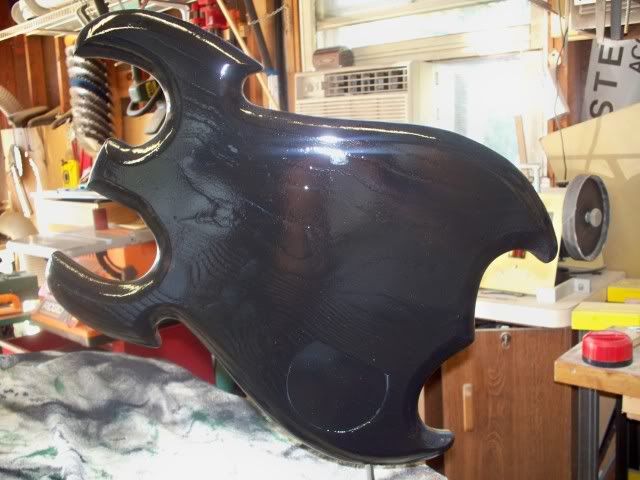
did you use different lacquer this time it looks like it burnt in much better scott,, or maybe you were closer when spraying it and kept it wet as you made the next path.
(knock wood....my head works well for that! )