Rob Keeble
Member
- Messages
- 12,633
- Location
- GTA Ontario Canada
Some of you might remember the burl i purchased recently. Well it was the first time I have ever had a burl in the raw in my hands and i really did not know where to start.
Ed Thomas kindly offered to take a look at it and before attending the recent get together downtown Toronto Ed invited me to stop by his workshop for us to examine it.
So if you want reminding on it you can see it posted here.
Well now for the results of our get together.
I did not know it but the burl had formed in such a way that it was actually two burls. One on either side of the trunk. Ed spotted this right away. He is a pretty sharp guy. So he suggested cutting it in two. But he said sleep on it. Heck noooooo. I said lets cut it now. I been waiting months to see whats inside that thing. Talk about patience.
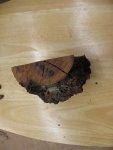
So here is shot of the burl cut in half.
This is what was inside, and boy am i happy I saw doctor Ed.

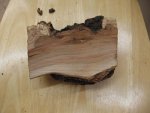
Had i not and had i turned this burl as one i think i would have been disappointed and wasted a burl. Thanks again Ed for saving me.
Well naturally after getting home from the meet I could not wait to get one half of the burl mounted on the lathe. Ed and i had discussed this part too so as to ensure i dont do my usual stunt and turn it from the wrong end. The Burl had a natural place to drill a hole with a forstner bit. So i did this and contrary to Eds advice (heck my impatience got the better of me.) i used my One way chuck and spigot jaws to mount it. Worked well but i should have glued a glue block into the hole, which i will do later.
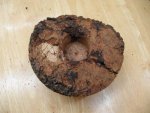 So i cleaned some bark off the top, heck its going to be stripped away when i hollow it out.
Here it is mounted on the lathe
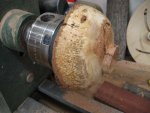
These are shots of what has come out so far
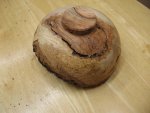
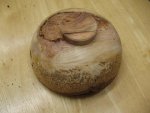
As you can see my fear is this burl is a waste of time or is going to explode on me when i get that tennon into the lathe to scoop out the bowl.
My best guess is to use super glue to fill that crack you can see in the first picture.
But a bigger problem is how far to go. Ed did warn me that these would most likely be pretty small bowls that come out.
Comments and advice would be most appreciated and welcome. Thanks for watching.
I just checked the pictures and they make this burl look way better than it does when you hold it in your hands.
Ed Thomas kindly offered to take a look at it and before attending the recent get together downtown Toronto Ed invited me to stop by his workshop for us to examine it.
So if you want reminding on it you can see it posted here.
Well now for the results of our get together.
I did not know it but the burl had formed in such a way that it was actually two burls. One on either side of the trunk. Ed spotted this right away. He is a pretty sharp guy. So he suggested cutting it in two. But he said sleep on it. Heck noooooo. I said lets cut it now. I been waiting months to see whats inside that thing. Talk about patience.
So here is shot of the burl cut in half.

This is what was inside, and boy am i happy I saw doctor Ed.


Had i not and had i turned this burl as one i think i would have been disappointed and wasted a burl. Thanks again Ed for saving me.
Well naturally after getting home from the meet I could not wait to get one half of the burl mounted on the lathe. Ed and i had discussed this part too so as to ensure i dont do my usual stunt and turn it from the wrong end. The Burl had a natural place to drill a hole with a forstner bit. So i did this and contrary to Eds advice (heck my impatience got the better of me.) i used my One way chuck and spigot jaws to mount it. Worked well but i should have glued a glue block into the hole, which i will do later.
 So i cleaned some bark off the top, heck its going to be stripped away when i hollow it out.
 Here it is mounted on the lathe

These are shots of what has come out so far


As you can see my fear is this burl is a waste of time or is going to explode on me when i get that tennon into the lathe to scoop out the bowl.
My best guess is to use super glue to fill that crack you can see in the first picture.
But a bigger problem is how far to go. Ed did warn me that these would most likely be pretty small bowls that come out.
Comments and advice would be most appreciated and welcome. Thanks for watching.
I just checked the pictures and they make this burl look way better than it does when you hold it in your hands.
