G&G Inspired Bookcase - Assembled Pics

I know this thread is threatening to turn into my own personal BLOG but, posting keeps me moving forward so please bear with me.

Glenn i was taught to sit quietly and listen while the teacher speaks.:rofl: So i am following along attentively.:D

There is so much to take in and digest in your posts my stack overloads and i have to reset the brain. :rofl: Ithink its time for a new cpu wonder when we get to brain tansplants.


Looking good. There is one thing that i am betwixed and between with G&G design is the finger joints on the corners. Sort of counter intutive to me to make a fine closing joint and then round over all the square edges. Almost sort of indicates the original woodworker designer was hiding out of square edges. I know you a big G&G fan along with others here, but those round over corners i dunno. It really hit me when Rennie made his box prototype. When they are done on a small scale it looks good to me but when they get to the large thick set joint i dunno.:eek:
 
Last edited by a moderator:
sorry for being absent glenn but your doing a fine job on this as you already know... your corner is spot on now..great match up of the grain and the straps will make this all come together..you done a tsaw cut on the shoulders back aways first and then finished on the band saw right?? had to play catch up tonight:)
 
Shoulders and cheeks just as you describe Larry. Thanks for the comment on the large rabbets leaving too little material behind. You were dead-on. I adjusted a few other dimensions as well and have learned plenty that I can apply to other similar builds.
 
Just caught up here Glenn. Looks awesome!:thumb: I've been so busy with my build I almost missed out on this.

I think you've inspired me to try and do something different once I complete my kitchen.:wave:
 
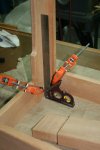
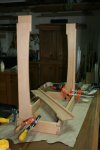
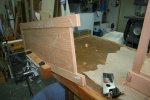
Just to let you know I haven't wandered off. The dry fit went well. Fitting the verticals is easy but interesting. I keep a couple flat and level surfaces in the shop. This seems to have helped me eliminate mistakes like drawers that don't end up square after assembly and tables that teeter. Having the surface level allows me to use gravity as a reference (bubble level) as well as the parts relationship I may be working with.

I left the rabbet faces a bit rough as I wasn't sure how well the verticals would align with the frames after sub-assembly.

ii-GnG BC-1-frame-Glue-up.jpg

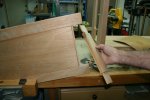
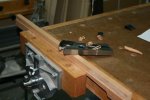
With the lower frame on a flat, level surface I used a block plane to bring each vertical to 90* by planing the faces here and there. Not much effort at all I was glad to find.

jj-GnG BC-1-frame-Glue-up.jpg

And the rest for today will be pretty boring as the glue up looks remarkably like the dry fit :eek:. I plan to template shape the shelf trim pieces but, that looks just like template shaping anything else :dunno:.

kk-GnG BC-1-frame-Glue-up.jpg

Oh, I drilled the shelf pin holes and I will start to fit the lower shelf/plate/whatever you want to call the bottom. It will have a bit of shaping to it to make a fit around all the corner elevations. I'll also start experimenting with finishes today. BTW, what do you think about this color?

GnG BC-1-color-test-1.jpg

909
 
Last edited:
Glenn, I when I'll grow up I want to be like you.;) I can't but admire the way you work and the way your posts are well organized and set up.

I know that these things go with the beast as we say here, so my chance of getting at your level are poor, my way of working is more random and for sure less tidy, so you and your projects are a source of inspiration and example to me.

Thanks a lot for taking us along on that ride.:thumb::thumb:
 
Toni you and me too.:D:thumb:


Glenn my table saw said i had to contact you and let you know its delighted. After seeing your saw and knowing we have the same saw and that i probably got mine after you, i was shamed into cleaning mine up from top to bottom. Took a lot of waterpaper and some scrapers but she is all shining and waxed.:D:rofl: She said "Thank you Glenn".:rofl::rofl:

Now the whole shop is screaming at me to clean it up too. See what happens when you post the darn tools hear you all the way from L A to Toronto Canada.:D
 
After seeing your saw and knowing we have the same saw and that i probably got mine after you, i was shamed into cleaning mine up from top to bottom.

When dialed in, the Zip Code saws can be surprisingly capable little beasts, can't they? Don't let her ride you too hard Rob. There's a lot to be said for living in a desert basin when it comes to rust control. Not to mention that the photos seem to show a seamless gray surface but, they are scratched, scared and show the typical signs of actual use ;-) Its kinda like how folks comment that my shop looks clean . . . that may be what the camera shows but we all know the truth :D.
 
Last edited:
When dialed in, the Zip Code saws can be surprisingly capable little beasts, can't they? Don't let her ride you too hard Rob. There's a lot to be said for living in a desert basin when it comes to rust control. Not to mention that the photos seem to show a seamless gray surface but, they are scratched, scared and show the typical signs of actual use ;-) Its kinda like how folks comment that my shop looks clean . . . that may be what the camera shows but we all know the truth :D.

So Glen what is it that your tools are scared of getting scratched? Or are they scared of getting scarred? We just need to know these things.:eek::rofl:
 
So Glen what is it that your tools are scared of getting scratched? Or are they scared of getting scarred? We just need to know these things.:eek::rofl:

I have seen them shiver when they see me approaching with a piece of MDF :D. Naw, they are just as beat as any good user that gets a little bi-annual TLC. That's the miracle of flash photography, the surfaces look smooth and even in the pics ;). Why is it the same camera has no problem showing up EVERY blemish in my finished pieces???
 
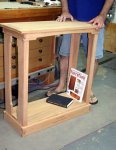
I know I'm being pretty granular on this process but, it helps keep me moving forward. I have reached that stage for the last couple days where you do all sorts of stuff that doesn't show till your done . . . the last pic seems so familiar . . .

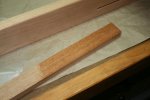
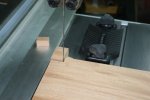
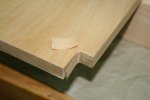
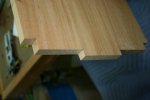
I slotted the lower frame, hand sanded all the finger joint tips and fitted the bottom shelf. I used the bandsaw again for fitting the lower shelf/base plate. I snuck up on the size and then used a chisel, paring style to get the final fit. I use the low fence as a guide and the magnetic featherboard as a stop.

ll-GnG BC-1-top-frame-Glue-up.jpgmm-GnG BC-1-top-frame-Glue-up.jpgnn-GnG BC-1-top-frame-Glue-up.jpgoo-GnG BC-1-top-frame-Glue-up.jpg

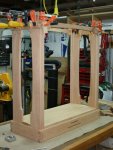
and I have the top frame glued up and in clamps.

pp-GnG BC-1-top-frame-Glue-up.jpg

1046
 
Last edited:
All i can say is Jim you taught him well:D:rofl:

Looking very nice now Glenn. I see all sorts of aids in your shop that make me think if i visited your shop i would be snapping away continuously.

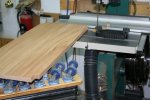
That roller made of upside down casters looks real handy. Is there any reason in particular that you chose to make it that way. Seems like a load of casters to me. Do you think it would work as well with these captive roller balls. Do you use it as outfeed support on your table saw? I can see an advantage of the wheel there if a board hits the edge of the wheel due to bending it would be carried up and over I guess but what if it hits the wheel below centre?

Glenn your attention to detail and patience shows. I tip my hat to you man.:thumb:
 
Seems like a load of casters to me. Do you think it would work as well with these captive roller balls.

Side note - it is really annoying when you type up a few paragraphs and then forget to hit "submit" :thumb:

The idea for the rollers came from Lee Valley's stand. The two rolws of casters keep narrow stock from dropping between casters. If I had a bending brake I would have made a ramp like the LV one.

The one that you noticed in the pic used to have roller balls. They are now used as ballast. If your material has much weight at all the roller balls work poorly. There is so little contact surface on the tip of the ball that your material's weight is highly focused leaving ruts in things like 8/4 lumber or veneered ply. I thought the rollers would be the ultimate solution but even after upgrading the ones that came on the stand to some costing more than the stand itself, the result was still poor for me.

I have 4 roller stands and of course now realize that 2 would have been plenty. Two are long rollers only. Two were roller balls, a long roller or a solid strip. One of those had the roller ball surface modified with the caster board you noticed and the other will be modified as soon as those casters go on sale at Harbor Freight for $1 each again :D

The casters are great for large round items like table tops when supporting at the bandsaw or router table. They also follow the direction of the material riding on them as opposed to trying to guide the material like the long rollers can do.
 
Last edited:
Then they poor quality roller balls Glenn. Way back in my past I was involved in automation of a production line. We were moving 20Kg steel boxes around on a small wooden pallet no bigge than 14 x 8 inches. We used roller ball tables that we made ourselves but with bought in roller balls. Guess there are different types and quality. I seen some at Busy Bee tools that i would not use if they were free.

That stand looks real good Glenn not sure how i missed it at lee valley before. I see it has fine tune adjustment too. The plate makes all the sense to what i was concerned with.
 
Last edited:
Then they poor quality roller balls Glenn.

First off, sorry about going off on a tangent there. This is a build thread, not a ball thread. :D The balls rolled great, they just left dents. Not a bad product, just a poor application. Even after planing, scraping and sanding there were times when the finish would show trails of crushed fibers on pieces that started out as heavy stuff. I'm sure with a greater area of balls to share the weight they would do better than the single row. :)
 
Last edited:
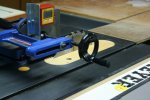
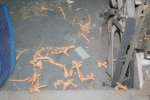
I started this 20 days ago and am moving along pretty well for me :rolleyes:. DAMHIKT but always double check your tenoning jig for square on all axis:

qq-GnG BC-1-top-trim-tenoning.jpg

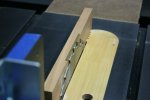
These bridle joints will be the width of the material plus 1/8":

rr-GnG BC-1-top-trim-tenoning.jpg

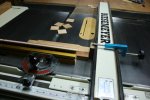
Once the jig work is done the cheeks get cut off on the tablesaw:

ss-GnG BC-1-top-trim-tenoning.jpg

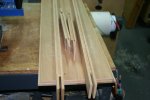
The router table makes quick work of the grooves and panel profiles:

tt-GnG BC-1-top-trim-tenoning.jpg

Here's a look at the top trim frame and panel joinery:

uu-GnG BC-1-top-trim-tenoning.jpgvv-GnG BC-1-top-trim-tenoning.jpg

And this gives you some idea of the scale of the little beastie (pardon the Hobbit-feet):

ww-GnG BC-1-top-trim-tenoning.jpg

BTW, thongs (as we call those things on my feet around here) are NOT approved shop footware. I kicked off my low top boots when I went in for a snack. I decided I was done for the day and just went back out to snap some pics. Safety announcement and disclaimer; don't wear thongs, sandals or slippers while working. Exposed feet are scientifically proven to attract falling chisels.

A lot of scraping and hand shaping on the trim frame. Then the shelf and the trim for it. I can make all the plugs while the first few coats of finish are setting up.

1118
 
Last edited:
The shelf, although adjustable up and down, will be captured. Installation requires attachment of the trim after the shelf is installed. I accomplished this by using pocket holes to attach the trim. I use a shoulder plane to clean up the rabbets where the trim and the shelf meet:

xx-GnG BC-1-shelf-trim (1).jpg

I assemble the unit; the Forstner "mortises" on the end grain allow the style of shelf pin I am using to recess and make a closer fit for the shelf to the verticals. I use a hand plane just a bit to bring the trim flush with the shelf surface:

xx-GnG BC-1-shelf-trim (4).jpg

Ok, more than just a bit maybe . . .

xx-GnG BC-1-shelf-trim (6).jpg

Anyway, a familiar but slightly different view of the progress:

xx-GnG BC-1-shelf-trim (5).jpg
 
Last edited:
Top