
Ken Schweim
Member
- Messages
- 38
- Location
- Madison Lake, Mn
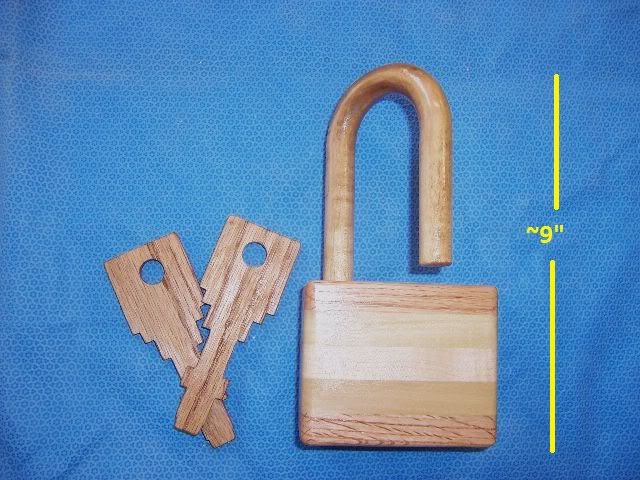
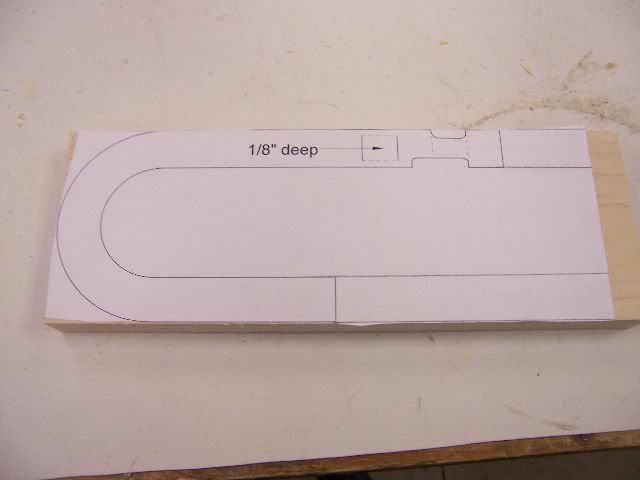
This is another attempt by me to become a wood worker. The plans were found in an excellent book called "Making Working Wooden Locks" written by Tim Detweiler. I bought my copy I believe from Amazon. The instructions are very clear, lots of color photos and blueprints. Th instructions state the shackle is the most difficult part so I started with that. I copied the dimensions from the book onto my home CAD system and made an actual size blueprint. Incidently, all the blueprints in the book are actual size so I can't really say why I re-drew them. Then I pasted the print onto the wood. I made the shackle from maple. I practiced first on basswood and pine and I believe you could use just about any wood you like.
The finished shackle:
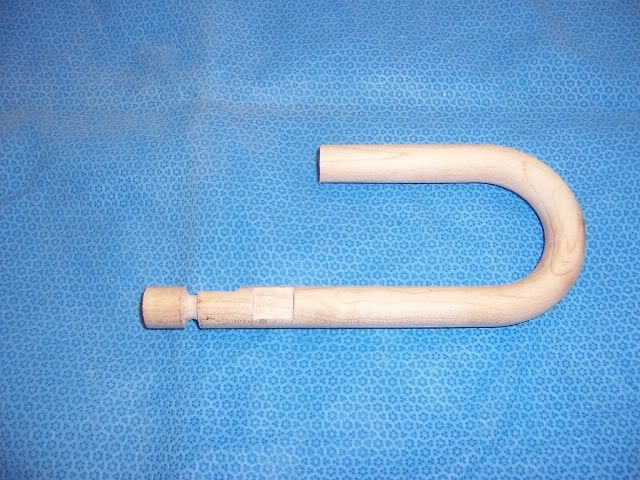
The shackle requires the use of a router and I don't like routers which is why I Haven't bought a router table.....which is really dumb. The challenge is to make the shackle end up with perfectly round 3/4" wood. The book says to make about 3 gradual passes with the router and I found it to be really very easy to make.....with the help of a little sandpaper. It would have been really easy with a router table.
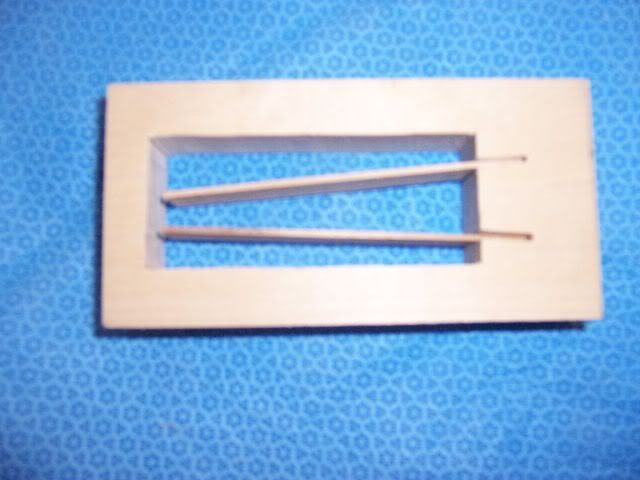
There are five "layers" in the main body. I used wood I had on hand, Oak, Poplar, and Maple. Each layer has a special purpose. This five layers look like this:
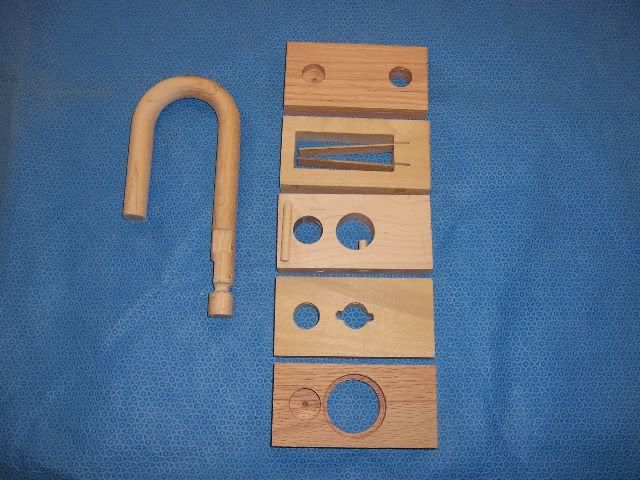
The most critical one (in my estimation) is the second layer which contains the actual lock. The lock is two 1/16" strips of wood positioned at a relatively precise angle. I made the strips from hickory
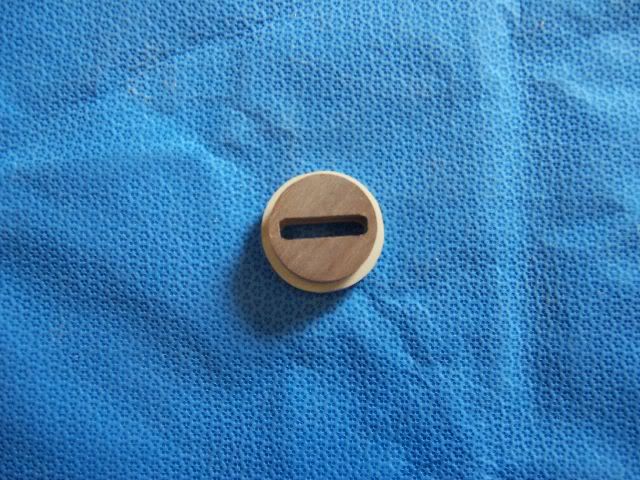
On the bottom there is a round piece with a key slot made from two pieces to from a little ledge to hold it in place.
You do have to be extremely careful during the final glue-up. If any glue is allowed to get inside any of the layers the lock probably will not work and there is no plan B.
I made the keys from standard 1/4" red oak and they require minimal skill.
There are five locks described in the book but I kinda lost interest after the first one.....it is a fun project though and a "Job well done" to Mr. Tim Detweiler for the excellent instructions.
Last edited:

 Then this year Larry goes and gives me a "roundtoit" so now my excuses are more limited.
  I think those things are just amazing. How much time do you estimate that particular lock took to make? I have never seen them for sale in a craft shop/show, that is something I would probably buy just for the fun of it. Thanks for posting this and pushing me one step closer to making one of these.