
- Messages
- 36,121
- Location
- ABQ NM
A few days ago in Tom's Donut Chuck thread, I mentioned using a roughed-out bowl as a friction chuck. Since I had a bowl bottom to finish, I took a camera along for the ride.
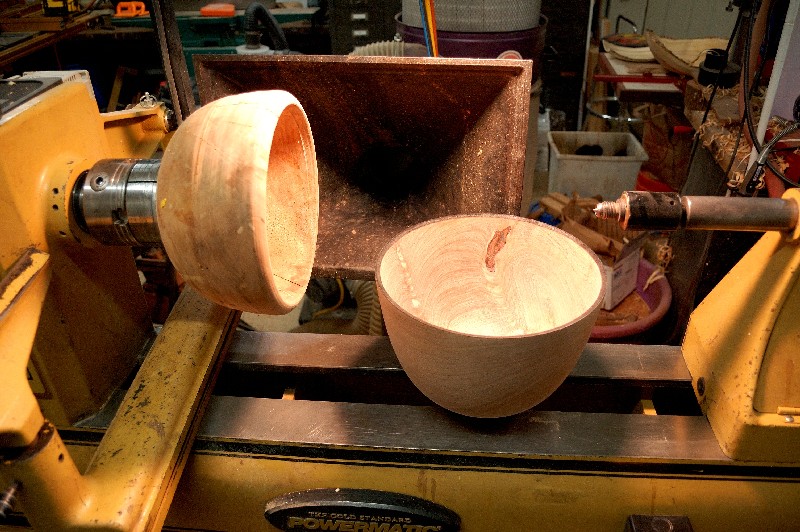
Here's the basic idea...the shallow bowl that's mounted in the chuck is a roughout that I don't plan to finish. It's got some hairline cracks that I don't think are worth the effort to fix. The bigger bowl on the right is the one I need to finish the bottom on:

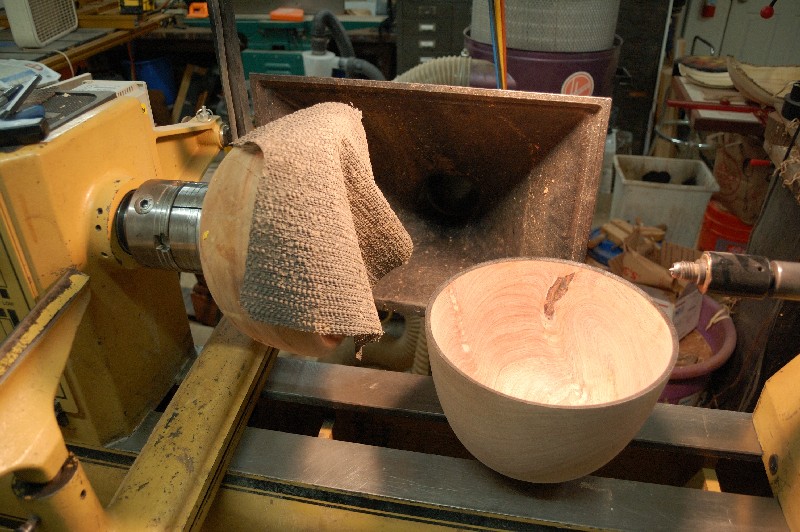
I put a sheet of rubber shelf liner/router pad in between the two, and used the tailstock to hold the bowl in place:
At that point, I'd typically turn the tenon down to a nub, do any finish turning to the bottom of the piece, then turn the nub down to a cone and remove it, doing any final sanding of the foot off the lathe. I've used this method for a lot of bowls, and have been happy with the results. You can use a similar method for finishing the bottoms of hollow forms. To do that, the "chuck" bowl needs to be bigger than the hollow form, so the vessel fits inside of the bowl.
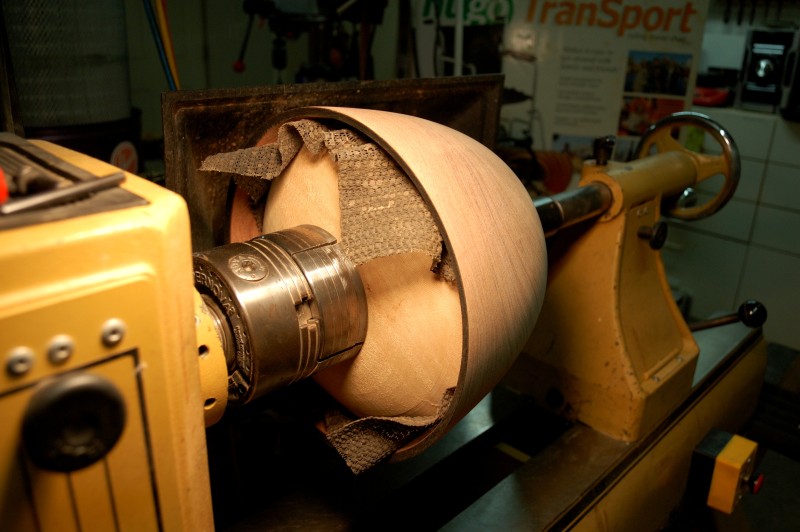
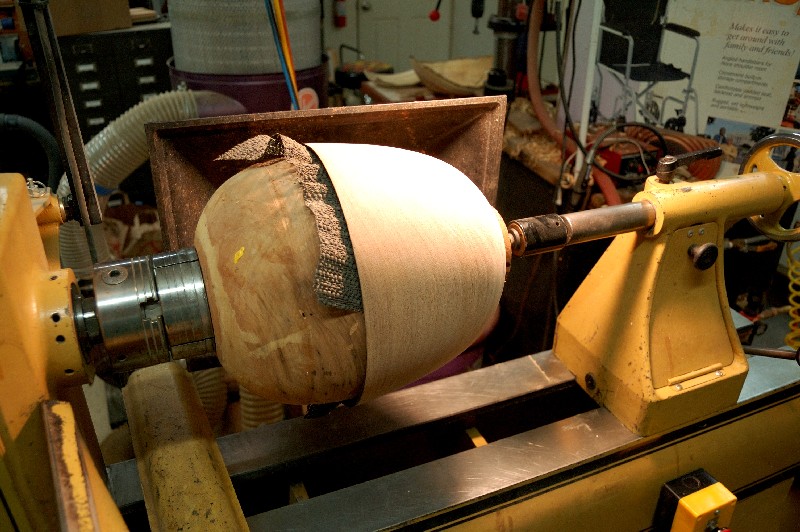
But with this particular pair of bowls, I didn't really like the way the big bowl fit over the smaller bowl. So I went back to the scrap bowl pile and picked out another, larger bowl to use as the friction chuck. If you look closely at the photo, you can see I've re-trued the rim of the "chuck" bowl:
Here again, I used some beat-up rubber shelf liner as an interface pad:
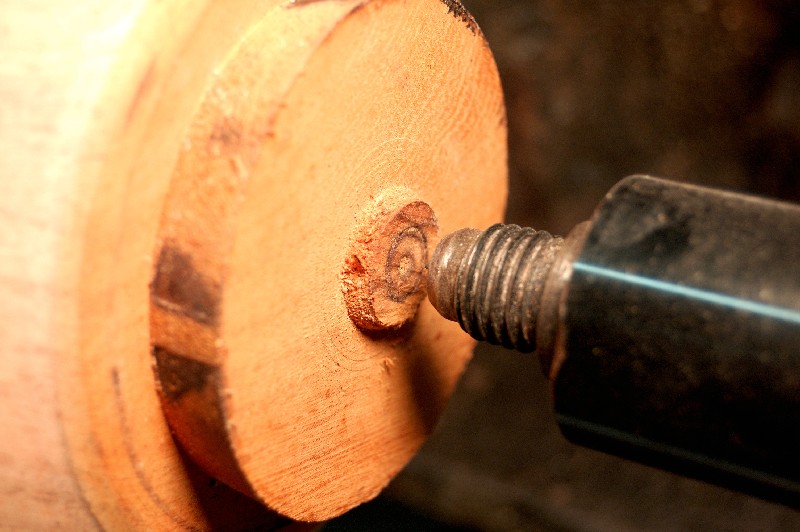
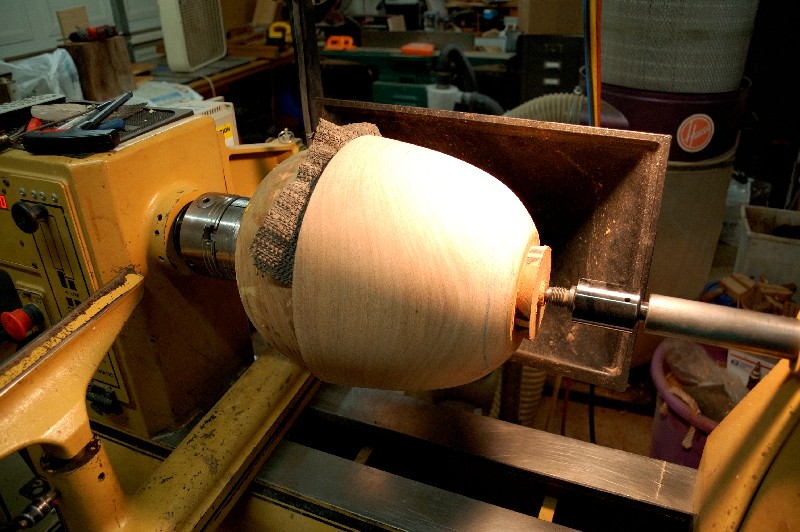
And used the divot in the tenon from when the piece was first roughed out to center the bowl on the friction chuck:
Giving me this:
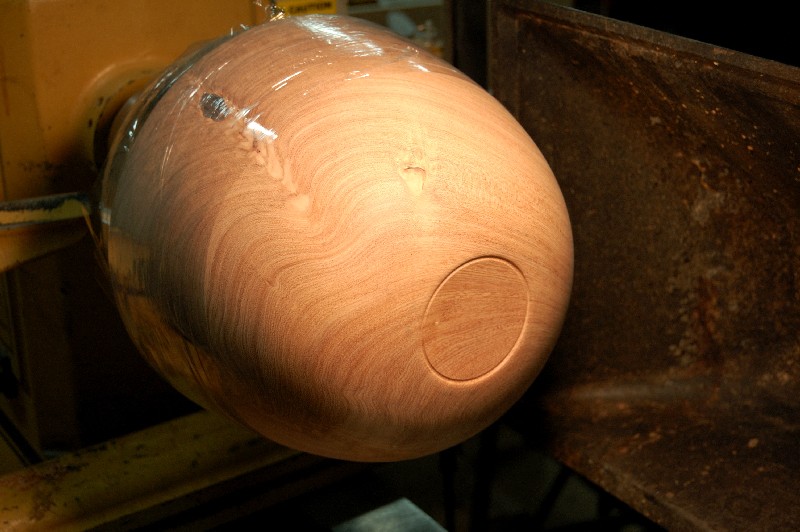
And from another angle. I should point out that the blue line near the bottom of the bowl shows me where the inside bottom is. Before reversing the bowl, I use the laser pointer on my hollowing rig to accurately determine the bottom thickness, so I know how much I can (or should) remove from the bottom as I finish it:
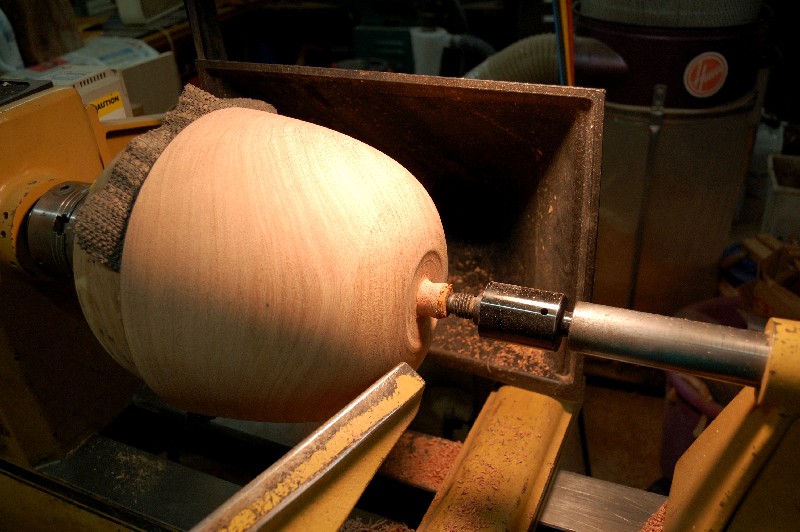
Then I do any final shaping of the bottom 1/4 of the bowl, as well as start whittling away at the tenon on the bottom:
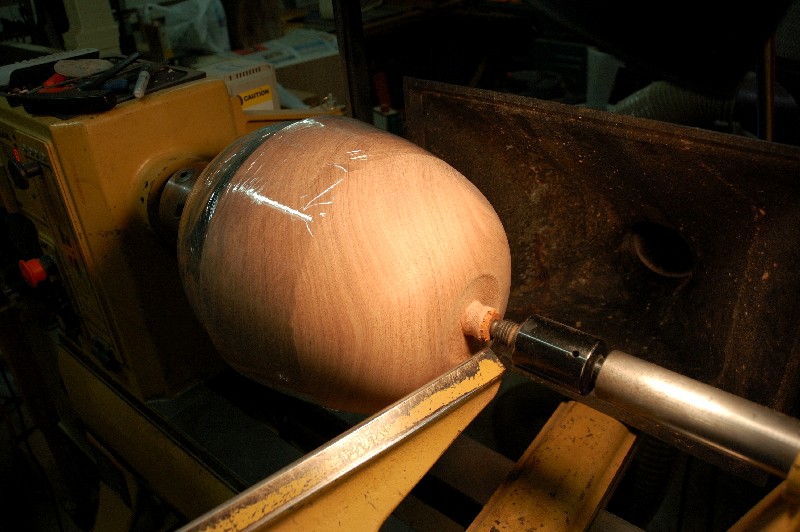
Once the tenon was down to about 3/4" in diameter, I decided to take out a little extra insurance in the form of plastic stretch wrap. I wrapped it tightly around the joint between the two bowls, making sure to wrap in the same direction as the lathe rotation. (I don't want the lathe's spinning to unwrap the plastic.):
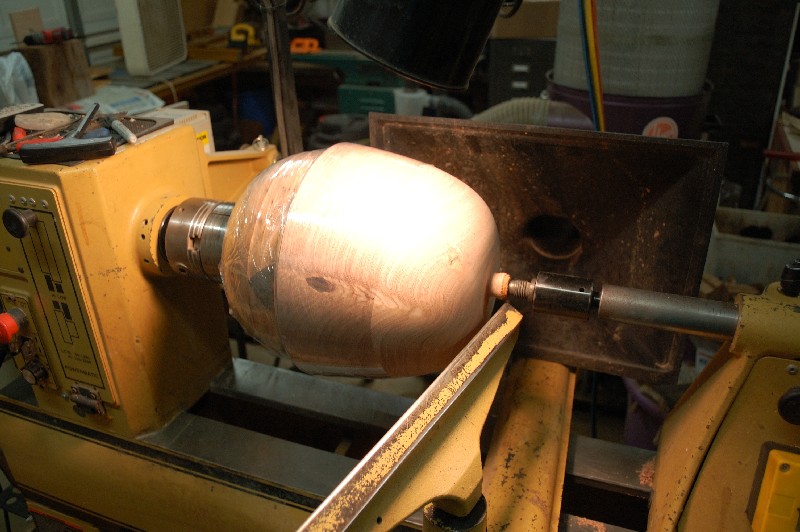
Here's another view. You can see that I've done some initial sanding of the concave foot area (by hand, with the lathe running):
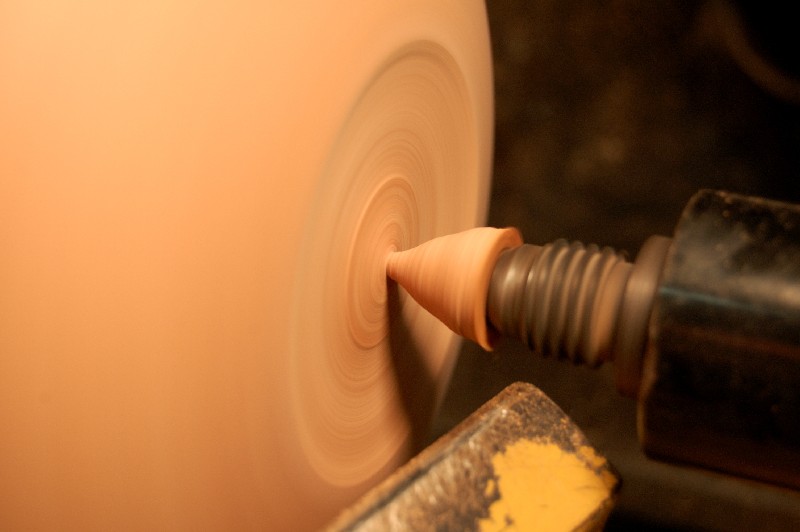
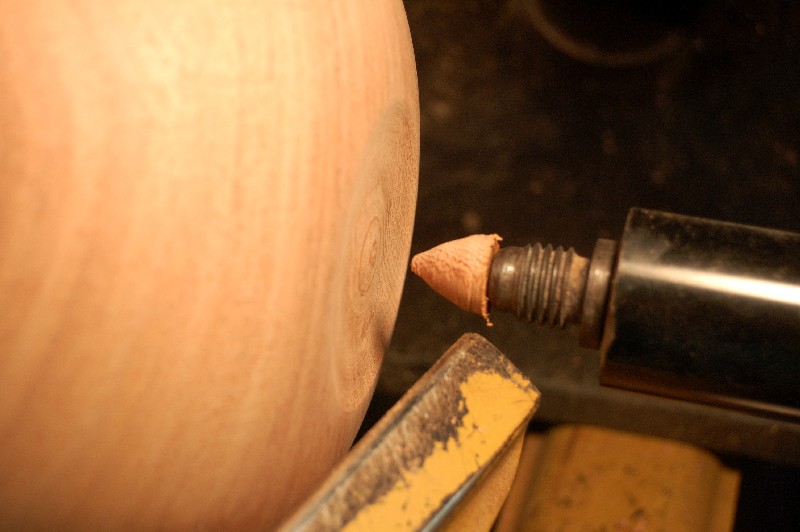
The I go about turning the nub down to a cone. Here's a spinning shot:
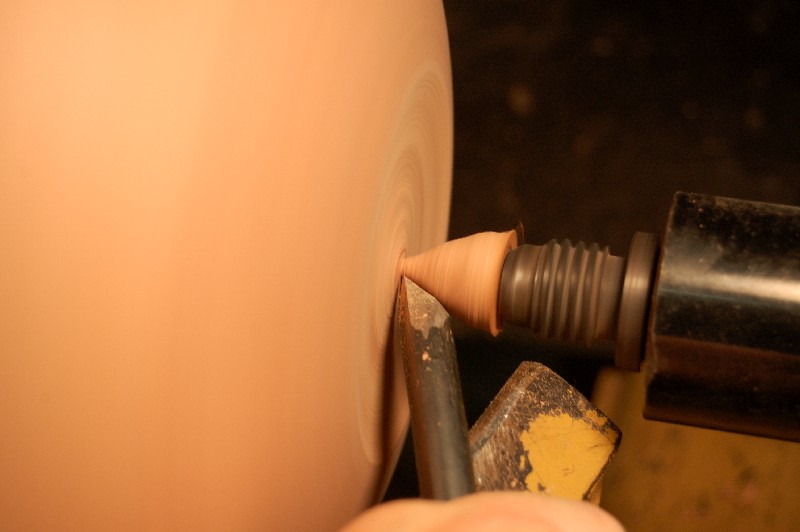
And another photo showing how I hold the detail gouge to get a shearing cut on the cone. I'll point the gouge the other direction to make similar shearing cuts on the foot itself. It was a bit exciting taking this shot one-handed, while holding the gouge in place right next to the spinning wood:
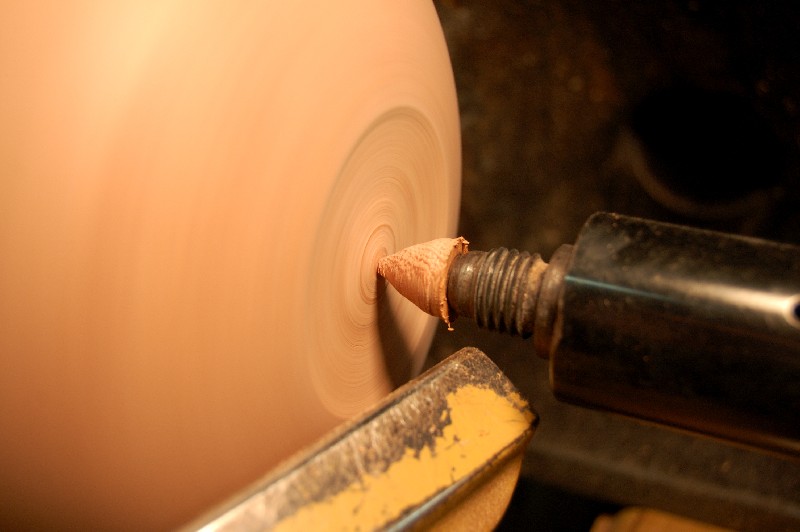
And, the "free at last" shot. Notice that the bowl is still turning but the cone is not.
Here, I've stopped the lathe and moved the tailstock back a bit. You can see that the cone stays stuck to the live center:
At this point, any of the work I've done on the bottom of this bowl could have been done without the stretch wrap. As I mentioned earlier, it was there just for insurance. But since it was there, and since it was holding the piece securely, I decided to do a little bit more tooling on the foot after moving the tailstock out of the way. Here's the finished bottom after the extra tooling and final sanding:
Although I didn't get any decent photos of it, the inside of the finished bowl did show some marks (they looked almost oily) from the rubber pad. Those marks sanded away easily with 400 grit sandpaper after I took the bowl off the lathe. The stretch wrap, however, leaves no trace on the finish-sanded raw wood.
This isn't the only way to finish off the bottom of a bowl or hollow form, and it's not even one that I use very often (I usually skip the stretch wrap part), but it's one of many ways that works well.
Questions and comments are welcome and appreciated.")
Here's the basic idea...the shallow bowl that's mounted in the chuck is a roughout that I don't plan to finish. It's got some hairline cracks that I don't think are worth the effort to fix. The bigger bowl on the right is the one I need to finish the bottom on:
I put a sheet of rubber shelf liner/router pad in between the two, and used the tailstock to hold the bowl in place:
At that point, I'd typically turn the tenon down to a nub, do any finish turning to the bottom of the piece, then turn the nub down to a cone and remove it, doing any final sanding of the foot off the lathe. I've used this method for a lot of bowls, and have been happy with the results. You can use a similar method for finishing the bottoms of hollow forms. To do that, the "chuck" bowl needs to be bigger than the hollow form, so the vessel fits inside of the bowl.
But with this particular pair of bowls, I didn't really like the way the big bowl fit over the smaller bowl. So I went back to the scrap bowl pile and picked out another, larger bowl to use as the friction chuck. If you look closely at the photo, you can see I've re-trued the rim of the "chuck" bowl:
Here again, I used some beat-up rubber shelf liner as an interface pad:
And used the divot in the tenon from when the piece was first roughed out to center the bowl on the friction chuck:
Giving me this:
And from another angle. I should point out that the blue line near the bottom of the bowl shows me where the inside bottom is. Before reversing the bowl, I use the laser pointer on my hollowing rig to accurately determine the bottom thickness, so I know how much I can (or should) remove from the bottom as I finish it:
Then I do any final shaping of the bottom 1/4 of the bowl, as well as start whittling away at the tenon on the bottom:
Once the tenon was down to about 3/4" in diameter, I decided to take out a little extra insurance in the form of plastic stretch wrap. I wrapped it tightly around the joint between the two bowls, making sure to wrap in the same direction as the lathe rotation. (I don't want the lathe's spinning to unwrap the plastic.):
Here's another view. You can see that I've done some initial sanding of the concave foot area (by hand, with the lathe running):
The I go about turning the nub down to a cone. Here's a spinning shot:
And another photo showing how I hold the detail gouge to get a shearing cut on the cone. I'll point the gouge the other direction to make similar shearing cuts on the foot itself. It was a bit exciting taking this shot one-handed, while holding the gouge in place right next to the spinning wood:
And, the "free at last" shot. Notice that the bowl is still turning but the cone is not.
Here, I've stopped the lathe and moved the tailstock back a bit. You can see that the cone stays stuck to the live center:
At this point, any of the work I've done on the bottom of this bowl could have been done without the stretch wrap. As I mentioned earlier, it was there just for insurance. But since it was there, and since it was holding the piece securely, I decided to do a little bit more tooling on the foot after moving the tailstock out of the way. Here's the finished bottom after the extra tooling and final sanding:
Although I didn't get any decent photos of it, the inside of the finished bowl did show some marks (they looked almost oily) from the rubber pad. Those marks sanded away easily with 400 grit sandpaper after I took the bowl off the lathe. The stretch wrap, however, leaves no trace on the finish-sanded raw wood.
This isn't the only way to finish off the bottom of a bowl or hollow form, and it's not even one that I use very often (I usually skip the stretch wrap part), but it's one of many ways that works well.
Questions and comments are welcome and appreciated.


 ... That stuff you posted looks usable.