Mahogany Credenza - Build Update - Done

its nice watching a build from someone who knows what hes doing.

what bothers me most, is that the average person has no clue what a quality piece of furniture takes as far as man hours and talent to produce.
 
its nice watching a build from someone who knows what hes doing.

what bothers me most, is that the average person has no clue what a quality piece of furniture takes as far as man hours and talent to produce.

Believe me, there are times during a project like this that I'm asking myself, "waddaya think you're doin'?" :rolleyes:

Clueless is right! I've been asked many times if I could build an item for someone. When I give them the cost, the usual response is, "But I can get the same thing at XYZ store for $89!" Yep, sure you can! ;)
 
Its been something I ponder all the time since I started making anything out of wood.

not going off topic-why dont you use readily available mahogany or sapele veneered plywood for the inside of the cabinet? ONe sheet could probably cover you, costs around 110-130 bucks. I have no clue what veneers cost.
 
... not going off topic-why dont you use readily available mahogany or sapele veneered plywood for the inside of the cabinet? ONe sheet could probably cover you, costs around 110-130 bucks. I have no clue what veneers cost.

I got a sheet of flat cut mahogany through JWW for $53 plus about $10 shipping. I can put that on 1/2" sandeply for most of the interior structure; 3/4" for the bottom of the case. I'm comfortable working with veneers. :)
 
Last edited by a moderator:
I got a sheet of flat cut mahogany through JWW for $53 plus about $10 shipping. I can put that on 1/2" sandeply for most of the interior structure; 3/4" for the bottom of the case. I'm comfortable working with veneers. :)


sorry bill, I hit the wrong button there.

I am so uncomfortable working with veneers. I did one project and didnt have the greatest results, but I dont own a vacuum press, and I dont know what a good quality veneer is supposed to feel or work with.

You seem to have it down to an exact science. I guess in time Ill have to break down and learn the process correctly.
 
... I am so uncomfortable working with veneers. I did one project and didnt have the greatest results, but I dont own a vacuum press, and I dont know what a good quality veneer is supposed to feel or work with.

You seem to have it down to an exact science. I guess in time Ill have to break down and learn the process correctly.

A vacuum press is great, if you have one. I wanted one and had access to a pump that a friend was selling. I got the remainder of the parts from JoeWW and built the thing. I'm too cheap to order the "real" vacuum press vinyl, so I bought very heavy vinyl material at Walmart a few years ago. In fact, my first vacuum press bag was a shower curtain. The heavy material is much better for larger items, of course.

Everything I've done and will do on this project could be done without a vacuum press. For instance, for the top veneers I could have done the same prep as for bagging but, at the point where I spread glue on the substrate, I would have also spread glue on the back of the veneer. Let the glue dry until tacky, spread another coat on the substrate, align the veneer on the substrate and use a clothing iron to activate the bond between veneer and substrate. The same procedure could be used for all other veneered parts on this project.

The bentwood components could be done like they were for centuries: by steaming the wood and clamping it over a form. I choose to cut thin (1/8" thick) strips and create a lamination, but I still could have done that with clamps and a form. The advantage of a vacuum press is its even pressure and not having to chase anywhere from three to sixty clamps and get them equal. ;)

As to the "exact science", I have a course of events to thank for the training I got on veneering. I was a project manager for a firm based in Florida starting in 1998. The privately-held company sold to an international firm in the Fall of 2000. They began layoffs immediately but I was assured I was safe. I was until several layoff rounds later when I was in one of the last groups. Our last day of work was 9/7/2001. Four days later, things went crazy on many levels. I had contacts all over the country but most of them were also looking for jobs. When my unemployment was about to run out nine months later, I saw a listing for a bench carpenter in a high-end cabinet shop. I went for an interview and was hired on the spot. I had already built some decent things, but working in the shop gave me lots of exposure to different processes as well as the opportunity to do a lot of veneering. So, we never know what might lead us in any given direction. In this case, a bad event led me to much more knowledge than I could have gotten in the same amount of time otherwise.

Sorry to get so wordy. We now return you to the program already in progress. :wave:
 
joe ww is the guy I ordered veneers from. It sure looked pretty.

Before I invest money into a vacuum press, Id have to have someone teach me the basics of veneering.(money wouldnt hold me back, just lack of experience and know how)

I see for sure veneering opens up a completely new avenue for woodworking and building furniture.

I got an excellent report from my neurologist this morning, so Im planning on venturing out next year and learning some new things.
watching your build is egging me on to learn about veneering.
even if I only use veneers for door panels, I see so many beautiful possibilities.
 
... even if I only use veneers for door panels, I see so many beautiful possibilities.
The only limit is your imagination. One set of raised panels I made at the commercial shop was especially interesting. The frame was the basic cope and stick but the panel got a little involved. Specifications for the doors was a cherry frame and raised panel with crotch walnut veneer in the center of the panel. The panel had an MDF center segment about an inch less in both dimensions than the veneer. Cherry was used to wrap the MDF like a picture frame. After the cherry and MDF were glued up, a piece of veneer was carefully centered on the panel and vacuum-pressed. Glue squeeze-out onto the cherry wasn't an issue because it was going to be routed into a cove. The cove was cut in several passes to a point that cut into the veneer but short of the MDF center. It made for quite a nice assembly! :thumb:
 
Thursday:

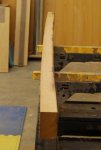
Well, sometimes stuff happens! Take a fairly straight raw board, rip it and hope. Here's what happened to one of my mahogany boards.

mah_bowed1.jpg

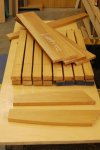
So, I said, "I'll show you who's boss!", and turned it into this:

mah_bowed_pieces1.jpg

Actually, the 80" bowed board was destined to be stiles for the doors and end panels anyway! I cut it into four 20" segments, resawed them, then ripped them to a bit over the final 1.5" width. After they "rest" overnight, I'll mill them to final dimensions.

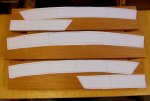
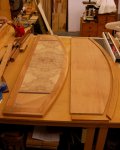
I took some other pieces of mahogany I had milled to 3/4" thickness, applied my cutting patterns and band sawed them. After checking the joints, I cut #0 biscuit slots and glued the radius together.

mah_lwrfrm1.jpg

mah_lwrfrm2.jpg

So far, it's been a fairly productive day. I'll prep a bit more mahogany for the laminations to make the bottom apron before calling it a day.
 
Friday:

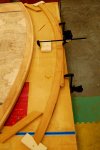
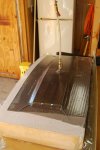
Well, I didn't get a photo of the laminations for the bottom apron before applying adhesive and putting them in the vacuum press. But, here they are taking a nice nap to shape them to the radius I need.

btm_apron_0.jpg


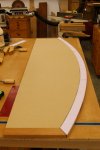
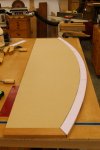
I used the bottom panel radius assembly to mark a piece of MDF for its radius cut. I need to do some sanding to both to finish matching them up flush before applying veneer to both sides of the MDF.

btm_pnl0.jpg


Not a lot of production on the credenza today since I had to take time for some cleanup. I tend to get busy on multiple things in the shop and finally decide to do some cleaning and organization after I wander around in a daze trying to find something! Ah, well - Monday's another week!

Y'all have a great weekend! :wave:
 
great watching here bill.. and am getting ancy to see you finish it

Oh, trust me, I'm more of your speed Bill. It will come...eventually. ;) :D

OK, you guys! If my plans fall into place, I should have something that looks more like a cabinet by the end of next week. I need to pick up a sheet of 3/4" birch ply for the interior structural pieces and cut those while I have other items in the vacuum press.

By the way, I've been trying to think of a way to have the drawers pull out fully. On my drawing, I have 12" and 8" ball bearing slides but I'm sure there's a better way. I've been reviewing sliding dovetail drawer slides that a friend in Florida liked to make and use, but I'll have to work out the details on whether I can make them work with two different lengths on the same drawer. Any suggestions will be welcomed.

fww_dwrs.jpg

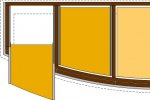
On the drawing, drawer slides are shown in gray. This is 1/2 of the cabinet - the drawers are gold; the tan on the left is half of an open shelf.
 
More on my drawers: In running through options for drawer slides, I'm now thinking along the line of plain, old fashioned wood slides. I can customize the length to the different left and right sides of the drawers, attach a positive stop to the underside of the cabinet top and have a reasonable amount of support for the drawer box. I'd probably use a sliding dovetail to control movement. Here's what the drawer with the greatest front angle will look like pulled out of the cabinet.

fww_dwrs2.jpg

Comments? Suggestions? :huh:
 
Monday's production was primarily the continued milling of parts like stiles for the doors and end panels. I also milled and cut down some blocks that will become the feet of the credenza. A lot of tedious work, but it goes with the territory!

parts1.jpg

Milled a couple of pieces of 8/4 to make a larger block that I'll use for the front corner feet. I want them to be parallel to the front and side, so I'll have to do some shaping on the bandsaw.

parts2.jpg

Got ahead of myself. Actually, the first thing I did on Monday was to cut the veneers for the top and bottom faces of the bottom panel of the credenza. Like with the top panel, I used some junky veneer for the unseen bottom face. For the top face, much of which will be visible, I used mahogany veneer.

Here's a shot of the bottom panel before veneer, then after veneering beside the top panel.

btm_pnl0.jpg

top_btm_pnls1.jpg

I started today, Tuesday, going to a local supplier for a sheet of 3/4" birch plywood that I'll cut down for interior panels.
 
Enjoying the ride immensely Bill, sorry i aint much help in the draw department i am way too much of a rookie.

I have had a look at your shop tour on your site and love your outfeed table. Was there any particular reason other than space in your shop for not using the full length of your mdf sheets when you made it.

I can see where width got modified given the saw and router table insert but want to check with you on the length.

I have had a similar config in mind for some time. One thing is wish to add is a downdraft area for sanding with a piece of pegboard as a top and tied into the TS dust collection below. Any thoughts on this.

Thanks, Rob!

The outfeed table gives me about 4.5' of support past the saw blade, so a full sheet is supported. To the right of the saw, the table is 3.5' wide which is a couple of inches more than the fence rail. The left side table is 32" which, with the saw table itself, is enough to lay a full sheet up, setup the saw, then slide the sheet over to cut.

While I haven't done it yet, I could build a bottomless frame to hold a piece of pegboard, pull the router insert and lift out, put the pegboard over the hole and turn on the dust collector. For now, when I do a lot of ROS sanding, I have a hose connected to the ROS. The ROS plugs into an automatic switch that controls the shop vac.

:wave:
 
Last edited:
Well, a day late and ..... yeah...

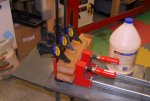
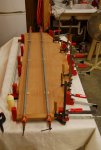
Tuesday's production was OK after I took time to go out and get a sheet of 3/4" plywood for interior panels and shelves. I got the bottom panel mahogany trim clamped onto the veneered MDF panel after a bit more sanding.

btm_frmglue.jpg

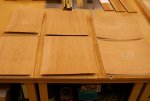
I cut down the 3/4" plywood into four pieces I need for interior support and two pieces to be shelves in the center area of the credenza. Then, I used the panels as guides to cut mahogany veneer to fit.

pnls_1.jpg

All of these panels are oversize. I'll cut them to final dimensions later. The shelves will get a radius cut on the front edge to match the cabinet.

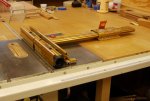
Ventilation for equipment mounted in the cabinet will be via lattice panels in the upper half of the cabinet back. I did a similar thing on another cabinet I built as a commission a few years ago. Maintaining exact spacing to make the dadoes was easy using my Incra fence. When I made the other cabinet, my shop was our two-car garage and I had the factory extension table on the saw with a router in it. All I had to do was turn the Incra 180* and I could use it on the tablesaw. With my current arrangement, I needed to add some 1/4"-20 threaded inserts to the right of my tablesaw as you see here:

incra_ts0.jpg
incra_ts1.jpg

Now, let's see what I can get accomplished today! :huh:
 
Top