Mahogany Credenza - Build Update - Done

I started today with an appointment at my primary care doctor. Gotta try a different cholesterol med to see if we can sidestep the side effects of statins.

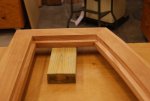
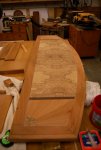
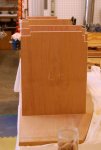
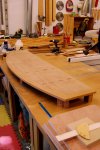
Production continues on our credenza. On Wednesday, I decided it was time to glue the veneered panel into the top frame. I had previously routed a rabbet in the topside of the frame and did some sanding and chisel work to get a good fit. I had cut the rabbet to 1/2" wide; depth was 3/4"+top & bottom veneers. After gluing the veneers onto the panel, I needed to make the rabbet about 1mm deeper.

top_pnl_glu-rab.jpg

top_pnl_glu-all.jpg

I also took the bottom panel and lightly marked layout lines on it as a sanity check against my drawing. So far, it looks like this thingy will fit together after all! :eek:

Today, I'll work on the end frames as well as the interior panels since all are part of the cabinet support.

Y'all have a great day! :wave:
 
OK, for a change I'm posting today's production today! :rolleyes:

Part of my time today was checking final layout dimensions for the first interior panels I wanted to set up. On many (most?) of the larger projects I've built, I sit at my computer until I'm nearly blind drawing each and every component and cross-checking them. This time, I did enough detail in my drawing to determine accurately what materials I'd need. Then, I bought twice as much as I calculated!

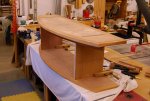
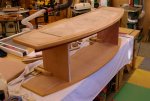
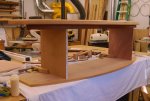
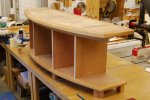
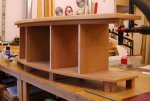
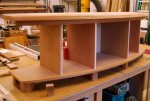
I did a bit of layout testing yesterday, then dove into it pretty good today. I really didn't want to mess up the veneered panels, so I measured everything so many times I lost count, then checked real-world against my drawing. After notching the panels you see in the photos, I had to see how this thing was going to fit. It actually works!!! Take a look! :)

asmbly00a.jpg
asmbly00b.jpg
asmbly00c.jpg

Nothing is actually attached yet. The panels are held in place with handscrews. Gravity (believe me!) is keeping the top from floating away! By the time I finish this project, I'm gonna need a team of horses to drag it in the house! :eek:

Oh, by the way, Larry - I should be starting to apply some dye and sealer to some of the parts next week. We'll have the mahogany dancing before much longer. :thumb:
 
OK, for a change I'm posting today's production today! :rolleyes:

Oh, by the way, Larry - I should be starting to apply some dye and sealer to some of the parts next week. We'll have the mahogany dancing before much longer. :thumb:

well when she comes around the mountain riding those three white horse's i will be waiting to to see her:D:thumb::thumb:
 
I guess I'll have to call this a productive day as well as a productive week. Well, at least I didn't go backward!

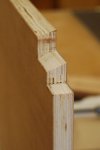
The first photo shows the notches and bevels in the front of an interior panel. The front edge is beveled to match the base trim. There's a beveled notch for the apron and an offset for the top panel trim.
asmbly01a.jpg

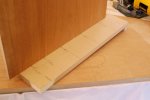
I'm joining the interior panels to the base with biscuits, so I made a story stick to be sure the slots in the panels match slots in the base.
asmbly01b.jpg

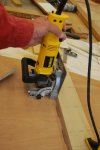
Using the base of the plate joiner as the reference, I align it to the story stick lines and plunge into the base vertically. Slots in the bottoms of the interior panels were made by laying them flat on the bench, being sure that the side of the panel that will be where the story stick is aligned is facing down.
asmbly01c.jpg

After cutting all of the biscuit slots, I stood each panel in place on the base to check alignment and positioning.
asmbly01d.jpg

After clearing the area of sawdust and chips, I placed the base on the blocks that will become the feet of the cabinet and made sure all biscuits were aligned in their slots.
asmbly01e.jpg

Then, I stood each panel in place and set the top panel on them. It's starting to look more and more like a real cabinet now.
asmbly01f.jpg

With the base sitting on the foot blocks, there's a better perspective of how the finished product will look.
asmbly01g.jpg

In this last photo, you can see a sample foot in the foreground. It's simply a flat area on top to accept the skirt segments with a bevel below to lighten the appearance.
asmbly01h.jpg

I've had a long day and I know it's 5 o'clock somewhere! Whoa, it's 5 o'clock HERE!!!!! :beer::bliss:
 
... The work is awesome. I'm very glad you have the thread going. Guess you are aiming for that "100%" mentioned in another thread. ...
Thank you for your comment, Jim!

I think we're wrong not to aim for 100% in whatever we do. I sure try, but I'd rather look at another person's completed project because that's what I see: a complete project that looks great. No matter what piece of furniture or other project I've done, no matter how 'perfect' it might appear, I always know where the warts are and can't help but think of them when I look at the piece! :huh: Of course, I don't go pointing them out to folks! :D
 
That is coming along beautifully. Thanks for taking the time to post the process. We all approach things differently and I always seem to pick up something new by watching someone else. I'm having a good time tagging along for the ride.
 
Monday & Tuesday activity

Monday was spent milling more mahogany as well as working on a seperate project suggested by SWMBO. I'll post another thread on some trivets she wanted me to make. She's also adding a couple of things that her coworkers have requested, but my primary focus is still the credenza. :)

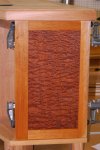
The main thing I accomplished on the credenza on Monday was some sanity checks on some assembly components. In the photo below, I ran dadoes in the frame for an end panel and checked the fit. Since it fit nicely, I had to wipe it with MS to see how it would look.
asmbly02a.jpg
Tuesday morning I finished running the frame parts for the other end panel and glued up both assemblies. Sorry I didn't get a photo of them in the Besseys, but I think y'all have seen stuff in clamps before! :rolleyes:

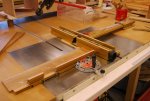
Part of my plan for Tuesday was to start running the material that will become the lattice on the top half of the cabinet back. For this, I moved my Incra LS to the table saw position and put the Incra miter in the slot.
asmbly03a.jpg

I installed an 8" dado set for a 3/8" wide cut on the saw and adjusted the height to 1/4". I'm using 1/2" material to cover the back; plywood for the bottom and lattice for the top.
asmbly03b.jpg

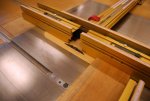
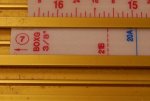
The Incra 3/8" Box Joint template is perfect for this operation. I'll run 3/8" dadoes spaced 3/8" apart.
asmbly03c.jpg

Here's how the first batch of material turned out. This is probably the most tedious part of this project, but will be worth the effort. I have several more boards to run Wednesday before I start ripping them into 3/8" wide strips.
asmbly03d.jpg

Y'all have a great day! :wave:
 
I spent part of my time on Wednesday doing a little clean up and milling a bit more mahogany for the project. Production on the credenza was mostly running more material to make the lattice for the back. Today, I'll take the boards in the photo below and make them into toothpicks. :rolleyes:
asmbly04a.jpg

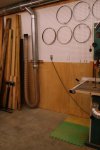
I also spent a short time clearing out the area where I'll put the G0555 when it arrives. According to online tracking, it was scheduled for delivery yesterday, but I haven't heard from the freight company yet. :dunno:
g0555_pos.jpg
 
Catching up

Here's more of the production from last Thursday. I got busy at the end of the day and didn't post at that time. OK, so I procrastinate - but I'm dependable - I eventually get 'er dun! ;)

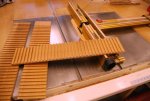
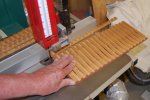
Since My new G0555 band saw hadn't arrived yet, I was forced to change the blade on my 17" G0513 and start making toothpicks. Well, that's what it feels like when I've taken a nice chunk of 8/4 mahogany, resawed it, then do something like this:
asmbly05a.jpg

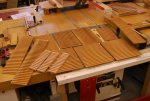
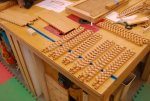
As I cut down the different pieces of stock that I had dadoed, I laid out the sticks to keep count of how many of which length I had. I need 97 vertical pieces, all the same length and 70 horizontal pieces at three different lengths. This photo shows the parts for the center of the credenza and the sections to the left and right of center.
asmbly05b.jpg

Here are the parts that will make of the two, smaller end sections of the cabinet back.
asmbly05c.jpg

I got a little better yield than calculated when ripping the parts. For simplicity, I allowed 7/16" for each 3/8" wide piece, whereas the band saw blade is 0.025" thick rather than 0.0625". May not sound like much, but it yields 1 more 3/8" cut in a 10" board. I know, I know - who gives a care?!?!?! :dunno:

Friday "production' was this, of course.
 
Monday's production was assembly of the mahogany lattice segments that will become the top half of the back of the cabinet. You saw the strips I cut from dadoed boards in an earlier post. I had to cut most to final length today, then begin assembly. At best, this can be described as tedious; another description would be "something nobody in their right mind would do". Agreed!!! :rolleyes:

I cut about 190 strips to be sure I had enough to end up with the 169 I needed to assemble these pieces. In spite of having the remains of a cold to deal with, I managed to place a dot of glue at each of 1,246 intersections across all five segments. I'm glad this day is over! It's definitely time for a barley pop!!! :yes:

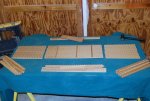
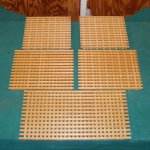
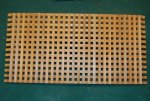
Here are the five completed assemblies.
asmbly06a.jpg

The horizontal face the inside of the cabinet.
asmbly06b.jpg

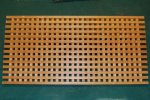
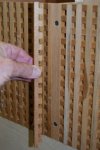
The vertical ribs will face the outside of the cabinet or wall.
asmbly06c.jpg

More fun tomorrow! :wave:
 
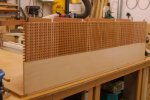
Tuesday's effort was focused on the back of the credenza. Since I completed assembly of the individual lattice panels yesterday, I wanted to fit them to the back and make finish cuts on the plywood panel that goes under them. After getting the lattice in place, I then had a sanity check for the width of the plywood, which I trimmed and set in place. So far, so good.

asmbly07a.jpg


Attachment of the individual lattice panels was accomplished with a strip of a dadoed board that I cut to match the thickness of the 3/4" plywood.

asmbly07b.jpg


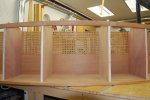
Here's a view from the front of the cabinet.

asmbly07c.jpg

Tomorrow? There's still plenty to choose from! :huh:

As always, comments are welcome.
 
Bill I am just catching up been awol for a while. Wow i had to take two on so many of your pics. But that one of the panel with MS on it still has me shaking in my boots. :eek::eek:

Thank you ever so much for posting how you do it all. I cannot say more than i appreciate it very much.

Its quiet amazing the difference a curve makes to a piece of furniture. But you sure do not take the easy route when i see that rear lattice. :eek::thumb: Its inspirational on its own.
 
... Its quiet amazing the difference a curve makes to a piece of furniture. But you sure do not take the easy route when i see that rear lattice. :eek::thumb: Its inspirational on its own.
The curved front was part of the metamorphosis of the project design. My first drawing was the typical rectangular box. Next was a large rectangular box in the middle with two smaller boxes, one on each end. That's so much like so many commercial units now, so I wanted something different. the next iteration was keeping the small boxes on the ends and making the center a radius front. It was a relatively small step from that to a full radius front as you see it now.

As to the lattice, there is no way a commercial shop would do it the way I did. It's not at all feasible when you're trying to make money! There are many types of lattice or other decorative panels one can buy to accomplish airflow objectives. The reward for me in something like this is that I know it's there and why I did it. :)
 
Top