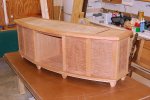
Mahogany Credenza - Build Update - Done

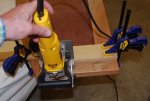
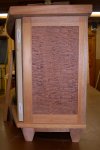
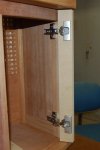
Today's effort was primarily working on fitting end panels to the bottom and top frames with biscuits as well as installing hinge mounting plates to the interior and end panels. After carefully measuring and accounting for all of the offsets involved, I made a story stick to align my plate joiner to get the slots in the right place. So far, so good.
asmbly14a.jpg
asmbly14h.jpg


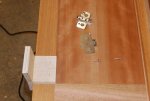
Next was mounting the hinge plates to the end panels while I had them loose to cut biscuit slots. I made a simple jig to set the centerline, 37mm inset and mounting screw spacing.
asmbly14b.jpg

The jig has one side set to 90*. The other is set to 95* to accommodate the angle of the front edge of the two center interior panels.
asmbly14c.jpg

I used 5* wedge plates on all hinge mounting plates to account for the radius of the cabinet front.
asmbly14d.jpg

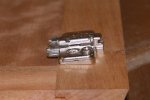
On the end panels, I used a 30* Blum hinge which, when coupled to the mounting plate with the 5* wedge makes the 25* angle I need to make the doors operate properly.
asmbly14e.jpg

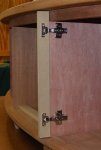
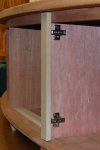
The other doors mount at a 5* angle to match the cabinet, so I used a straight hinge mounted to the plate and wedge.
asmbly14f.jpgasmbly14g.jpg

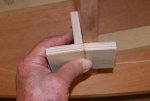
In the three photos above, I used MDF strips to simulate the stiles of the doors. Some adjustments will be necessary before committing the final cuts to the real doors. It's kinda tedious but I'm not taking any chances!

I hope I'm not boring anyone with too much detail! :eek:

Now, if I can just get finished with the "side projects", I'll be able to have some real fun with this thing! :D
 
too much detail!

No worries there. I am enjoying this run. Sharing methods and techniques help us all broaden our skills. Watching how someone else does something gives me ideas of how I might do something; even on a completely unrelated style or type of piece. If we all put out the effort to do an occasional build thread, I think everybody wins.
 
No worries there. I am enjoying this run. Sharing methods and techniques help us all broaden our skills. Watching how someone else does something gives me ideas of how I might do something; even on a completely unrelated style or type of piece. If we all put out the effort to do an occasional build thread, I think everybody wins.

sorry glenn for being a slacker lately:rolleyes::)
 
Thanks for doing this Bill. I have really enjoyed the process.

If I threw up a build thread I think it would be a comedy of errors!:D That and I've got to be the slowest one human being on earth.
 
Thanks for doing this Bill. I have really enjoyed the process.

If I threw up a build thread I think it would be a comedy of errors!:D That and I've got to be the slowest one human being on earth.

Thanks, John. I could have greatly increased my number of posts if I shared "everything" that happens on a project like this! And I ain't no speedy feller, either! :rolleyes:
 
OK, so today it was time to deal with a course correction (can we say error?). :eek:

I had made the doors wide enough to be full overlay on the hinge side. After they were completed and I was using them to help align other components, I realized that I had an issue. Due to the angles involved and the profiles I used, the hinges I had chosen would not allow sufficient clearance for the doors to operate properly. In looking at my options, I realized I actually liked the appearance of a half-overlay due to the reveal it provided. LOML decide she likes the half-overlay as well (whew!). One option would have been to use an articulating hinge (spelled 'bulky') and neither of us wanted that. So, anyway, I either had to re-make the doors or simply cut them down a bit. Trimming the width would be the quickest way to alleviate the problem and, if I didn't like the results, I could do a re-make.

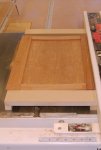
Since the doors have a radius, I couldn't just lay the face on the saw and go for it because one cut on each door required it to be on the convex side. So, I built a cradle to hold the door steady while pushing it past the saw blade. It worked like a charm! The other trimming involved having the concave side down, so no cradle was necessary.
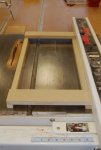
asmbly15a.jpgasmbly15b.jpg


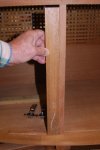
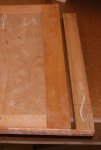
Having adjusted the width of the doors, I started marking for the hinges. I made a simple story stick with the hinge locations marked on it and attached a 1/8" thick indexing tab to the bottom. The index tab sits against the bottom of a door for alignment. When marking the mount location in the cabinet, the index tab allows for a 1/8" offset for the plate.
asmbly15c.jpgasmbly15d.jpg


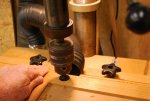
Well, it was time to dive in and drill the door stiles for the Blum hinge cups. No big deal - you have one shot to get it right! Measure - measure -- measure! Set up drill press and fence correctly! Go for it!
asmbly15e.jpg


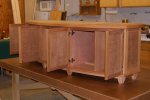
Yep, we all survived! It's good to get past a day like this!!!
asmbly15g.jpgasmbly15f.jpg


That's all for now, folks! :wave:
 
that is some fine woodworking.
the entire build was done with such precision, excellent craftsmanship.
Thank you, Allen. It's coming along well but I still have several things to do before breaking it down to start finishing. There are shelves, drawers and a few cleats to add inside, And, of course, many hours of sanding prior to finish. :rolleyes:

still looking forward to the finish part but am enjoying the ride to get there bill:)
Unless something jumps up and bites me, I should be able to do the initial finish steps on the top next week. LOML is taking off work at noon today and has Monday off, so I'm not sure what the schedule will be. I'm going to work on a couple of small projects this morning to get them out of the way, then do a little shop clean-up. Oh, LOML said she was going to vacuum the shop floor for me this afternoon! Ain't she great? :thumb:
 
Finally got back to my shop today. Had to do a few maintenance items first and sort through some stuff that surfaced during a cleanup Friday night. Also worked on a couple of gift items. But, I did get a little done on the credenza this afternoon. I still have some prep to do on the inside components of the cabinet - fitting shelves and marking for a couple of drawers. One way to ease that process is to remove the top.

I set the top on my finish table with the underside up. It makes sense to me to work from inside out so I started on the bottom of the top! The first step was some sanding with 220 - no fun but necessary! After blowing the dust off with my exhaust blower running, I mixed some BLO/Naphtha in a 1/1 ratio in a glass jar. I used a t-shirt rag to apply the oil starting with the veneer. I used a generous amount of oil and wiped several times to ensure it was evenly distributed. I let it set about 15 minutes, then wiped with a dry cloth, then wiped again about 15 minutes later.

These photos are the before and after of this process. Oh - the photo on the left is 'before'; the one on the right is 'after'. :)

asmbly16a.jpgasmbly16c.jpg
 
The credenza looks terrific Bill.

Just for future reference you could use the hinges they have for thick doors to gain more overlay. The only major difference is you need to drill a 40mm hole for the hinge instead of a 35mm.
 
why do you mix the blo with naptha?
cant you just rub the blo on and even that out with some clean up wipes? Does it have something to do with drying time?
Drying time is exactly the issue. I'm the farthest thing from a finishing expert, but my experience with cherry taught me a few things. It (and many other woods, I'm sure) needs something like BLO to enhance the grain. BLO is heavy and will do a great job but, in my experience, it is much better to help it along with additional solvent so it soaks in quicker and, as necessary, you can re-coat quicker. Years ago, I used MS in the 1/1 mix, then tried naphtha. It may not make much sense, but it seems since naphtha is less 'oily' than MS, it aids the drying process and still 'pops' the grain of whatever I've used. Right or wrong, it works for me!
 
The credenza looks terrific Bill.

Just for future reference you could use the hinges they have for thick doors to gain more overlay. The only major difference is you need to drill a 40mm hole for the hinge instead of a 35mm.
That became the issue in this case. I don't have thick doors and really don't have room for anything more than the 35mm hole on the two outside doors. In fact, after I decided to change to half overlay because we like the look better, I seriously considered changing the outside doors to the smaller, 26mm hinges I used for the inside doors. The great thing about a project like this is having the flexibility to make changes based on real-life situations and an understanding client (LOML). :thumb:
 
Top