A Little Upgrade..

Rails & Stiles.

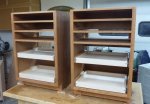
As I have these two lower carcasses on the assembly table I thought I may as well make the doors for them.
Last night I machined a few pieces to close to thicknes and let them sit overnight.
I'm sure they will move just a tad so after 24 hours I machined them to final thickness.
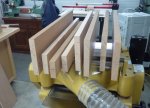
rails and stiles 1.jpg

After all the pieces have been ripped to size I shoot one end .
Then a quick trip to cut all to the right length and then clean that end up on my shooting board. Only takes a couple quick licks with the #9.

rails & stiles 2.jpg

If I remember Glenn B uses his router table for his grooves and tenons.
I just use my table saw.
Push it though one way and then the other. This ensures the groove is in the middle. For doors I go 3/8" deep.

rails & stiles 3.jpgrails & stiles 4.jpg

My tenons are also made on my table saw.
Quick little test block to get the right height and depth.

rails & stiles 5.jpg

This is the joint we are looking for.
Nice and tight line. Tenon goes in easily and does not have to be forced.
But will not just slip out. Fine line between to tight and too loose....

rail & stiles 6.jpg

The last thing I do is take all the parts to my bench again
Here I spend a couple of minutes cleaning up the edges.
Even with sharp blades and a shelix head in the jointer it is amazing what a couple quick stokes will do with a hand plane.
Most time I will use my 4 1/2 for this.

rails & stiles 8.jpg

And after a hour we have the parts for a couple of doors.

rails & stiles 7.jpg

Nice leisurely evening in the shop...
Next time we will do the flat panels for these two doors.

.
 
Last edited:
Flat Panels. Table Saw vs. Jointer

This morning I got the two flat panels done for these doors.

I did one with the table saw and one with the jointer.
Just to see if there is any difference in the joints

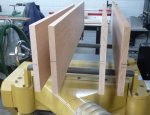
After leaving the four boards over night at about an 1/8" too thick we get them to final thickness this morning.
Keen eyes will see I put marks on the ends to make sure my panel pieces don't get mixed up.

flat panels 1.jpg

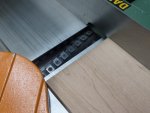
A quick run through the jointer will make these flat if they moved any overnight. I have a 8" General Canada jointer with a Byrd head.
The Byrd head was put in a few years ago. After doing it I wish I had done it sooner.

flat panel 2.jpg

After my panel pieces are cut and ripped to a little oversized I flip them around to see which grain pattern I like the best.

flat panel3.jpg

This first panel I used my table saw to get the cuts I needed.
First piece goes through face up.
Next one goes through face down so we get a mirror image.
Even if the blade is not at a perfect 90 we will get a tight joint.

flat panel 4.jpg

I put a pencil triangle to keep my order.
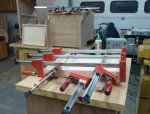
No need for a ton of clamps on this glue up.

flat panel 5.jpg

And a close up of how this table saw joint is going to go together.

flat panel 6.jpg

Next panel I used my jointer to get my glue edges.
Same process again.
First piece with the back against the fence,
and then the next with the face against the fence to give me a mirror image.
Close up of the jointer glue edge.

flat panel 7.jpg

I try not to use too much glue.
Only enough to get a little glue squeeze out that is consistent along the joint.
Lots of debate on how much clamp pressure.
I'm in the camp of not a lot.

flat panel 8.jpg

And after a half hour I scrape the excess glue off.
This is where those old chisels come in handy.
Sure cuts down on the sanding time....

flat panel 9.jpg

So tomorrow morning we will see if there is any difference in these two joints.

Hope everyone is getting a little shop time this weekend.


.
 
Last edited:
A Couple of Doors..

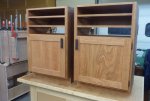
Today we got a couple of these doors together.
And I can finally see some progress on this project...

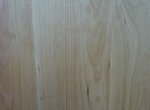
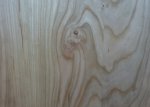
This morning after I sanded the two panels I had a close look at the glue joints.
Both the jointer and the table saw did a bang on job to get a real respectable joint.

Jointer...

doors 1.jpg

Tablesaw....

doors 2.jpg

My panels are just under 1/2" so to go into the 1/4" groove I need a rabbit on the panel.
I don"t like 1/4" panels, they just seem to flimsy.
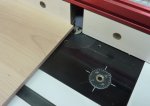
Quick trip to the router table and both are to size.

doors 3.jpg

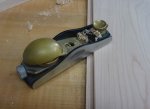
On the back of the panel I use a block plane to knock the corners off.
More for appearance than anything else...

doors 4.jpg

I make sure everything is going to fit together without using a sledge hammer when it comes to my glue up.
You got to hate trying to make things fit when they don't...
Especially when you have the glue on.

doors 5.jpg


I gave the two panels a BLO bath before the glue up.
This will ensure if the panels shrink any that no raw lines are visible.
When I use BLO I cut it with a little turpentine. 2/3 BLO, 1/3 turpentine.
As I wait for glue to dry I got a coat of BLO on these two carcasses.
Starting to really take shape, these are....

doors 6.jpg

After a couple of hours I can glue the doors up.
The BLO is not real dry but dry enough to quickly get the doors together.
I'm not real happy with the panel on the left.
There is a tad of sapwood in it and to make matters worse the whole panel has that pink tinge to it.
I'm thinking this one is not going to turn very brown...:(

doors 7.jpg

Keen eyes will notice that as this is going on I am still putting the faces on more of the lower carcasses.
All the lowers are staggered.
Because of this as I get enough scraps I do another one face now.
Sure cuts down on the waste.
Next will be to do the lower cabinet that will hold all my saw blades.

.
 
Last edited:
Moving right along Gary. It is nice to get glue ready joints off your tablesaw. If nothing else, that is a good reason to take some time and align your saw. Those pullouts are gonna be real handy.
 
Gary i dont see that panel being out of place with the rest of these

http://familywoodworking.org/forums/showthread.php?t=25281

I would like to ask a favor after i went back to check out your other thread again.

I have to say i am breathless when i see the pics of what you got stored away in those cabs. I will pass on the planes ....er for now but would you consider at some point doing a thread on your hand saws.

Here is what i would like to know and i am sure some other guys here can weigh in then too.

What saw is for what and whats its purpose.

My only education on these goes back to school days.

Back then a saw with brass back and hand operated was loosely put a tennon saw.

We used one type on everything.

Only since coming to Canada have i seen the same kinda saw in so many different permutations. Attended a "have a go touch and feel" lie Nielson event held in the GTA a while back but they did not have anyone to do the explaining so touchy and feely did nothing to tell me what LNs variety are for.

Now i see LV has a deal for getting all three of their dovetail and cross cut saws but then i see they also have carcass saws. I get the tooth number being different and the set or no set ie rip or cross cut but i am struggling to get my mind around the need for so many variations with what seems to me like pretty little differences when it comes to teeth. You have an even greater variety. Look there is another side to this, i think these tools all of them in the hand work category are works of art in their own right so i could easily be a tool hog and horde them for the fun of it. But would like to get over the ignorance. Planes i can get it. Just not there yet on the saws.:dunno::huh::eek:
 
A Small Victory...

Small victory in the shop tonight...
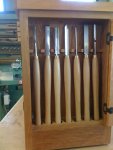
These two are done except for the drawers. They will be done after all the carcasses are in place.
I'm kind of liking the way this is coming together.

doors on.jpg

Short break from the shop for a few days now.
I've got a bum knee that needs a little rest.

Rob, for the saws in the till
All of the ones on the left are dovetail saws or small cross cut saws.
I have this little addiction with these things...
When I have run across one with a real nice handle, it seems to come home with me.
In there is a LN progressive saw that I really don't like.
I also have the new thin plate dovetail saw that I really like. Starts really nicely.(It's not in the till)
But my go to one is the one that Rob Cosman made.
That one has 22 teeth at the tip and starts like a breeze.
It's in the box in the middle. I also have his cross cut saws.
The ones in the middle are tenon saws. Why four?
Well again its the handles.... A couple are cocobolo which are my favorites.
The left ones are carcass saws one rip and 2 crosscut.
These are just smaller tenon saws.
I will cut tenons by hand the odd time, if the project only has a few.
In my stable I have 3 or 4 that I use a lot.

The rest have just appeared for some odd reason.
I think they multiply at night....


.


.
 
Last edited:
Thanks for the answers i understand the multiply effect. I have that disease as well, for a moment i was worried there was something particular i was missing. :)

Sent from my MB860 using Tapatalk
 
Lathe Stand

This upgrade in my shop has been going on for awhile...
I was never happy with my little lathe stand so a year ago it got an upgrade.
Little cherry unit that does the trick now
This one again was a build as you go and kind of evolved as it went on.

lathes 1.jpg

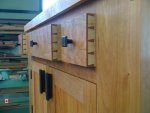
In keeping with the theme of the drawers these were hand cut.

lathes 2.jpg

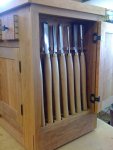
Storage I like. So the ends of this cabinet have tool compartments.

lathes 3.jpg

lathes 4.jpg

I make a lot of bottle stoppers and my little lathe is used for spinning them.
You got to give the mustard monster a break once in a while.:D


.
 
gary, youre lathe cabinet is nicer than most peoples kitchen cabinets.(did I mention that somehwere here before, well, its true)

Id be afraid to accidently drop a chisel or tool and dent one of those cabs.

Its the prettiest and most organized shop I think Ive ever seen.

Thanx for sharing this.
 
Last edited:
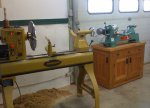
...I should probably turn it on one of these days.

Or better yet, turn on it. :D

That's a sweet-looking cabinet, Gary. You do superb work. :clap: And thanks for including a photo that showed some wood chips on the floor. Now we know you do actually make a mess occasionally. (Even though it's swept up into a nice neat pile.) I figured you HAD to make a mess sometime considering all the stuff you build, but from the earlier pics I was getting the impression that your shop had a magic floor that repels all foreign objects and debris. :D

If I had a shop as nice as yours, my wife would never see me. (Hmm...she might like that idea. :rolleyes: Maybe if I told her that, she'd find a way to buy me a nice shop.) :rofl: Seriously, you've got a great setup there. :thumb:
 
Saw Blade Rack

You got to hand it to Rob Lee....
I drive by one of the LV stores two times a day.
Every time I go in there it is like going into a candy store for woodworking warriors.
Needing a few more slides for a few more sliding drawers I stopped by there first thing this morning.
Right by the check out counter were these little tiny planes.
I've seen the emails on them and in the catalogue. But not in person.
How can one resist?
Well long story short the three can home with me.
Now I can say I've got a few LV planes to go with my LN set.;)
Nice marketing Rob...

mini planes.jpg

You got to admit they are pretty cute!

Today was spent getting three more sliding drawers in to hold my dado sets and saw blades.
Late last night I glued the three up.

blade holder 1.jpg

This morning I mounted the hardware and made the maple holder for my saw blades.
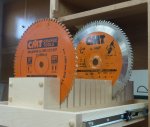
Quick trip to the bandsaw to cut my 3/16" slots that are 3" deep.

blade holder 2.jpg

And now we will have a dedicated cabinet for my blades.

blade holder 3.jpg

Tomorrow we will tear all the hardware off and give a couple more lower cabinets a BLO bath.
Four more lowers to work on and then we can start on some more doors...

.
 
Top