Frank Pellow
Member
- Messages
- 2,332
- Location
- Toronto, Ontario, CANADA
Oak floor lamp with stained glass shade -Finally Completed
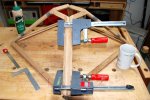
This is a project that I started earlier in the year and put aside for a while. Now, I am starting again and plan to complete the lamp and give it to Margaret (my wife) for Christmas.In this post I will describe the work that I did on the project last spring.I spent a couple of months searching the internet for designs of arts and crafts lamps. Finally, in April, I found a design that I like in a book I spotted at Lee Valley. The book is entitled ‘Boxes, Clocks, Lamps & Small Projects and it is published by Woodworker’s Journal. Here is a picture of a Prairie Style table lamp made from quarter sawn oak with opaque glass from Kokomo Glass of Michigan (who made the glass used by Gustav Stickely).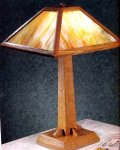 I believe that I can extend the design to make a floor lamp for our living room.The real trick to making this lamp is the many shop-made jigs employed in making the frame for the lampshade. I spent a day and a halfall working on these jigs and used them to make a prototype half-frame out of pine.
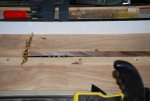
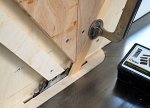
  Actually, this is my second prototype and it is a little too big.Here is the tablesaw jig used to make the mortises and tenons at the 55 degree frame ends:
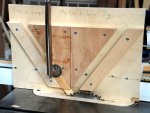
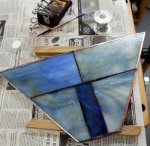
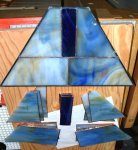
 I took a stained glass course at for 8 evenings at a stained glass store in downtown Toronto and, at the store, I spotted some glass (also made by Kokomo) that will work for the lamp and will fit in with the colours in our living room. Here is a mock-up of the design that I think I will use:
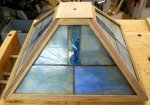
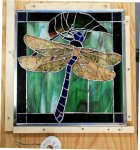
 I think that it is a good compromise between the “glass only” design that I started with and the more complicated “vertical herringbone strip down the middle” design that my stained glass instructor Caroline suggested. I hope that the lamp itself, will be a “work of art” and that this will compliment but not overwhelm the woodwork. So, I built a real panel:

 I do like it and expect that I will do something quite close to this for the real lamp, but I want to show the design to some folks and I want to think about it some more. I do have time, because I will be building the lamp as a present for Margaret next Christmas and I will build the real frame before making the glass panels to fit into it. There are three things I want to think about changing:
This is a project that I started earlier in the year and put aside for a while. Now, I am starting again and plan to complete the lamp and give it to Margaret (my wife) for Christmas.In this post I will describe the work that I did on the project last spring.I spent a couple of months searching the internet for designs of arts and crafts lamps. Finally, in April, I found a design that I like in a book I spotted at Lee Valley. The book is entitled ‘Boxes, Clocks, Lamps & Small Projects and it is published by Woodworker’s Journal. Here is a picture of a Prairie Style table lamp made from quarter sawn oak with opaque glass from Kokomo Glass of Michigan (who made the glass used by Gustav Stickely).
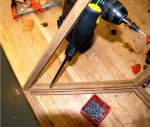
 I believe that I can extend the design to make a floor lamp for our living room.The real trick to making this lamp is the many shop-made jigs employed in making the frame for the lampshade. I spent a day and a halfall working on these jigs and used them to make a prototype half-frame out of pine.
  Actually, this is my second prototype and it is a little too big.Here is the tablesaw jig used to make the mortises and tenons at the 55 degree frame ends:
 I took a stained glass course at for 8 evenings at a stained glass store in downtown Toronto and, at the store, I spotted some glass (also made by Kokomo) that will work for the lamp and will fit in with the colours in our living room. Here is a mock-up of the design that I think I will use:
 I think that it is a good compromise between the “glass only” design that I started with and the more complicated “vertical herringbone strip down the middle” design that my stained glass instructor Caroline suggested. I hope that the lamp itself, will be a “work of art” and that this will compliment but not overwhelm the woodwork. So, I built a real panel:

 I do like it and expect that I will do something quite close to this for the real lamp, but I want to show the design to some folks and I want to think about it some more. I do have time, because I will be building the lamp as a present for Margaret next Christmas and I will build the real frame before making the glass panels to fit into it. There are three things I want to think about changing:
- Is the fact that one can see the light-bulb through the dark blue glass going to be a problem?
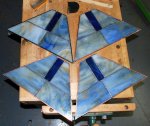
- Should the four light blue and amber panels form a continuum, as they do in the mock-up. Or can they be a contrast as in the prototype
- Should the proportions be changed or, perhaps, should the design itself be changed?
Last edited:





 , I find that I like the stained glass work at least as much as woodworking.