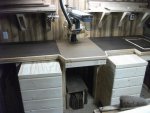
Saw bench/storage

I have the same radial arm saw and would like to build that extension... any plans? Or do you have some dimensions?....

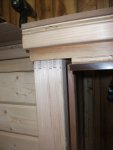
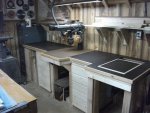
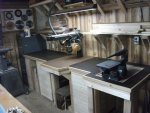
Hi Tom, Yes, welcome! Sorry no plans, just winging it as I go. It's approx 28" from the wall to the front{with-out the bump outs}, and 36" in front of the arm{bump-out not built yet}, and it's 36 & 1/2 high to match my table saw and other benches, also a hair over 9' 2" in length. Wish I would of surfed around some myself, to see what others have done...I get inspired from others work, but have a bad habit of just jumping into things :eek: aw well it's all fun! :D
 
I'm looking to build a stand for my 1950s Craftsman 113.27520 table saw. I'd also like to build extenders to either side of the saw, giving it a much larger workspace. Any suggestions? I've seen some excellent work, but no plans or hints on how to do it... I'm pretty new to woodworking. Thanks!

Tom

I'd start by looking around the net.

http://myweb.cableone.net/jimnbeck/tabsaw cabinet.htm

http://www.shopnotes.com/plans/table-saw-cabinet/

http://www.binkyswoodworking.com/TblSawCab.php

http://lumberjocks.com/gwurst/blog/4414

http://www.blackcatwood.com/Tablesaw_Station.html

http://www.woodcentral.com/shots/shot309.shtml

http://forum.canadianwoodworking.com/showthread.php?26835-Table-saw-workstation

http://canadianhomeworkshop.com/2087/project-plans/make-a-tablesaw-and-router-workstation

http://sketchup.google.com/3dwarehouse/details?mid=f997c292ac8ae55fdaca450dd7f093


After your research pick the features from several cabinets that you've seen & Using a pencil & paper or Sketchup or other CAD program combine them in a way that fits your contrastor's table saw & the way you work.

Here is the one I built.
 

Attachments

  • This will change the height of you contractors-saw.jpg
    This will change the height of you contractors-saw.jpg
    22.9 KB · Views: 36
Slowly but surely...

Made the top{s} removable just in case
16.jpg
the other side is screwed from the outside

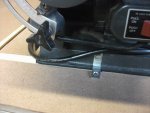
as far as locking, I lucked out, I set it up to only flip forward and back, not in a complete loop so to say. The machine sides plywood base, I left extended and use that as a stop against a section of 3/4" ply that I attached to the front once I had the measurement to keep it flush with the bench-top. The other side is kept from dropping with an L-bracket that I attached with a self-tapping screw into the scroll-saw. The center of gravity keeps the flipper from wanting to 'pull' back on itself, and the L-bracket seems to hold it in place well enough to do it's job.
17.jpg 18.jpg 19.jpg

Anyways...I can quit burning brain cells and finally, get on to finishing up the rest of the bench.
Here's a little vid of it...{click below}
[URL=http://s946.photobucket.com/albums/ad305/KennysShots/?action=view&current=FlippedMyTop.mp4][/URL]
 
Still at it...got the top down and first coat of satin poly on it. The 1/4" MDF is just held in place with some 5/16 brad nails, should make it easy to replace when need be. Built another roll-out drawer cab...plenty still to do, fence, drawer pulls, storage under the scroll saw etc., think I'm going to leave the west end open as is for sheet shorts storage...and need to figure out what I'm going to do with the space under the saw itself... actually getting semi-organized :bliss:

20.jpg

21.jpg

22.jpg
 
:rofl:Good point Bob. :thumb:

Ken your shop is looking great and you just confirmed something for me. First i always wanted the wood panel look so thats definite take away for me. Looks great your walls. Then the roll out you got me sold.

I been thinking this one over for so so long. Building dedicated cabinets and draws are fine. But come time to reorganize and its not that easy. With mobile draws its a piece of cake.

I never settled on fixing my tops onto my double draw sets. But now i am gonna put a thin masonite layer over and build a frame to hold the bench top surface and make my draws mobile. You just sold me the idea.
Thank you ever so much.
 
Top