Walnut Floor Lamp.... W.I.P.

Bryan Cowing

Member
Messages
728
Location
Ridgetown, Ontario, Canada
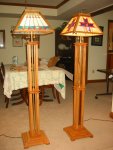
Swmbo has been wanting a nicer floor lamp. We shopped local stores, anything that she liked ran $300 to $400+ . Found some wood ones during a online search Swmbo seemed to like, so I started looking for plans to build one. Very few plans out there! I did find this one during an image search which looks neat so I got started on the top.
The-Floor-Lamp-112.jpg
IMG_5243.JPG
 
Hey Bryan, here's a picture of a floor lamp that someone sent me quite a few years ago. Probably at least 7 years ago. These pictures were posted on another forum and I asked the person that made them if he would send me the pics and plans. He didn't have plans, at least not that I remember, but he sent this pic. Maybe your wife would like this design.

floor lamps.jpg

It seems it would be pretty easy to build. The only hard part would be finding someone to do the leaded stained glass shades. I was going to build them using some of the cherry that I harvested from my property, but never got around to doing it. Anyway, if you do build them be sure and post pictures.
 
No dimensions Carol. If my memory serves me, which it doesn't very often anymore, they were about 60" high.

I think I was going to do them to a height of 60" so it could go behind our couch and light the entire couch.

I would think you could even make a table lamp that looks like them, just cut down the sizes.
 
IMG_5248.JPG
bryan, Id be interested in knowing if you are going to pass a tube to hold the electrical wire through the center of it, and how will you drill out the center?
Laminating 5 pcs of 1" ruff stock for the 4" x 41" turning blank. This is for the centre section, & left a 3/8" gap for the electrical wire. I cut 3/8"x2" piece to plug the ends for the lathe work.
 
thanx, was wondering if you were going to glue up or use solid stock, since I couldnt figure out with solid stock how youd make a long section without drilling.
now that I got that, Im figuring you are going to drill out the centers of the top and base pieces, then attach them to the center piece with dowels? dominos? biscuits?(dowel screws are out)
 
Last edited:
thanx, was wondering if you were going to glue up or use solid stock, since I couldnt figure out with solid stock how youd make a long section without drilling.
now that I got that, Im figuring you are going to drill out the centers of the top and base pieces, then attach them to the center piece with dowels? dominos? biscuits?(dowel screws are out)

Actually Allen If I were doing it I would turn a mortise in the top and base piece and then a tenionin each end of the center section.:thumb:
 
IMG_5251.JPGIMG_5252.JPG
thanx, was wondering if you were going to glue up or use solid stock, since I couldnt figure out with solid stock how youd make a long section without drilling.
now that I got that, Im figuring you are going to drill out the centers of the top and base pieces, then attach them to the center piece with dowels? dominos? biscuits?(dowel screws are out)
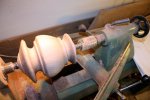
I turn a pin and drill a socket to attach the pieces. You can see the 1.5" pin in pic #2. I have the piece ready for fluting, just have to go get a special double ball bearing router bit at LV.
 
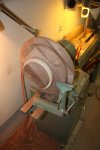
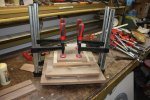
started on the base! Clamped up a stack of walnut pieces! Dug out the seldom used lathe attachments! Guess buying a used lathe with a bunch of attachments finally paid off! Think I used the outboard rest to make a bowl or two 15 yrs ago, LOL!!
IMG_5253.JPGIMG_5249.JPG
 
Gone as far as I can, till I can get a fluting bit. Temporally put parts together to see how it looks. Still have one socket to drill for the top piece to set in, but have to wait till fluting is done.
IMG_5257.JPG
 
I enjoy all of your builds bryon. You dont dilly dally around and always use precision planning and technique to get your projects done in a short time and turn out such beautiful work.
thanx for always sharing your craftsmanship.
I always look foward to your projects.
 
Top