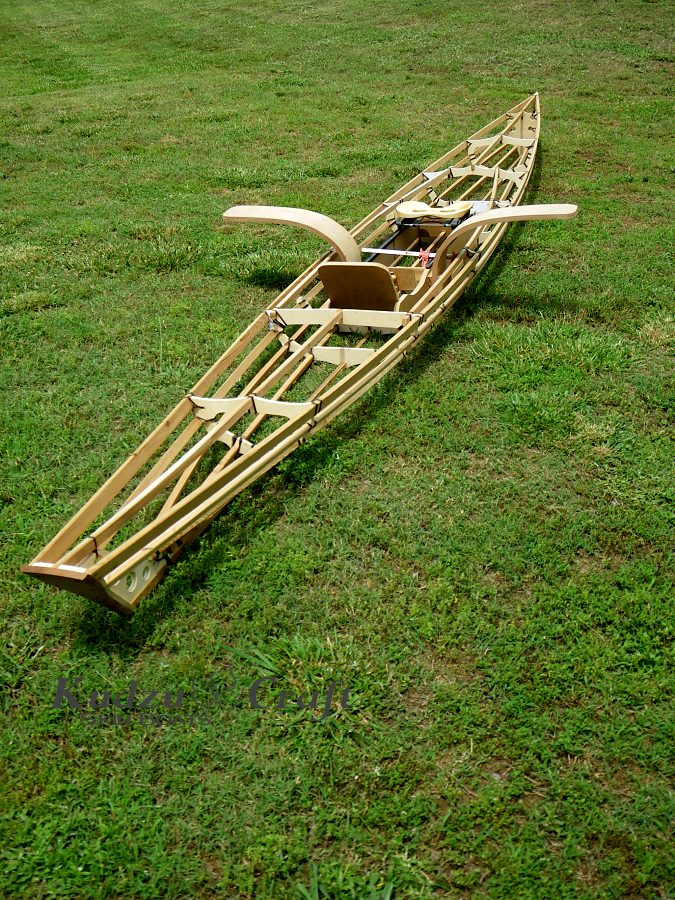
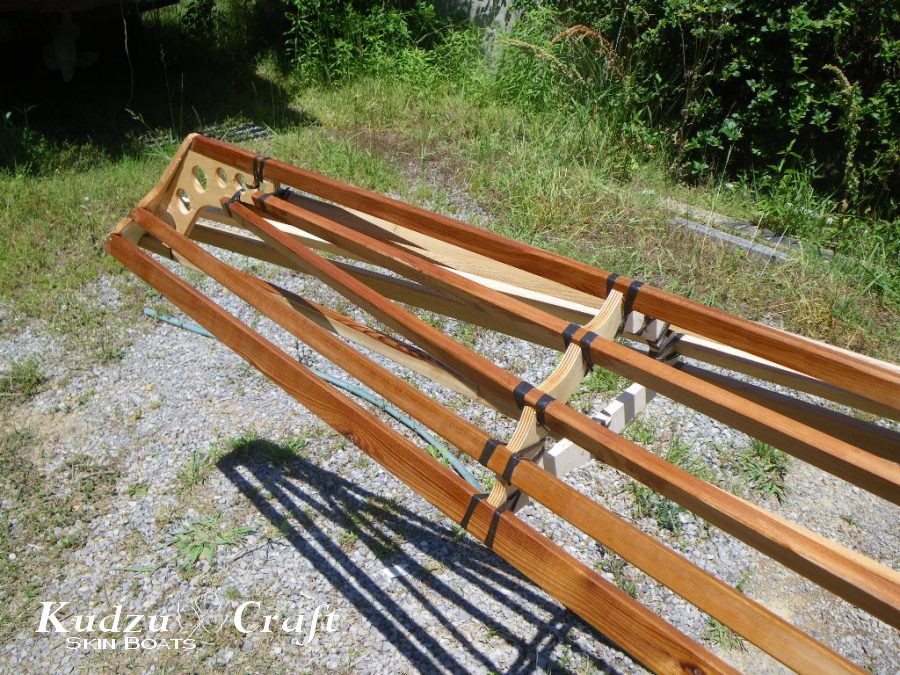
If you have been following along you know that the sliding seat design was done. The only thing missing was the outriggers for it. I have had several ideas on how to build these and had drawn several versions, but there is nothing like taking it from the computer screen to wood. It doesn't always work the way you had in mind!
One my goals in nearly all my designs is to keep is simple so that most anyone can build it. At the same time I don't want it to look like a backyard project that was thrown together. I want something that looks really good when your done.
VERSION #1 (Too ugly)
I started with a simple and old design for a boomerang shaped wing with two simple supports that would attach to the frame near the feet. On paper it looked OK, not especially attractive but sometimes form just needs to follow function. So I built it, clamped it together it looked promising
Until I put in the boat!
HOLY UGLY DUCKLING, BAT MAN!! That thing looks like it is trying to grow wings and fly!
VERSION #2 (Too hard)
As the old saying goes,"Life it to short to spend it in an ugly boat." So this had to go. Another idea I had played around with was cutting the outriggers into three pieces and joining it together at angles. It would look like a Gull wing and shouldn't be too hard to build .... so I thought!
I did some quick layouts, recut the pieces from the first version and started to put it together.
It didn't take long to realize assembling this was not going to be easy for anyone. By the time all the braces were added to make it strong enough it was going to be a big job to build. Bottom line was there simply was not advantage to this version.
There was really only one good way to build this and I had been trying to get around it.
VERSION #2 (THIS ONE IS JUST RIGHT)
Time to build a form and laminate the outriggers from strips. I was trying to avoid this because I was afraid it was to complicated for inexperienced builders. I have built a lot of laminated coamings for my kayaks and while they are not particularly hard, they are very aggravating.
To my total surprise this was nowhere near as hard as I had expected. Anyone with any skill could do this. And to think of all the time I wasted trying to get around laminating them.
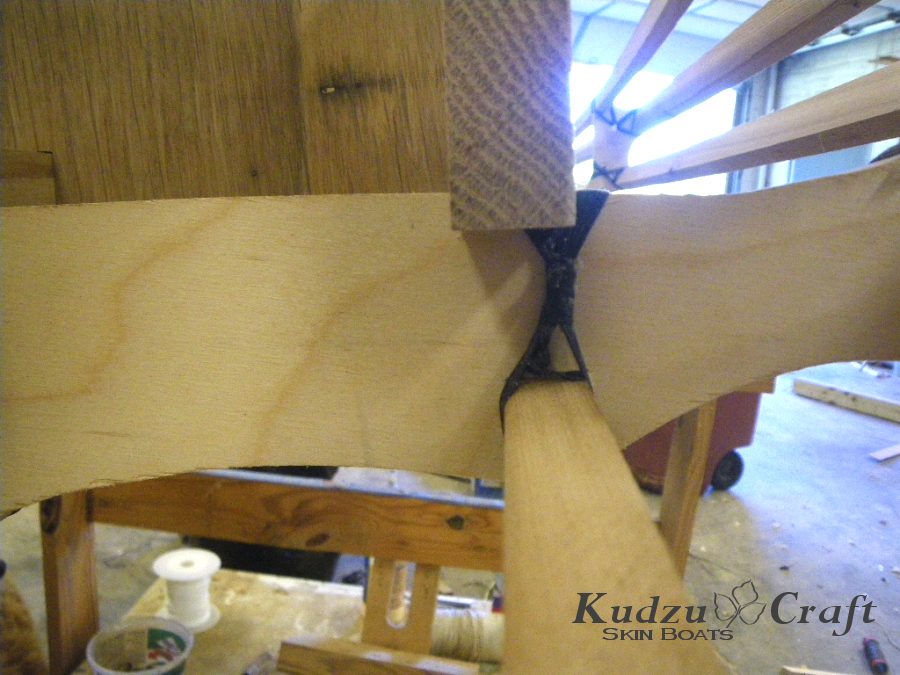
I drew full size patterns. Cut out two pieces of plywood and used short lengths of 2x4 as spacers and clamping points. These were simply held in place with drywall screws.
For the lamination's I used 3mm Okoume plywood ripped into strips. I thought about ordering maple veneer used for making skateboards but I had the plywood in shop and no use for it. So if it failed I wasn't out anything. I applied glue on each piece and clamped 6 strips on the jig and started bending and clamping them around the form. I was surprised at how easy it was to bend 6 layers and clamp it in place. A second set of hands would necessary but it would have made it easier though. I was totally surprised at how fast this went.

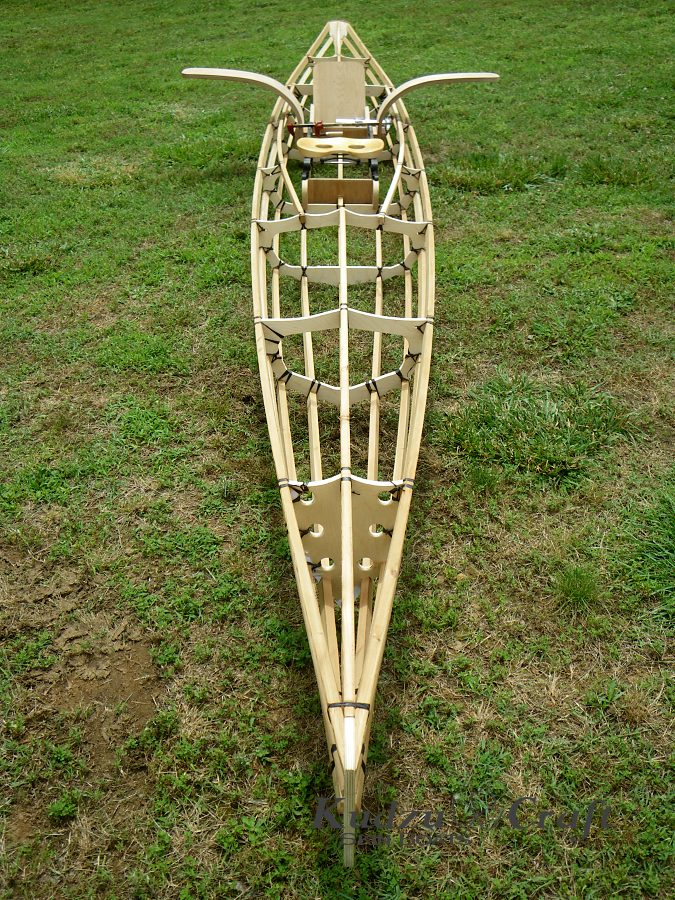
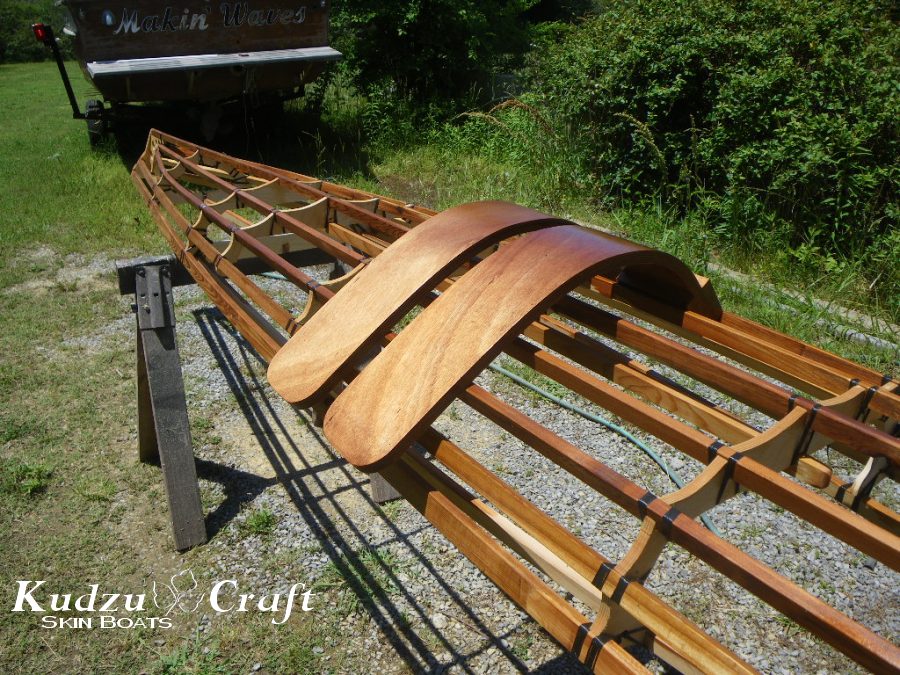
First piece straight off the mold and on to the sliding seat. I had to see what it would look like.

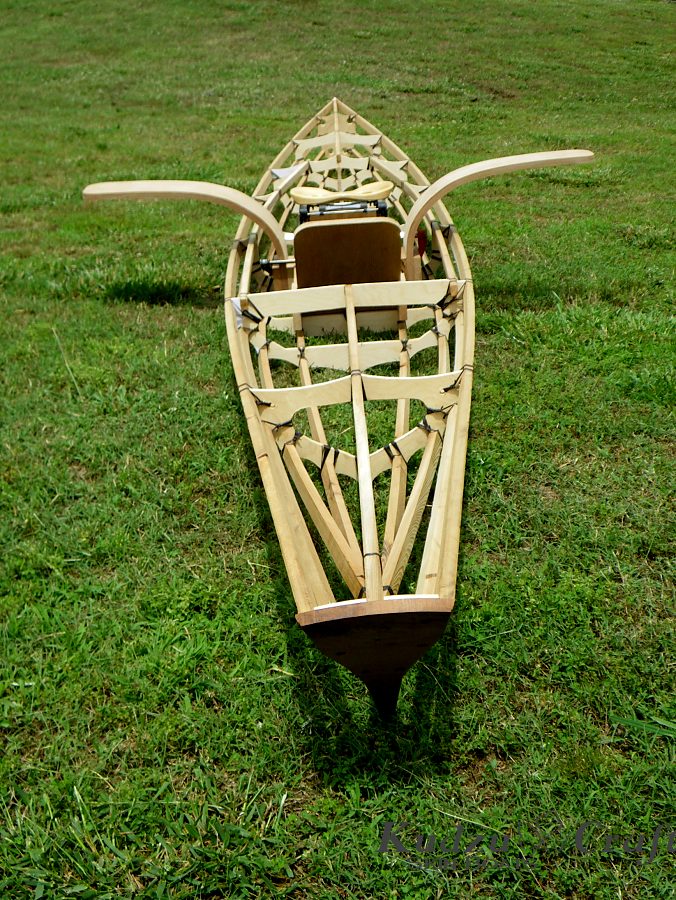
Here it is in the boat. You can see that is it very close to the seat. I have to add a spacer behind it but that was part of the plan all along. I wanted to make sure that I had the clearance that I expected and that there were no surprises before I did anything else.
I had planned on laminating it to a full inch of thickness but I was surprised at how rigid it was at this thickness. There is going to be some give under a hard pull but since this is a recreational boat and not for competition I don't think a little flex will be a problem. If I were racing I would want all my energy gong to moving the boat, not bending wood. The good thing is, if this does present a problem, I will build some stronger one and replace them.


 What type of glue did you use for the lamination?