Ken Cook
Member
- Messages
- 3,798
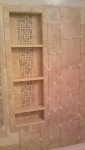
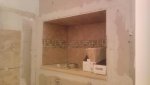
That 'niche' looks like it's custom made for a flat screen  ...good to see more progress being made!
...good to see more progress being made! ...good to see more progress being made!

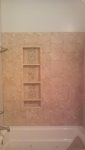
I am a little concerned about the wooden shelves and water etc. re shower? What you sealing them with ? Is that not going to be a permanent maint issue?