crosscutting little pieces

Cynthia,
If you are going to be doing a bunch of this kind of cutting, I suggest you do your best to find a Millers-Falls Langdon-Acme miter saw. it's hand-powered (well, arm and shoulder-powered, too), accurate as the day is long, darn near noiseless and cheap. I found mine at a garage sale for $14. It's more accurate than your miter saw. They are no longer made, but they show up at garage and estate sales, CraigsList and eBay for reasonable prices.

they look like this:

View attachment 71488

I agree and nice find Bruce!
 
Ryan, that's a great link! Never heard of woodgears. I didn't quite understand what he meant about his saw blade though, cutting the dado. Does he mean you need a special blade (other than a dado set) if you want to cut a dado with a single blade?

Thanks Bruce. I think that's a great idea. I actually have (what I think is) a pretty good one, but I haven't figured out how to anchor it to the work surface other than permanently. :huh:
 
Ryan, that's a great link! Never heard of woodgears. I didn't quite understand what he meant about his saw blade though, cutting the dado. Does he mean you need a special blade (other than a dado set) if you want to cut a dado with a single blade?

I think he was just using that blade because it gives a flat bottomed cut. Many of the dado blades leave "wings" where the edges of the teeth stick up slightly higher than the center so it cuts somewhat like V (vastly exaggerated). The flat top is nice here because you don't want the guide to wobble, although in practice I'm unsure how much difference it would actually make.
 
All you need to do is screw the base of the miter to a piece of plywood and then clamp that to your bench when you want to use it.
 
A one more idea for the record (Rogers reply spiked this in my memory banks).

These are assuming you have trouble cutting square with a hand saw. Not disparaging any handsaw skills you may have, but we can all use a little help sometimes :D

You could make/use a bench hook (they are normally "90" or "eyeball accurate" only, but can be made to have some angle guides built in). And example with an angle system is available here

or a saw guide

Once its cut you can get really precice on the angle with a shooting board. Even a really good saw cut is still comparatively ragged edge from what a plane will do, so for a super precise fit further refinement can be nice. A plane works better than sanding because sanding rounds the edges.

What the picture frame people use (or at least used to use) is a mitre cutter, having one of these is on my long list if I see one CHEAP at an estate/yard sale sometime (I don't want it bad enough to pay normal prices :D). These (if sharp and well tuned) leave a comparable cut to what you get from a plan off of the shooting board.
 
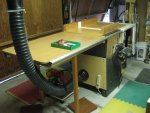
Well; the shop is a real disaster; that means "not practical to take pics." So I will see if I can find pics of my sled to add to Cynthia's confusion. Well again. It seems that some lazy woodworker has not transferred his ww pics to the new (to the shop) computer.I'll check back in later.Enjoy,JimB
 

Attachments

  • TS not finished but functions.jpg
    TS not finished but functions.jpg
    114 KB · Views: 11
Last edited:
O.K. Here I Are Again,
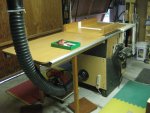
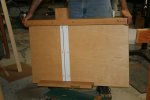
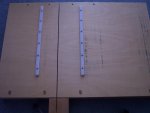
Pic 1: CCS on dolly. Top view

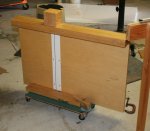
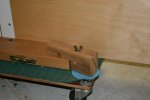
Pic 2: Foot latch to hold CCS on my sled dolly

Pic 3: Shows top with Zero Clearance (known as 0C from here on). The handle is a great asset when placing CCS on to TS top.

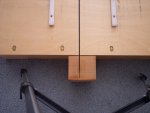
Pic 4: Pic of 0C in the block.

Pic 5: Shows which saw blade it is for label on OC in the block.

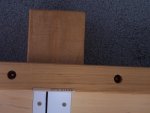
Pic 6: Bottom view of "protection block" showing how it looks if you forget (only once) to stop the cut on schedule.

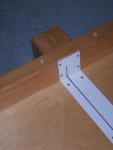
Pic 7: The white strips are Ultra High Density runners on the bottom of the sled.

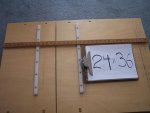
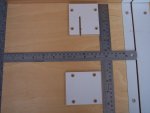
Pic 8: This just shows the dimensions of the "block" 0C insert. This CCS is 24 x 36 inches. Glenn made this for me back when I first became interested in wood working. It is one of my "Treasures," not just because Glenn made it but because it is so fantastically useful.

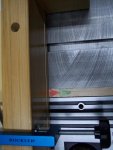
Pic 9: These are my "Count Down" markers. Green says, "Hey. You are getting near." The Red says, "You are through the cut; don't put another slice in the "Protection Block."

Pic 10: These pics are old. This was when this saw was being tuned and having the router table attached. I put it here because it shows how the sled slides over the routing table. In pic 10 the sled has already crossed over the red and green markers. This is not a pic of an actual cut; it is just to show the marks. The first indication of "Count Down" is when the narrow part of the green first appears under the sled fence. The green gets wider as the sled continues. Then it shows the narrow part of the red. By the time the wide part of the red appears the cut is finished.

I would not be without the Cross Cut Sled! I keep saying that I am going to make a smaller one for small work. This one also works for small stuff so a new smaller CCS just keeps being put off into the future.

If you make a CCS, you will never do without one again! The accuracy of cuts and the repeatability is wonderful.

Enjoy,

JimB
 

Attachments

  • Crosscut Sled 1.jpg
    Crosscut Sled 1.jpg
    102.9 KB · Views: 15
  • CrossCutSledBottom.jpg
    CrossCutSledBottom.jpg
    52.6 KB · Views: 15
  • Dad-sled-2.jpg
    Dad-sled-2.jpg
    105.8 KB · Views: 13
  • Dad-sled-4.jpg
    Dad-sled-4.jpg
    105.8 KB · Views: 13
  • Sled Photo Description Document 004.jpg
    Sled Photo Description Document 004.jpg
    45.9 KB · Views: 13
  • Sled Photo Description Document 007.jpg
    Sled Photo Description Document 007.jpg
    50.1 KB · Views: 12
  • Sled Photo Description Document 008.jpg
    Sled Photo Description Document 008.jpg
    55.3 KB · Views: 13
  • Sled Photo Description Document 010.jpg
    Sled Photo Description Document 010.jpg
    32.2 KB · Views: 12
  • Sled Photo Description Document 013.jpg
    Sled Photo Description Document 013.jpg
    35.4 KB · Views: 12
  • Sled Photo Description Document 014.jpg
    Sled Photo Description Document 014.jpg
    65.7 KB · Views: 13
Last edited:
I meant to start with pic #2. So here I will add pic #10 which did not show because I started 1 pic too soon. You just have to remember, "When you get old your brains leak out."TS not finished but functions.jpg
 

Attachments

  • Sled Photo Description Document 015.jpg
    Sled Photo Description Document 015.jpg
    85.7 KB · Views: 13
Last edited:
I learned an unpleasant novice lesson yesterday when I tried to crosscut a thin strip on the miter saw which was set up because I was using it for other things. I had a strip about 3/4" X 1/2" by about 3'. When I tried to cut it, it jumped up and splintered. So how/where are you supposed to crosscut thin strips? I just took out a little hand saw and did it by hand.....:rolleyes: Thanks folks.

Sandwich it in between two other pieces of something thicker and more rigid.
 
My father had one of those in his shop and it was a very useful tool for him. Years after he passed I saw it at a garage sale. I inquired about the price but was told it was not for sale. :(
 
Cynthia, et al,
If you're still interested in dealing with small parts, there is a good, though short, article in the latest Woodsmith magazine, pp 44-45.
 
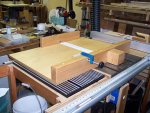
When I made my Table-saw sled I made it just a little longer on the left side this allowed for a stop block on the bottom of the sled & its mate on the edge of the Table-saw wing. The sled will only go far enough to cut threw the material & then is stopped by the stop block system. My front fence is 2 3/4" pieces of plywood & the sled stops long before it comes out the front of them so no hazard to the hands at all.
 

Attachments

  • sled fence 2.jpg
    sled fence 2.jpg
    58.3 KB · Views: 5
Top