Kitchen Hutch - Build Thread - Done

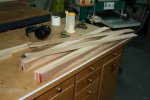
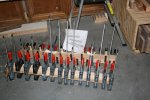
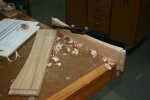
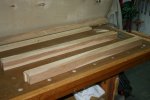
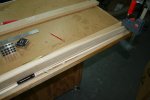
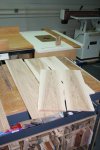
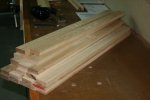
Doesn't seem like much output for the past few hours I've put in. Figure selection for those parts that will be facing the viewer ate up about a third of my time. I did get the drawer fronts selected and broken out into oversized pieces. These are some of the frame / leg parts. The legs are glued up blanks so I hope to get them into the clamps before I call it a day.
Kit-Hut-(5).jpg

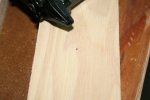
Hmmm, that went faster than I thought. I shoot 1/2" pins, left proud, into the surfaces of large areas that will be slick with glue to prevent creep during glue-up.
Kit-Hut-(6).jpg

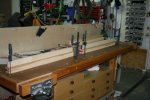
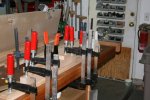
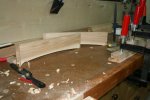
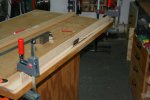
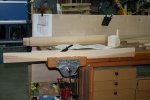
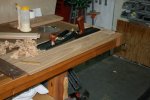
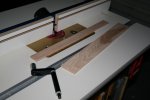
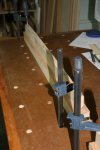
Some bowed cauls and a workbench combine to make a nice big clamp.
Kit-Hut-(8).jpg . Kit-Hut-(7).jpg
 
Last edited:
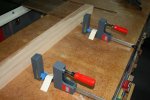
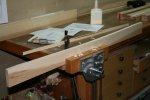
Some progress today. More vertical-parts glue-ups and I put the arches on the lower side rails. The front leg blanks get an 1/8" veneer across the front face. The tape keeps the glue off the clamps and the strips of paper are shims to assure that the veneer is proud on both sides of the blank.

Kit-Hut-(9).jpg . Kit-Hut-(10).jpg

This is a case where you want a nice even bead of squeeze out.

Kit-Hut-(11).jpg

What's that old saying?

Kit-Hut-(12).jpg

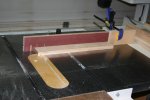
While those set up I clamp some other vertical parts that are glue-ups. While that stuff is setting around I mark the tenon shoulders on some rails and cut them on the tablesaw. This method means there's only one setup for all 32 cuts.

Kit-Hut-(13).jpg . Kit-Hut-(14).jpg . Kit-Hut-(15).jpg

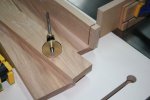
There are a lot of ways to take care of the cheeks on a tenon and I pretty much use them all based on what is available at the time. For the lower rails that require an arch, I rough it out on the bandsaw. Since I was there I just did the cheeks on the bandsaw as well. Then I clean up the tenons with a shoulder plane and the arches with a shave.

Kit-Hut-(16).jpg

A different thread where Larry was discussing arches led me to alter mine a bit; I left 1/2" of meat at each end and increased the arch height by about an 1/8". The last pic shows how I am going to try to use the color variations in the pecan to an advantage.

Kit-Hut-(17).jpg
 
Last edited:
:lurk:

This is pretty interesting, we have all hickory cabinets in the ketche and I have a spot on the side that's just crying for a hutch (albeit a wee bit different layout on the interior than this one I think), I'll have to check the price-o-puchkawn around here and see if its competitive..
 
So frustrating; got stuck on the phone with work for a couple hours and I'm not even on-call :(. Anyway, the leg glue-ups came out OK. I just need to cut them to final dimensions before mortising them. The long arch on the front lower rail is faired with a shop made fairing stick. I then bandsaw out the waste and clean it up with a shave.

Kit-Hut-(18).jpgKit-Hut-(19).jpgKit-Hut-(20).jpgKit-Hut-(22).jpgKit-Hut-(21).jpg
 
Took a few days off to go visit mom and dad; had a great time. Back at it today. I really thought I would get the panels resawn and put in the frames by end of day . . . . Oh well, I got the frames done anyway. I guess the panels will have to get done tomorrow.

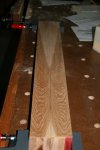
Here's an example of how I am trying to use the figure to my advantage. This is the front view of the two front legs side by side.

Kit-Hut-(23).jpg

You gotta love a shoulder plane.

Kit-Hut-(24).jpg

I was shooting to have both lower sides in the clamps by end of day Sunday. I will have to get pretty lucky to hit that goal as the mortises for the front and rear stretchers are yet to be cut. If I don't make it, I'll just set a new goal :D.

Kit-Hut-(25).jpg . Kit-Hut-(26).jpg
 
Last edited:
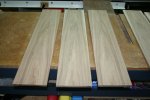
Sorry to be so granular but, it helps me keep up the momentum. Here's the panels for the lower right side; the outer panels are butterflied and the center is one I liked to complete the group. The second pic shows an example of what I was talking about when I said that pecan can provide contiguous figure when butterflied but, not necessarily a close mirror image like we may be used to. The three lower boards are resawn from the same board. The two short ones will be the upper side panels.

Kit-Hut-(27).jpg . Kit-Hut-(28).jpg
 
and today we get a peek at another tool that i didnt know you had ??:) how much do you use the edge sander glenn? and when you say butter fly whats the different between that and book matched?
 
and today we get a peek at another tool that i didnt know you had ??:) how much do you use the edge sander glenn? and when you say butter fly whats the different between that and book matched?

The Grizzly G0529 and the Jet oscillating belt were my step up from the Ridgid 4224 and my C-man disc/belt sander. When I bought the Ridgid, I thought I needed a spindle sander. I discovered what I really wanted was an oscillating belt. The Jet was third on my list as it is lighter weight and faster in speed than the Vega or Grizzly offerings. Rockler had it priced "too good to pass up - online today only" during a Memorial Day sale last year. As many said during my initial research and inquiries; I don't know how I got along without it.

Book-matched was what I was trying to think of when I said butterfly. I don't know if they mean the same thing but, I meant the same thing; I just couldn't get the old thinker a-goin'.
 
Sorry to be so granular but, it helps me keep up the momentum. Here's the panels for the lower right side; the outer panels are butterflied and the center is one I liked to complete the group. The second pic shows an example of what I was talking about when I said that pecan can provide contiguous figure when butterflied but, not necessarily a close mirror image like we may be used to. The three lower boards are resawn from the same board. The two short ones will be the upper side panels.

View attachment 72932 . View attachment 72933

I found that out also Glenn when I did phase II of my kitchen. What I ended up doing was cleaning up the side that was going to show just enough and taking the rest from the opposite side to get to the thickness needed. I also made sure that the grain pattern as far as color goes was consistent on both sides of the board so you don't end up with what happened to the bottom 3 boards in your second photo.
 
What I ended up doing was cleaning up the side that was going to show just enough and taking the rest from the opposite side to get to the thickness needed.

Amen to that. With pecan that isn't all bleached out it is all about the "show" side :). Here I'm doing a bit of that. The show side is a flat panel but I don't want them to seem flimsy. I 'raise' the back to get the 1/4" edge I want to fit the grooves. I could have just cut a wider groove in this case but, there were a lot of grooves to mill, most at 1/4", and I wanted to do nearly all of them with one setup.

Kit-Hut-(29).jpg . Kit-Hut-(30).jpg . Kit-Hut-(31).jpg

Sure is quiet around here this morning. I haven't woke up any of the tailed tools yet. I don't run reference marks for the long sides, I just use something of a known width to check my progress. I mark a stopping point on the short sides in red pencil so I don't overshoot and end up with rattles.

Kit-Hut-(32).jpg . Kit-Hut-(33).jpg

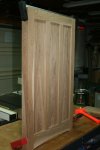
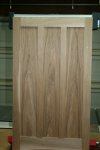
So the panel is eased at the back for fit but, looks flat in front. As mentioned I have used a more pronounced figure for the panels to make them stand out from the legs and stiles. There always seems to be more joinery than I recall from the design. Of course when I go back and check the drawings, all those mortises and tenons are there :doh:.
 
Last edited:
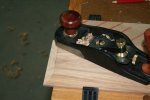
Amen to that. With pecan that isn't all bleached out it is all about the "show" side :). Here I'm doing a bit of that. The show side is a flat panel but I don't want them to seem flimsy. I 'raise' the back to get the 1/4" edge I want to fit the grooves. I could have just cut a wider groove in this case but, there were a lot of grooves to mill, most at 1/4", and I wanted to do nearly all of them with one setup.

Smart. Don't thickness the whole board, only where you need to.


Sure is quiet around here this morning. I haven't woke up any of the tailed tools yet.

I enjoyed the pictures of your planes raising the panels. I think most people would have done that on a table saw; not me but most people. Of course, you can sneak up better to the correct fit with a hand plane.
 
I enjoyed the pictures of your planes raising the panels. I think most people would have done that on a table saw; not me but most people. Of course, you can sneak up better to the correct fit with a hand plane.

Did I mention that I blew a start capacitor on my cyclone yesterday and have had to switch to doing this all by hand till I get that resolved? :doh: That has left me with one panel mostly done instead of two panels in the clamps for glue-up. This is not a big deal. I want to check the local lumber yard for some pecan for the panels on the left side anyway. The stuff I have is good but, I would like . . . better. Anyway, here's one:

Kit-Hut-(34).jpg . Kit-Hut-(35).jpg
 
Last edited:
My how life seems to throw us challenges to confirm we are alive and paying attention. DC is back online, LOML's car fire has been dealt with and a touch of the flu has come and gone. Still, my progress to date has not fared as well as the project interruptions. The power company even came by and banged on the door to warn me that they were killing power for awhile for an emergency repair. I thanked the guy for letting me know and shut down as I hate surprises when I'm in the shop :D.

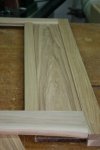
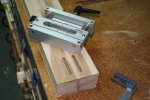
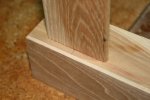
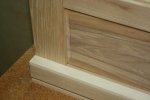
Once again the Mortise Pal has earned its keep. It takes just minutes to make more tenon stock than a given project demands. This means I am accumulating a stock of tenon . . . er . . . stock. Both side panels have been fitted and the floating tenons are for the long stretchers that tie them together to form the lower carcass. If I get all the long stretchers fit today, I'll feel pretty good.

Kit-Hut-(36).jpgKit-Hut-(37).jpgKit-Hut-(38).jpgKit-Hut-(39).jpgKit-Hut-(40).jpg
 
Top