Built in Entertainment Center Project

Making a little more progress. Work picked up, so weekday progress is difficult, as it's hard to heat the shop for just a couple of hours in the evening.

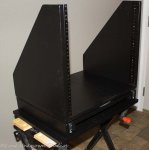
But I've got the component rack finished, and am starting on finishing the cherry ply carcass sides. I figure finishing the carcass panels first, then gluing them up will be way easier than trying to finish it assembled. It's a pretty big cabinet...

Getting closer!

FWW-8656.jpgFWW-8657.jpg
 
Last edited:
Taken a little while to make any progress. The cold has been a hindrance to getting the finishing done.

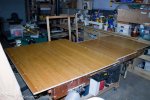
But pretty close. Carcass is mostly ready to install, and I got the top sanded flat and put a seal coat on the bottom.

Should be a big weekend of being able to make progress though, I hope.

FWW-8700.jpgFWW-8701.jpg
 
Making more progress.

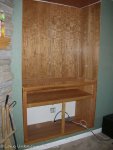
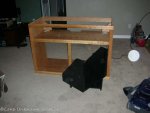
Moved the cab into the house to see how it fits. Needed to do that so I could trim the top to the right size.

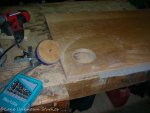
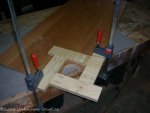
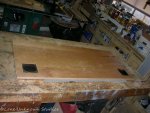
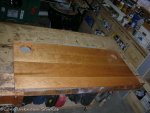
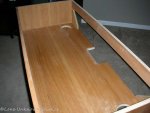
So trimmed the top down and got the holes in the top prepped. Drilled a 4" hole in the top and then routed a recess to hold 120mm pc fan filter screens. I'm going to use these as the only 'inlets' into the case. The theory is that if I pump air in through some filter screens, I'll keep the electronics hidden, cool, and dust free. With the inlets being on top, it will in theory be easy to hit them with a vacuum to take care of the dust.

One of Sharons biggest pet peaves is how dusty the electronics always seem to get, and I agree.

It was a little nerve wracking drilling the 4" holes in the top and routing the recesses for the filter screens. Kept thinking, if I screw this up, I get to start all over again.

Now I just need to work on the finish on the top, and can then move on to the cabinet doors and other installation issues...

FWW-4480.jpgFWW-4483.jpgFWW-4485.jpgFWW-4487.jpgFWW-4488.jpg
 
makes me want to reach out and touch it:) as for the fans we had some fans similaair to that in our film imaging equipment and they had a filter in frnt of them brent.. might want to look into that as well..
 
Nice work on the recess, well, on all of it, but you knew that :thumb:

I practiced the recess stuff a few times on some plywood before I went at it for real. I was kind of postponing doing that cause I didn't want to screw up that big panel.
 
Last edited:
That cherry looks real good. Nice job of cutting those holes. I am with you i would have been just as nervous. But....I now have faith in what Chuck said to me once.

Its only wood. If it goes wrong just put in pile and redo. With that little statement i calm down and do it with less gun to my head feeling and do a better job as a result when i do anything these days. :)

The frame in place looks really good match for the back walls. You seem to have finished the carcass and managed to get a even tone across it all from my take on the picture.

Well done.:thumb:
 
Its only wood. If it goes wrong just put in pile and redo.

Good advice!

The carcass is a little lighter, and I have a couple of spots that it's not all that even.

I haven't even really tried to do any color matching, other than trying to look at the lumber before I put it together. Finish is just simple satin poly.

I do really like the way the panels look though and cant't wait to get the molding up on it to hide the cracks.
 
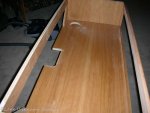
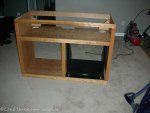
Some more incremental progress. Pulled the cabinet out and cut the ventilation holes in the center shelf and mounted the pull out electronics rack.

Got another coat of poly on the top, but it's taking a while to dry with the temps the way it is. I may actually get this installed in a day or so, then I'll work on the doors, speaker cloth cover for the middle rack, and the molding to go around the outside.

Heck, if I get the top on it in a day or so, I might actually start using it this week.

FWW-4489.jpgFWW-4490.jpgFWW-4491.jpgFWW-4492.jpgFWW-4493.jpg
 
Last edited:
Top