- Messages
- 12,169
- Location
- Constantine, MI
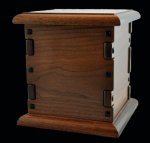
It took a little while, but I finally sold the last of the first group of urns I made. I also learned a few things along the way. I had to play with the price point a bit to find a sweet spot. I also got some feedback from one of my wholesale customers about what his customers were looking for. He likes the style and sturdiness, but he felt his customers gravitated more towards "wild grain". As the style was essentially Greene & Greene, I had made the first few in mahogany. Too plain, it seems, for the uninitiated.
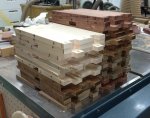
The next crop will be in several different woods. The purist in me is rebelling, but I need to always remind myself I'm not building these for me. So, I'm building a few in each - bubunga, ambrosia maple, jotoba, and walnut.

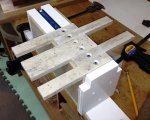
Here's the jig I made to handle the finger joints. This is a step up from my original as it allows easier adjustments and can also be reconfigured for other projects.


I also hit on a way to shave some labor time off the hundreds of square holes needed for the ebony plugs. Initially I would have laid out one and set up my mortiser with a fence and stops to mark the four corners, then used my handy-dandy Lee Valley square punch set to drill them out and chisel them square. Then, using a 1/4 chisel, go in and clean them all out.
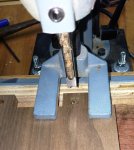
What I do now is set up a fence and stops on the drill press and, using a 5/16" forstner bit, drill all the locations for the holes. This gives me a flat bottom hole which will minimize splitting when I fasten it all together with #6 pocket hole screws. The other method used a twist bit and left a concave hole.
Once the holes are done, I duplicate the fence/stop configuration on the mortiser and, using only the chisel with no bit, press the chisel in and square up the hole. Then its back to the drill press to clean out the waste. Cleaning these out with a 1/4" chisel was always dangerous as it was easy to split out the end grain near the hole. DAMHIKT


This run should last a little while and give me several photos for a planned brochure. In a few weeks I'll start building a group in a different style.
The next crop will be in several different woods. The purist in me is rebelling, but I need to always remind myself I'm not building these for me. So, I'm building a few in each - bubunga, ambrosia maple, jotoba, and walnut.

Here's the jig I made to handle the finger joints. This is a step up from my original as it allows easier adjustments and can also be reconfigured for other projects.


I also hit on a way to shave some labor time off the hundreds of square holes needed for the ebony plugs. Initially I would have laid out one and set up my mortiser with a fence and stops to mark the four corners, then used my handy-dandy Lee Valley square punch set to drill them out and chisel them square. Then, using a 1/4 chisel, go in and clean them all out.
What I do now is set up a fence and stops on the drill press and, using a 5/16" forstner bit, drill all the locations for the holes. This gives me a flat bottom hole which will minimize splitting when I fasten it all together with #6 pocket hole screws. The other method used a twist bit and left a concave hole.
Once the holes are done, I duplicate the fence/stop configuration on the mortiser and, using only the chisel with no bit, press the chisel in and square up the hole. Then its back to the drill press to clean out the waste. Cleaning these out with a 1/4" chisel was always dangerous as it was easy to split out the end grain near the hole. DAMHIKT


This run should last a little while and give me several photos for a planned brochure. In a few weeks I'll start building a group in a different style.


