larry merlau
Member
- Messages
- 18,741
- Location
- Delton, Michigan
for the pros this will be old hat , but the new ones and the rest of us out there this might just save them a gray hair
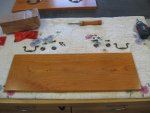
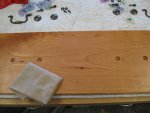
when i do multiple drawers and especially when they are inset fronts where they need to be in the right hole on the right drawer, i take and mark them in a area where it wont be seen but gives me a reference point to go to.. just a scratch awl and some prick points is all it takes.
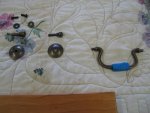
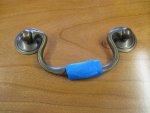
then we come to the hardware, in some case the handles are in several pieces so its a good to layout all the pieces for each handle to make sure you have what you need. some of the hardware have a good one side and not the other as in these handles. so i take and tape them up so as to not mar the piece while installing and during the delivery process.. note, i leave some tape away from the identifying detail of the front so i know what way is up
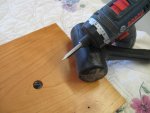
then on to the back side i take and make some indented recesses, so i can apply these to the drawer boxes in this case and not have them be in the way.. also as you can see i have used a power driver to apply the same pressure while screwing them in so i dont over tighten the screws, then will go back and give them a snug up with the hand driver,, more reliable than thinking i need it just a bit tighter to find out i have crunched the face of the escutcheon .. so that is a few tips that may help some of you next time you are doing multiples of drawers or doors as well..

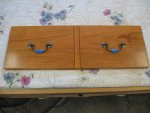
and the final product without any mishaps
when i do multiple drawers and especially when they are inset fronts where they need to be in the right hole on the right drawer, i take and mark them in a area where it wont be seen but gives me a reference point to go to.. just a scratch awl and some prick points is all it takes.


then we come to the hardware, in some case the handles are in several pieces so its a good to layout all the pieces for each handle to make sure you have what you need. some of the hardware have a good one side and not the other as in these handles. so i take and tape them up so as to not mar the piece while installing and during the delivery process.. note, i leave some tape away from the identifying detail of the front so i know what way is up


then on to the back side i take and make some indented recesses, so i can apply these to the drawer boxes in this case and not have them be in the way.. also as you can see i have used a power driver to apply the same pressure while screwing them in so i dont over tighten the screws, then will go back and give them a snug up with the hand driver,, more reliable than thinking i need it just a bit tighter to find out i have crunched the face of the escutcheon .. so that is a few tips that may help some of you next time you are doing multiples of drawers or doors as well..


and the final product without any mishaps


 Funny i never saw Jims post and was thinking the same thing about the quilt. I thought "yup, cats away mice will play" wait till mom gets home.
  BUt you off the hook seems to me.