
- Messages
- 36,134
- Location
- ABQ NM
There's been some discussion recently in another thread about mounting a faceplate on the bark side of a bowl blank. I've described how I do it a few times, but I finally dug up a few photos...
One way I do it is to drill a group of holes - all to the same depth - in the blank using a Forstner bit on the drill press. Here's an example:
It's hard to tell from this shot, but I drilled a starter hole (I'm guessing about 1 1/4" diameter, then nibbled away the edges to enlarge it by drilling other holes around the edge. The depth stop on the drill press ensures the bottoms of holes are all the same depth.
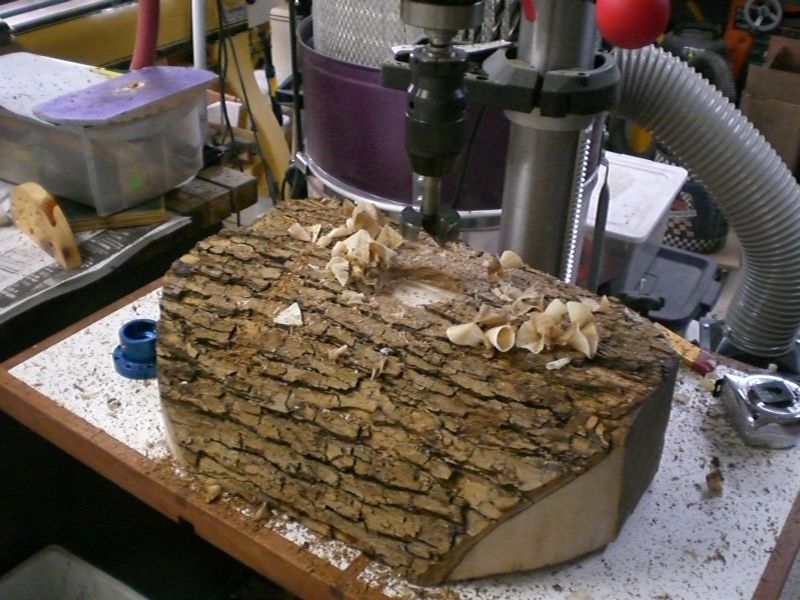
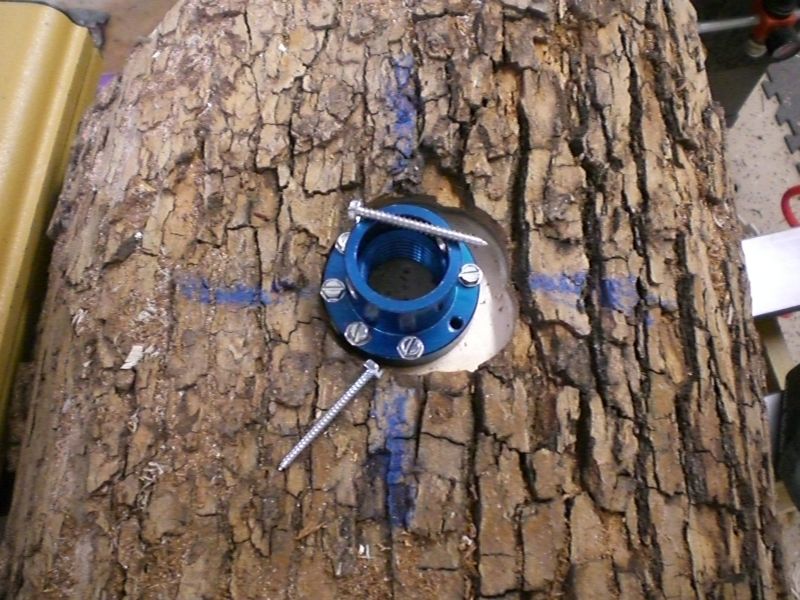
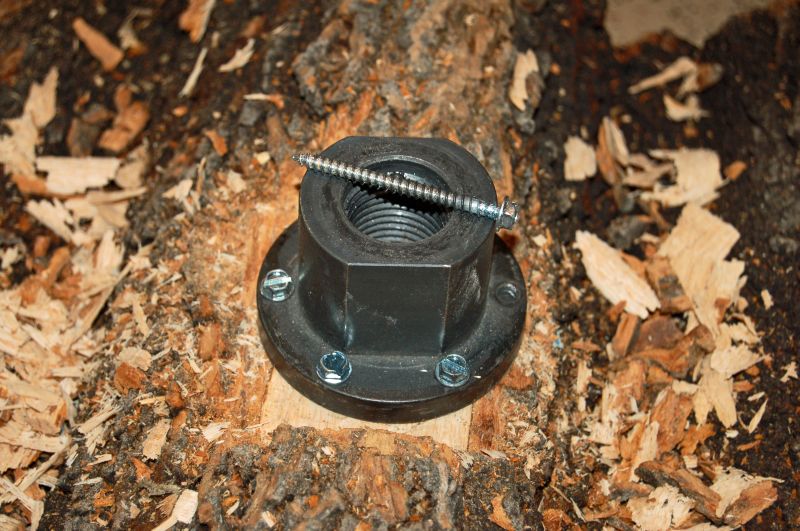
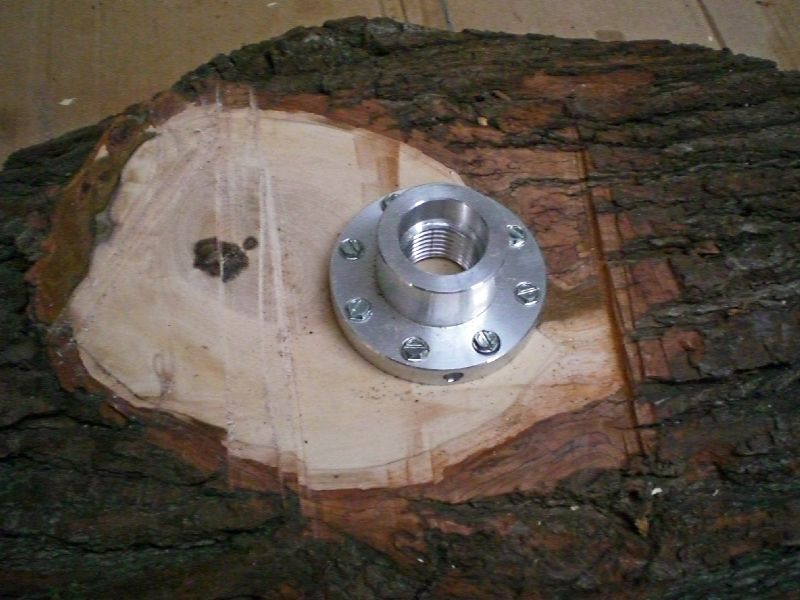
I think this is a 2 1/2" faceplate, and you can see that the edge of the hole isn't round by any means. It doesn't need to be.

Another shot...you can see how "accurate" I am when I mark the center of the blank with a lumber crayon. It's all done by eye. No need to get carried away with precision.
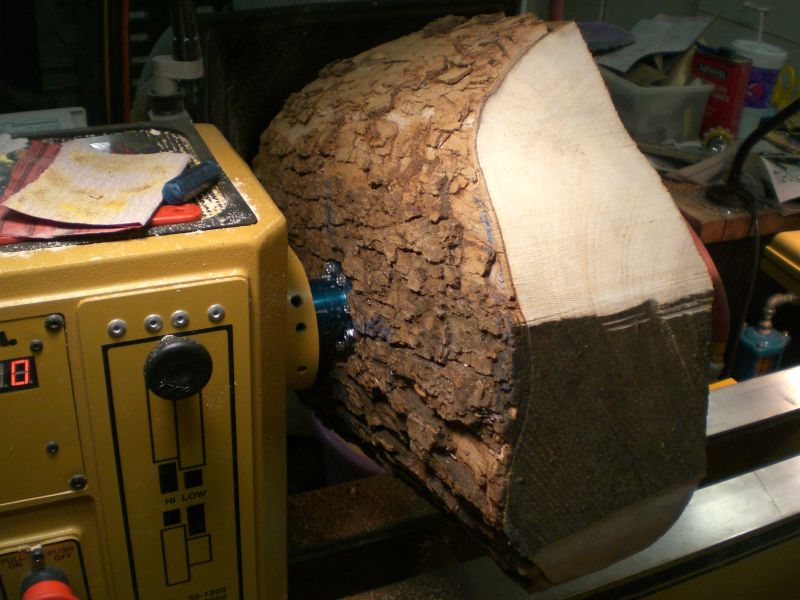
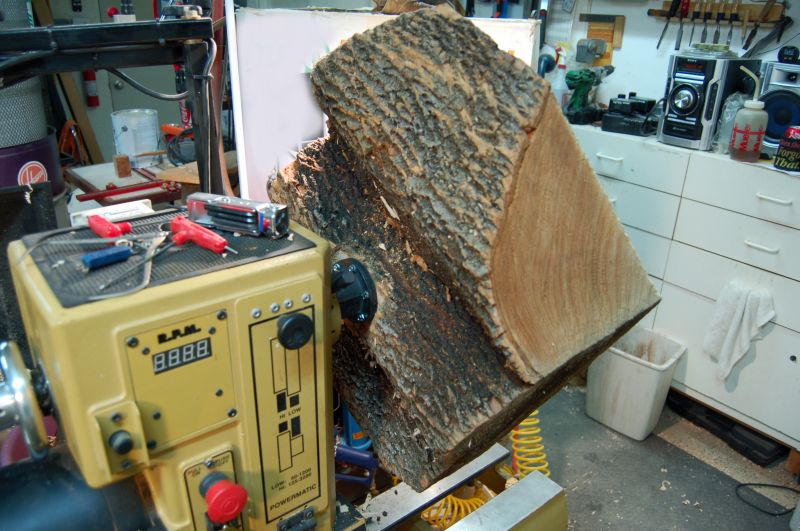
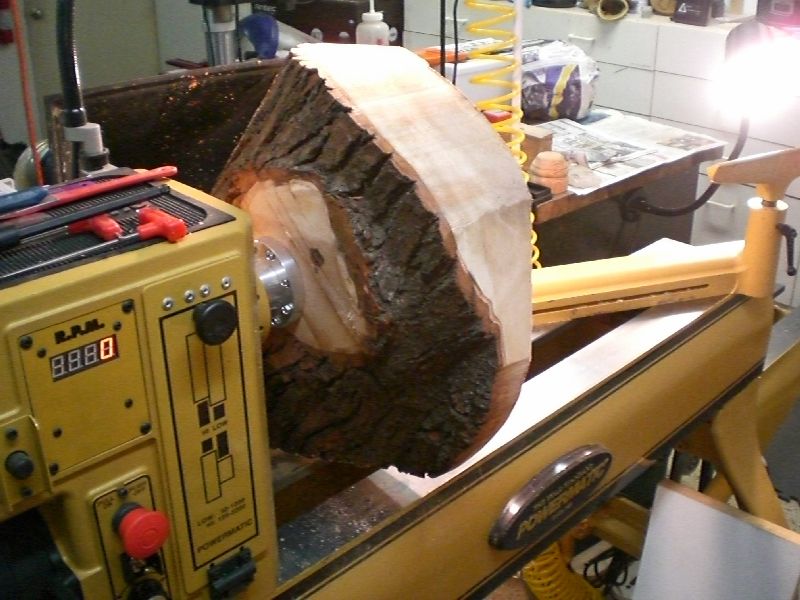
And to give an idea of the size of this blank, here it is mounted on my Powermatic. It's not a small chunk of wood.
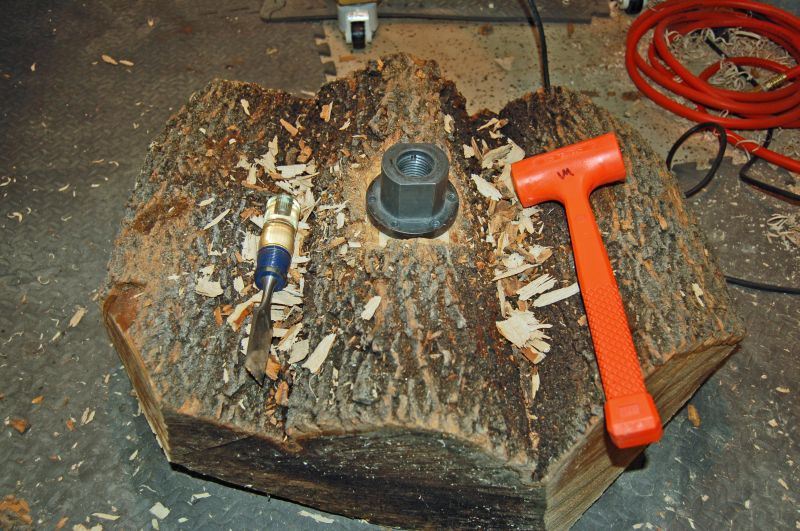
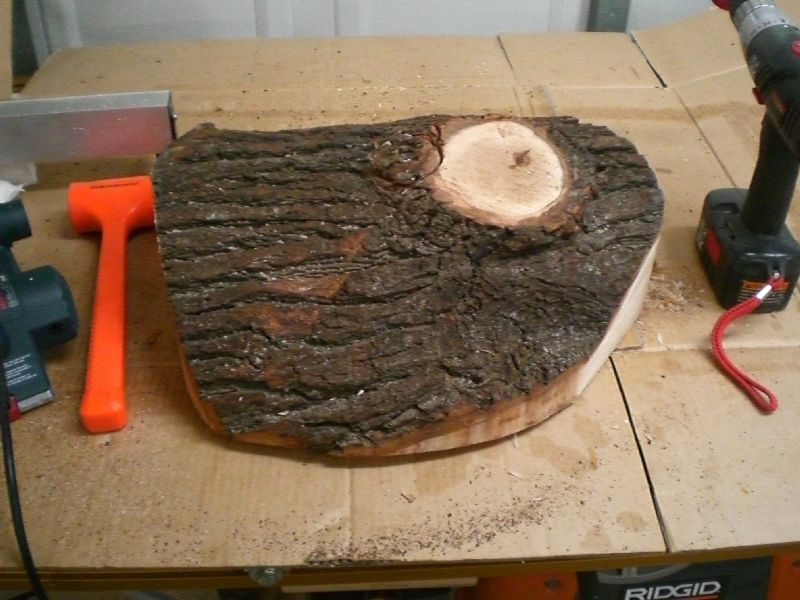
There are other ways to make a relatively flat mounting spot, too. You can use a hammer and chisel:
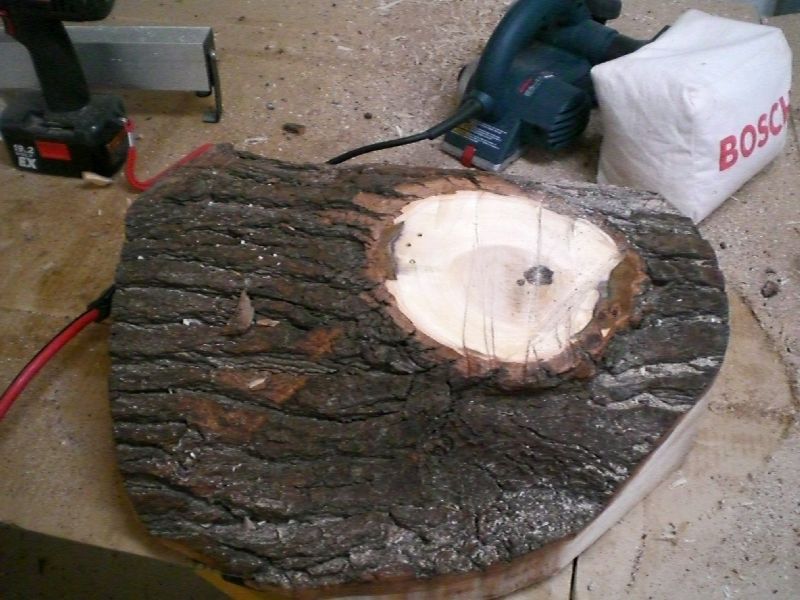
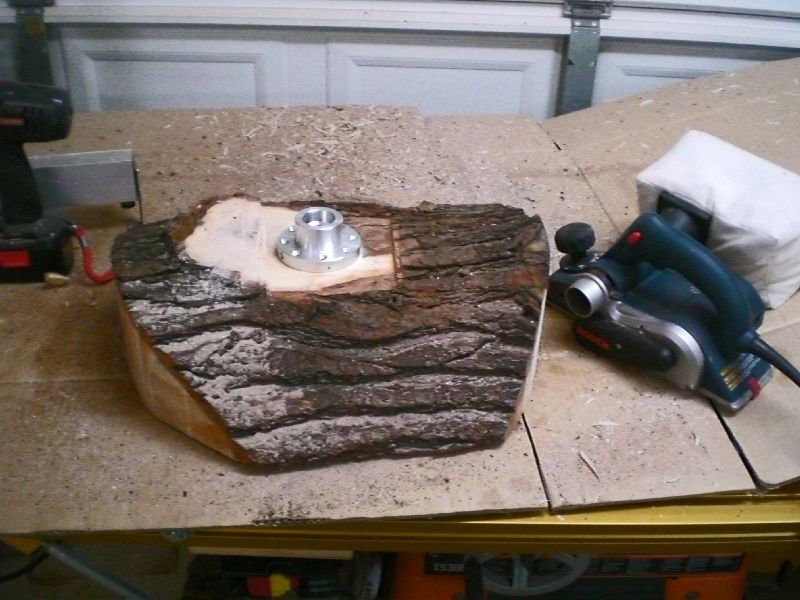
Or I've even used a handheld power planer to make a flat spot. (The blades were already pretty beat up. Otherwise I wouldn't have used the planer on bark.) This blank started out with a high spot where there had been a limb. I had to plane that down just to make room for the planer in the middle of the blank.
So that's three different ways to get a relatively flat spot for mounting a faceplate. Notice I said "relatively". It doesn't have to be perfect, just stable enough that the faceplate can't rock. I've even used wooden wedges in key locations to make up for voids under the faceplate.")
One way I do it is to drill a group of holes - all to the same depth - in the blank using a Forstner bit on the drill press. Here's an example:
It's hard to tell from this shot, but I drilled a starter hole (I'm guessing about 1 1/4" diameter, then nibbled away the edges to enlarge it by drilling other holes around the edge. The depth stop on the drill press ensures the bottoms of holes are all the same depth.
I think this is a 2 1/2" faceplate, and you can see that the edge of the hole isn't round by any means. It doesn't need to be.
Another shot...you can see how "accurate" I am when I mark the center of the blank with a lumber crayon. It's all done by eye. No need to get carried away with precision.
And to give an idea of the size of this blank, here it is mounted on my Powermatic. It's not a small chunk of wood.
There are other ways to make a relatively flat mounting spot, too. You can use a hammer and chisel:
Or I've even used a handheld power planer to make a flat spot. (The blades were already pretty beat up. Otherwise I wouldn't have used the planer on bark.) This blank started out with a high spot where there had been a limb. I had to plane that down just to make room for the planer in the middle of the blank.
So that's three different ways to get a relatively flat spot for mounting a faceplate. Notice I said "relatively". It doesn't have to be perfect, just stable enough that the faceplate can't rock. I've even used wooden wedges in key locations to make up for voids under the faceplate.
 For example, you've learned that you can change your mind and get do-overs on a lot of this stuff. One of the great things about most turning is that you're not constrained by any specific dimensions. If you do something you don't like, you can always step back, regroup, and try again. In most cases, the worst that will happen is the finished piece might be a bit smaller than you'd originally planned.