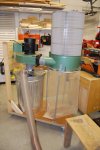
Internal Thien Baffle for HF DC

Thank you Jason. You are the first person I have heard ever describe the sucking power of their dust collector such that one can relate to the amount of air being pulled through it. I think this Harbor freight modified unit is a economical way to go for a hobby shop especially when I consider just how much my Oneida cost that I have now sold. Looking forward to hearing how it works Darren. In regards to how to clamp the bag my thoughts are with your welding ability a little bit of spring type band steel and this kind of pull catch http://www.directindustry.com/prod/emile-maurin/spring-loaded-draw-latches-39388-487101.html welded to it and voila it will open up and allow for bag to be put in place and then hook on and pull up clamp.
 
Ryan, I like the idea of putting the container on the cart. I came across the pic of one like that on lumberjocks

127340-438x.jpg

For now I think I'll try the internal one until I get things more finalized for how I want to run pipes and a permenant home for the collector. I like how Jason put his in a closet, so may have to combine the two ideas. I also found we have a wholesale plumbing supply about 5 miles from home. Since the HF DC has a 5" main, I'll have to see if they have some 5" pvc. I know I can get it in galvanized, so may end up having to go that route with an hvac supplier we have downtown.

Edit: the lumber jocks thread: http://lumberjocks.com/projects/29578
 
...In regards to how to clamp the bag my thoughts are with your welding ability a little bit of spring type band steel and this kind of pull catch http://www.directindustry.com/prod/emile-maurin/spring-loaded-draw-latches-39388-487101.html welded to it and voila it will open up and allow for bag to be put in place and then hook on and pull up clamp.

Rob, what you're describing is the typical spring clamp that comes with the HF DC. It clamps to the outside of the separator ring. The ring that Jason has on his Jet goes on the inside of the ring. The spring action pushes it outward for a friction fit...no latches.
 
Ryan, I like the idea of putting the container on the cart. I came across the pic of one like that on lumberjocks

Mine looks darn tooting close to that except for a few details (I used the top-hat design which is supposedly a smidge more efficient.

While I do like the convenience of a drum to dump, the ~40% performance hit isn't to be overlooked, some good data on that here:
http://www.jpthien.com/smf/index.php?topic=563.90
I also like that the pre-separator drops out most chunks before they hit the impeller... except one big one snuck though last week when I was "sweeping" the floor.. that was almost bad :eek:

I believe it would be possible to put a drum under the in-ring baffle with a "clever connector" and get the benefit of both worlds but haven't tried to pursue that.. yet..

edited to add
Rob, what you're describing is the typical spring clamp that comes with the HF DC. It clamps to the outside of the separator ring. The ring that Jason has on his Jet goes on the inside of the ring. The spring action pushes it outward for a friction fit...no latches.

Note that Phil has commented that the lip from those tends to catch dust and hurts the separation a fair bit (this was in response to a magazine review, there was a longish thread on SMC I can't find at the moment where Phil went into some detail on it
 
Last edited:
There is some interesting info on that thread Ryan, will have to do some more reading later. Interesting read about the air straightener to improve performance.

The chart on the first post of the page below goes into air turbulence at an intake. Makes me wonder about the one going into the base of my table saw. I do have the dust sliding down a 45* incline, but then I don't have anything directing dust to the port from the left or right. I used one of the plastic joiner ports to hook my hose to on the back, which isn't exactly straight, but could definitely be improved on to prevent loss

http://www.jpthien.com/smf/index.php?topic=563.105
 
A little more info to round out my entire DC system - i also have a pre-separator lid on a 55gal drum. It's one of those moulded plastic ones from Jet - it's a very specific style. No elbows inside or out, a center hole for the DC end, and a sloped spirally port on the outside for the Tool end. THIS design sets up the smoothest spiral i've found and has VERY little impact on my suction.

I only use it on the Jointer and Planer - because they produce the largest shavings and it is the most effective for those things. I run 6" from the closet, across the shop about 20', down through the ceiling to about 4' off the floor. At that point, i wye to a 4" and run about 2' of 4" hard duct to a short bit of flex - there's one adjustable elbow (maybe two, but the bends are very shallow) and with the gate open, it's pretty powerful. I have a 10' flex hose from that lid to the two tools - I swap between them depending on use (that's why the hose is so long) - it has never jammed or clogged and it doesn't let many shavings escape when in use. It won't suck up a tape measure at that point, but it's still more than plenty for the big fluffy shavings to be sucked in.

It occurs to me that maybe a video with a bit more detail of the entire system might be in order...
 
Once upon a time somewhere on some thread on some forum (maybe someone else here remembers it or more likely there have been dozens of the same :D)... I read about some folks who had changed the hookup on their TS to be essentially a bellmouth (bell opening up towards the cabinet). Reportedly it helped sucking the dust out of the cabinet a fair bit (based on the "dust left behind" method). I don't think I'd add an air straightener there because some slivers are likely to end up in the cabinet and would get hung up on them (or indeed anywhere between the source and the sliver destination).

I suspect that you get more bang/buck/time by adding some sort of overhead DC to the TS than messing with the cabinet outlet unless the cabinet outlet is really bad (and even then judiciously sealing side vents and opening up new ones to direct the airflow might well get you as much or more). I know that that is where the majority of the dust comes from for me on the TS, and its a LOT worse if I use a ZCI.
 
I know that that is where the majority of the dust comes from for me on the TS, and its a LOT worse if I use a ZCI.

Funny you mention that, I cut some 2" maple the other night. I was completely covered down my front side with shavings, with the dc going and I had not taken the ZCI off from the plywood I was cutting prior.
 
I suspect that you get more bang/buck/time by adding some sort of overhead DC to the TS than messing with the cabinet outlet unless the cabinet outlet is really bad (and even then judiciously sealing side vents and opening up new ones to direct the airflow might well get you as much or more).

Hear hear!

I guess i have more to blab about on the matter ... lol - i built an over-head blade guard with 4" dc on it ... THIS was the key change that made TS dust collection what i consider "handled" - yes the guard has to be moved sometimes, yes there's still a little dust left in the cabinet ... i don't purport to claim that my system keeps the bad stuff out of my lungs - but it spares me a LOT of cleaning up and I have to believe some of it's also staying out of my lungs as a result of my efforts. Here's a video of my overhead blade guard in case anyone's interested:


I'm a terrible cameraman and apologize in advance for all the nausea inducing footage :(

This system works very well for me - the key is that it stays on more often than the splitter does and that it has independent sides so that there's a better enclosure around the work to keep the dust to a minimum. Even if I am slicing the edge of a board, it doesn't spit back nearly as much dust (tho there is some) as it does without the guard in place. The one thing I need to figure out better is the counter-weighting system to keep it balanced better ... the springs don't work very well at all, in fact they're too variable across their range and it's not consistent enough to work well. Need to get the weights added!

Brilliant engineering Jason. I need to give this a think...
 
Jason you fantastic to have around and inmho you are a genius.

Ever since i first heard of the concept of over arm dust extraction I always felt that a guy that makes the "Shark Guard" had the solution.
However then came saw stop and to me those guys did a great job of understanding the action but did not quiet get the guard aspect fully solved due i suspect in some significant part to need to manufacture at lowest cost, so their guard still has the inherent weakness of "one size fits all" approach to the sides.
But seeing how u implemented that guard with sides that stay in place if not needed to move is downright genius.
Its a pity its late now but in my view this could have been patented.
The reason for my comment is from what i see your guard part could be easily made and made into a kit for user assembly keeping cost at the minimum of parts in pretty much flat form.

What i dont think everyone dabbling in making guards of their own have latched onto yet and incorporated is the aspect of where to have the extraction port fitted on the guard.

Sawstop from some info i saw somewhere had analyzed this and found it to be best at the rear of the blade. Now sure there could be a bit of the old marketing/wordsmithing smoke and mirrors at play in their pitching of their guard but they had me convinced i just have not heard from an actual independent user.

Btw thanks Vaughn for pointing out my misunderstanding. Somehow did not quiet get that it was internal. :) Good to know that the HF unit has it on the outside. :) I think this HF unit is going to be my future way to go.

Darren only thing i see as an issue with that cart design is shop space. I found just a vacuum and dust deputy to be always in my way.:)

Thanks a ton Jason for your video, you sure explain things very well I like your style and appreciate the effort you have taken to impart your know how.

Btw ;):) how is the cnc going? Not sure i caught the latest update:)


Sent from my MB860 using Tapatalk 2
 
Thanks fellas! :) Very kind words from you all - encouraging is an understatement :)

Really a nice set up. Wouldn't it help to have the spring setup so it pulled more up as opposed to back? Just ask'n , I'm no enjuneer......

It may - but it would also limit how much travel the mechanism would have. Not to mention finding a spring with enough travel. One of the biggest things in a guard, to me, is that it get the heck out of the way when i want it to and being able to raise it up fully and also down fully works out to about 18" of vertical travel (if not more, i'd have to measure). The biggest problems with springs is that they're not continuous force over their length of stretch and it's very hard to dial it in. My desire is to have the guard balanced so well that I can just raise it to ANY location and have it stay put. Weight is the best thing, I think, and I just need to work out how much i'll need for that. I may have to extend the tail a bit or find some of those nifty pneumatic assist things like on car hatch backs - maybe those would do the job, too.

Jason you fantastic to have around and inmho you are a genius.

Ever since i first heard of the concept of over arm dust extraction I always felt that a guy that makes the "Shark Guard" had the solution.
However then came saw stop and to me those guys did a great job of understanding the action but did not quiet get the guard aspect fully solved due i suspect in some significant part to need to manufacture at lowest cost, so their guard still has the inherent weakness of "one size fits all" approach to the sides.
But seeing how u implemented that guard with sides that stay in place if not needed to move is downright genius.
Its a pity its late now but in my view this could have been patented.
The reason for my comment is from what i see your guard part could be easily made and made into a kit for user assembly keeping cost at the minimum of parts in pretty much flat form.

What i dont think everyone dabbling in making guards of their own have latched onto yet and incorporated is the aspect of where to have the extraction port fitted on the guard.

Sawstop from some info i saw somewhere had analyzed this and found it to be best at the rear of the blade. Now sure there could be a bit of the old marketing/wordsmithing smoke and mirrors at play in their pitching of their guard but they had me convinced i just have not heard from an actual independent user.

Btw thanks Vaughn for pointing out my misunderstanding. Somehow did not quiet get that it was internal. :) Good to know that the HF unit has it on the outside. :) I think this HF unit is going to be my future way to go.

Darren only thing i see as an issue with that cart design is shop space. I found just a vacuum and dust deputy to be always in my way.:)

Thanks a ton Jason for your video, you sure explain things very well I like your style and appreciate the effort you have taken to impart your know how.

Btw ;):) how is the cnc going? Not sure i caught the latest update:)


Sent from my MB860 using Tapatalk 2

Port position IS significant, I found. My first few iterations of this had the port further back and it didn't work as well. It needs to basically sit right where that rooster tail of sawdust comes up off the blade. The mount on my ceiling is adjustable so i can aim the very center of the dust port right over that very spot. I think that was the biggest key to the collection performance i've been able to get.

As for kit form ... I've considered it - but the time it took to fabricate this one would have to be cut way down ... i have probably 60 hours into it (though admittedly half of that time was engineering and head scratching). I went a little overboard and made delrin bushings for all of the pivot points, too, and those took forever to turn - think little top-hat shapes with a hole in the middle - they handle all the friction between each pivot point, there is no metal-to-metal friction and the polycarbonate is also not a wear surface. This makes the mechanism VERY smooth - but i think i'd need to find a compromise there just to keep the cost down if i were to sell kits. I'd be surprised if anyone wanted to pay for the labor of these little teeny discs of delrin (they take about 3 hours to produce all of them for a single guard). Maybe some nylon washers or something ... if i ever get enough time in the shop that isn't already spoken for, i may do some tests to see how it works.

The CNC is good. It's done and has cut a few parts out, but sadly, i haven't had any time to play in the shop in the last month or more due to work and a vacation to NYC last week (for a kinda special concert at MSG - stealth gloat). When I do finally get some time, I need to pick back up and resume my quest to cut aluminum on it - smoothly and accurately. I've got a few videos of my latest adventures (which was january, yikes!) on my youtube channel - http://www.youtube.com/beamerweb

Thanks for all the encouraging words, guys - i didn't mean to hijack Darren's thread - i just happened to have spent a little time on the dust stuff :)
 
Jason if you were to consider offering kits the part u describe made from Delrin could be outsorced to a company that has those autoturn lathes where a rod of material is fed in one end and a cam developed that allows the cutter to cut the shape and part it off.
There are small shops that do this (nearly had one as a client here) for small quantities at fair prices suitable for piece part prices.
I was not thing of you making parts to make a kit, in fact my thoughts were you getting the likes of a rockler or someone to pay you royalties and them make a kit with their resources and distribution. :)

Dont discount ideas you come up with an simply give them away, you got a lot of capital invested in your shop and things like this could help bring in some extra coin for more toys :)

Sent from my MB860 using Tapatalk 2

All good points ... for sure. The last thing I care about is making money from my shop, though. It's my little corner of escape that I retreat to for my own recuperation. Plus, I am a firm believer of giving knowledge if I can - that's what keeps things alive in this hobby.

If someone wants to make millions off my idea, more power to 'em - it takes a lot of work to pick up where i left off and turn it into a viable business (even if you just license .. there are still quite a few hours of negotiation, pitching, and you do have to package things a certain way). If anyone wants to do that, I got no problem with that. I guess I lack a bit of the entrepreneurial gene or something - I've never been terribly driven in that direction. I do this stuff for myself and if someone else likes it, I'm happy to share up to a point :)

Usually once I've figured out how to do it, I don't want much more to do with it - i got my satisfaction in the process. I love to tinker and figure stuff out way more than I like to sell stuff.

I think you're right that this could be marketed in some capacity, though. I just don't have the inclination to pursue it. :)
 
Got one made and installed today. Works really well, the cyclone swirl of dust in the bag is mostly gone, just a little around the bottom. Took lots of pics for a write-up, but the phone is needing charged before they will upload...stay tuned for a new thread.
 
Top