- Messages
- 8,551
- Location
- Williamette Valley, Oregon
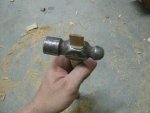
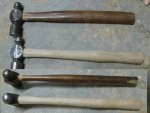
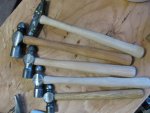
So what we have here is a perfectly good hammer head (actually I have a bunch but we'll get to that later).
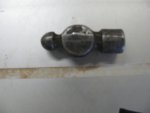
What it's missing is a nice handle..
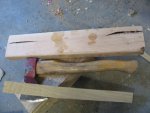
So the first thing we do is try to get a kind of straight grained piece of wood. This is white oak, not as nice as hickory.. but we're converting the shorts pile into useful things (I can have a stack of useless shorts and a box of nice hammer heads I can't use.. or.. well the alternative is obvious). So we split a chunk off to follow the grain.
Next I put it on the lathe and make round. I think of a hammer handle of this type having 3 or maybe 4 distinct parts. The rear handle part, the run out towards the head and the spot where the head attaches. Between the handle and the runout there is another section that is where I grip the hammer when I'm "choking up" on it so I like a bit of a swell there as well. To get the head section correct I measure the WIDE portion of the hole in the hammer head (the hole will be oval and beveled narrower from one enf of the hole to the other with the narrowest end being the side towards where the handle attaches - to give myself some slack I measure the widest possible part of the hole).
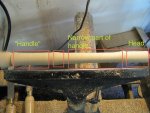
Done with the lathe, same idea but somewhat more refined. I usually clean it up a little with a skew and stop there like I did with this one. We'll be doing a lot more shaping here in a couple of minutes. You can see I left a bit of a shoulder where the head attaches, I'll use that later.
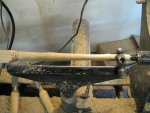
Because the hole is oval we have to figure out how wide it is. There are a bunch of ways to do this, with most ball peen hammers they have "cheeks" on the side so setting it on the ground and giving it a good smack after lining it up carefully does a pretty good job. For hammer heads without cheeks I often put a little BLO on the end and then line it up and dust some chalk over it - the blo helps hold the chalk. And yes that is a bit of tear out on the side of the handle - no worries we'll take care of that later..
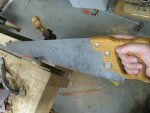
In any case now you cut off the sides of the cheeks. Leave it a little proud and cut down to the shoulder we left before and cut off the waste. Yeah you could rasp that all away but a saw is SO much faster. This is a nice little (~20" or so) panel saw I bought at a yard sale for a couple of bucks and re-filed rip. I have another about the same size my dad gave me filed cross cut; the plate is short enough that they actually are pretty stiff and a decent substitute for a back saw (I have a couple of small back saws but the length of the cheeks here are deeper than they'll cut - this saw works just as well).
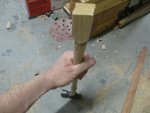
Now shape the part where the head attaches. I hold the head up and put the handle behind it and start down through the hole to see where light does/does not show to see where to remove more material. When you get close put the head on a board and then line the handle up with it and give it one (only one) good wack. That will mark the wood like this and let you know where to finish refining it. Make sure its pretty even all the way down this section, and you want it pretty snug.
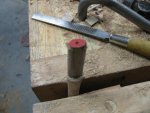
Now we make the whole handle oval. I like to take a bit more off of the narrow section than the grabbing part. This gives the hammer some bounce and flex and lightens the handle, as well as making it nice to grip. You might have noticed that I'd left the square chunk on the end, well this is why. I start with a rasp (actually one of the iwasaki carving files - I love that thing) and then move to a finer wood file afterwards. Rough and then refine.. repeat if needed.
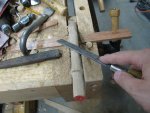
Here is a side by side of the side vs top views courtesy of my Macs "fantastic" built in photo editing tools. Hopefully gets the idea across anyway. Go ahead and cut the square piece off of the end now as well.
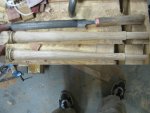
Now cut the wedge slot in the handle where the head goes. I don't cut all the way to the shoulder, but leave maybe 3/16" - 1/4" of solid wood; this helps keep it from splitting down into the handle when you drive the wedge.
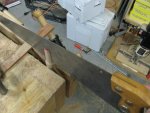
Continued in the next post...

What it's missing is a nice handle..
So the first thing we do is try to get a kind of straight grained piece of wood. This is white oak, not as nice as hickory.. but we're converting the shorts pile into useful things (I can have a stack of useless shorts and a box of nice hammer heads I can't use.. or.. well the alternative is obvious). So we split a chunk off to follow the grain.

Next I put it on the lathe and make round. I think of a hammer handle of this type having 3 or maybe 4 distinct parts. The rear handle part, the run out towards the head and the spot where the head attaches. Between the handle and the runout there is another section that is where I grip the hammer when I'm "choking up" on it so I like a bit of a swell there as well. To get the head section correct I measure the WIDE portion of the hole in the hammer head (the hole will be oval and beveled narrower from one enf of the hole to the other with the narrowest end being the side towards where the handle attaches - to give myself some slack I measure the widest possible part of the hole).

Done with the lathe, same idea but somewhat more refined. I usually clean it up a little with a skew and stop there like I did with this one. We'll be doing a lot more shaping here in a couple of minutes. You can see I left a bit of a shoulder where the head attaches, I'll use that later.

Because the hole is oval we have to figure out how wide it is. There are a bunch of ways to do this, with most ball peen hammers they have "cheeks" on the side so setting it on the ground and giving it a good smack after lining it up carefully does a pretty good job. For hammer heads without cheeks I often put a little BLO on the end and then line it up and dust some chalk over it - the blo helps hold the chalk. And yes that is a bit of tear out on the side of the handle - no worries we'll take care of that later..

In any case now you cut off the sides of the cheeks. Leave it a little proud and cut down to the shoulder we left before and cut off the waste. Yeah you could rasp that all away but a saw is SO much faster. This is a nice little (~20" or so) panel saw I bought at a yard sale for a couple of bucks and re-filed rip. I have another about the same size my dad gave me filed cross cut; the plate is short enough that they actually are pretty stiff and a decent substitute for a back saw (I have a couple of small back saws but the length of the cheeks here are deeper than they'll cut - this saw works just as well).

Now shape the part where the head attaches. I hold the head up and put the handle behind it and start down through the hole to see where light does/does not show to see where to remove more material. When you get close put the head on a board and then line the handle up with it and give it one (only one) good wack. That will mark the wood like this and let you know where to finish refining it. Make sure its pretty even all the way down this section, and you want it pretty snug.

Now we make the whole handle oval. I like to take a bit more off of the narrow section than the grabbing part. This gives the hammer some bounce and flex and lightens the handle, as well as making it nice to grip. You might have noticed that I'd left the square chunk on the end, well this is why. I start with a rasp (actually one of the iwasaki carving files - I love that thing) and then move to a finer wood file afterwards. Rough and then refine.. repeat if needed.

Here is a side by side of the side vs top views courtesy of my Macs "fantastic" built in photo editing tools. Hopefully gets the idea across anyway. Go ahead and cut the square piece off of the end now as well.

Now cut the wedge slot in the handle where the head goes. I don't cut all the way to the shoulder, but leave maybe 3/16" - 1/4" of solid wood; this helps keep it from splitting down into the handle when you drive the wedge.

Continued in the next post...


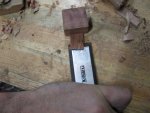

 I'll put a copy of it over in the Tips & Tutorials subforum.
