
You are using an out of date browser. It may not display this or other websites correctly.
You should upgrade or use an alternative browser.
You should upgrade or use an alternative browser.
Barn Raising - ALL moved in
- Thread starter Ned Bulken
- Start date
Ned Bulken
Member
- Messages
- 5,529
- Location
- Lakeport NY and/or the nearest hotel
ah, no, that would be on this weekend's to do list... but every night i've gotten at least some progress, except last night, got rained out...
Ned Bulken
Member
- Messages
- 5,529
- Location
- Lakeport NY and/or the nearest hotel
progress has been made, ran out of time today, but in the morning I'll be finishing up the trusses and monday will see a rube goldberg attempt to get them up on the top sill. Maybe even installed, but definitely UP on the sill. Have to see how my scaffolding project goes.
I'm off to the showers, when I get back hopefully my photos will have finished uploading.
last weekend with the brutal heat I decided that AC was better than heat stroke. Nice weather today though. Grizzz and Mark showed up this am, and we got a fair amount of progress accomplished.
I only whalloped my finger and thumb twice (one apiece, on successive swings). The air turned blue for a few seconds while I saw stars. OW just wasn't enough. Poor Mark was at a loss for words too.
Ned Bulken
Member
- Messages
- 5,529
- Location
- Lakeport NY and/or the nearest hotel
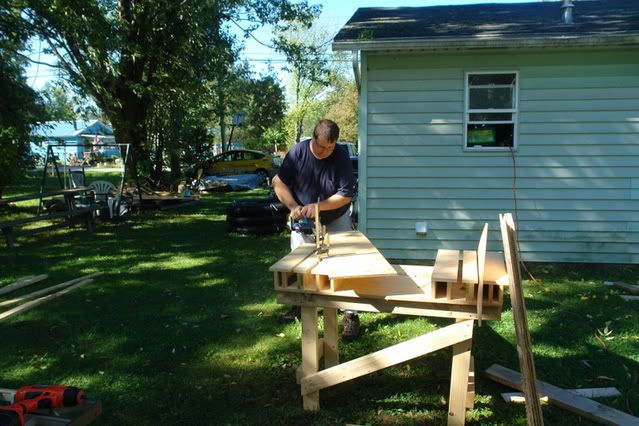
got to play with a new toyl today. I picked up batteries last week for my Ryobi 18v kit, and it has a circ saw.
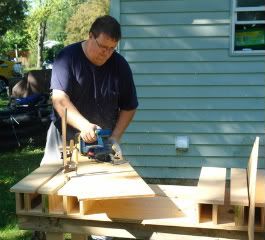
pretty neat little saw. I wouldn't want to use it on a job site, but for light homeowner duty, or breaking down plywood it works just fine.

I was cutting the additional gusset parts for the last couple of trusses there.
Mark and I got several assembled before I got to be Taxi-Dad and shuttle my youngest off to his grandparents for the weekend. LOML is at the field days playing treasurer, so I'm the gopher this weekend.
Ned Bulken
Member
- Messages
- 5,529
- Location
- Lakeport NY and/or the nearest hotel
I thought I noticed a strangeblue streak in the sky earlier today.


ahem, ah, yeah, that was me.

just got home from the field days, where i turned several cases of french fries into food for the masses. I'll have to bring the camera and get some shots of the new barn. Very spacious and nice in there.
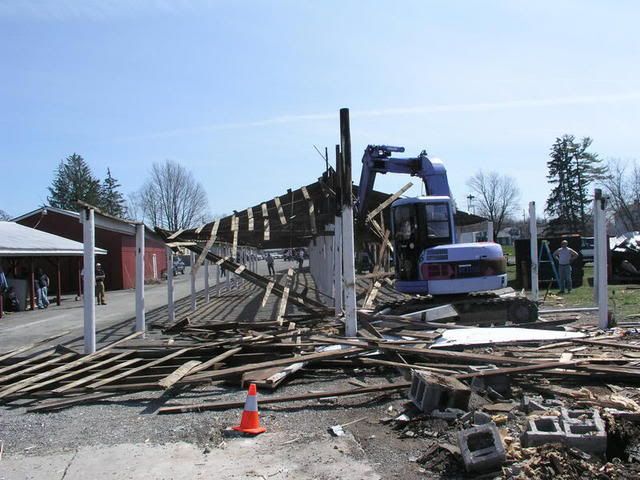
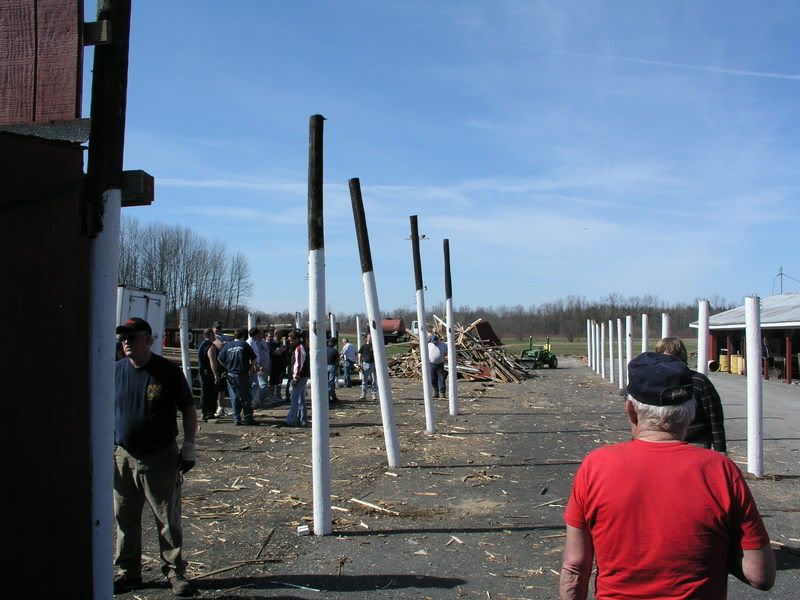
as a reminder here's what we had there for the last 50 some odd years:
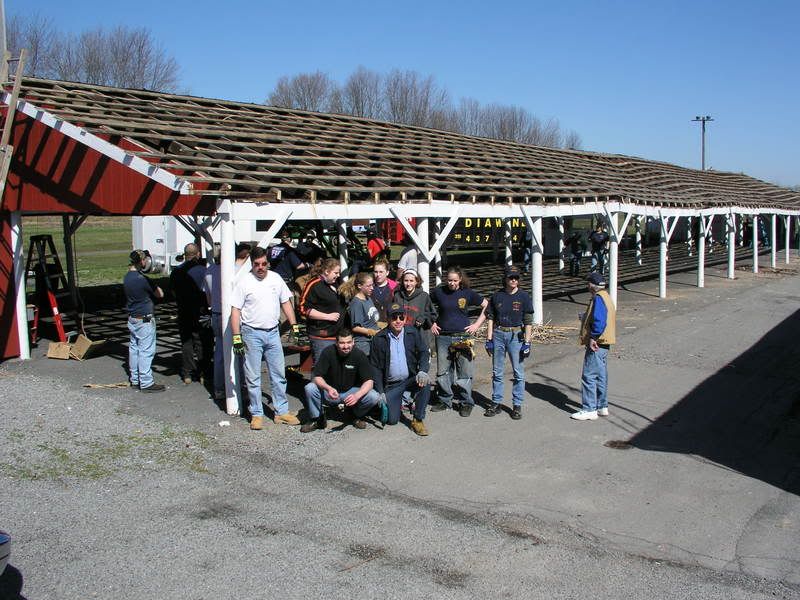
(before the major tear down push)
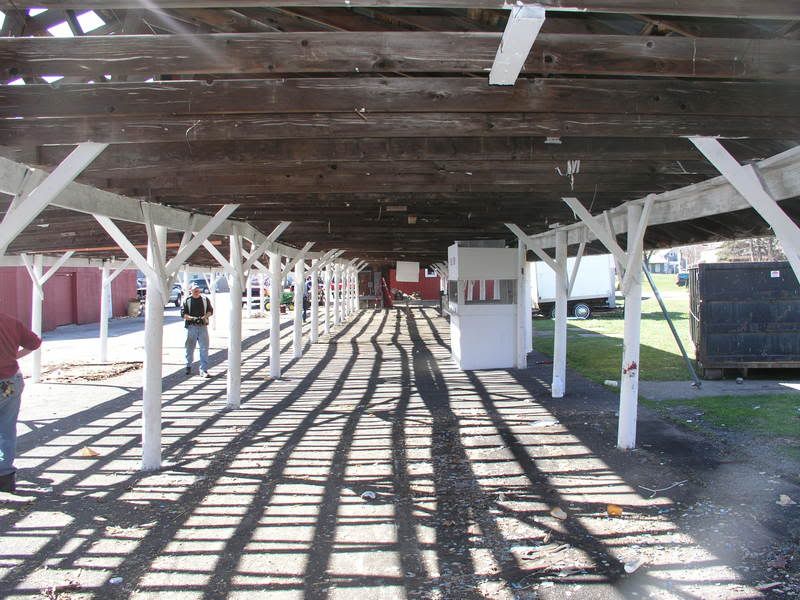
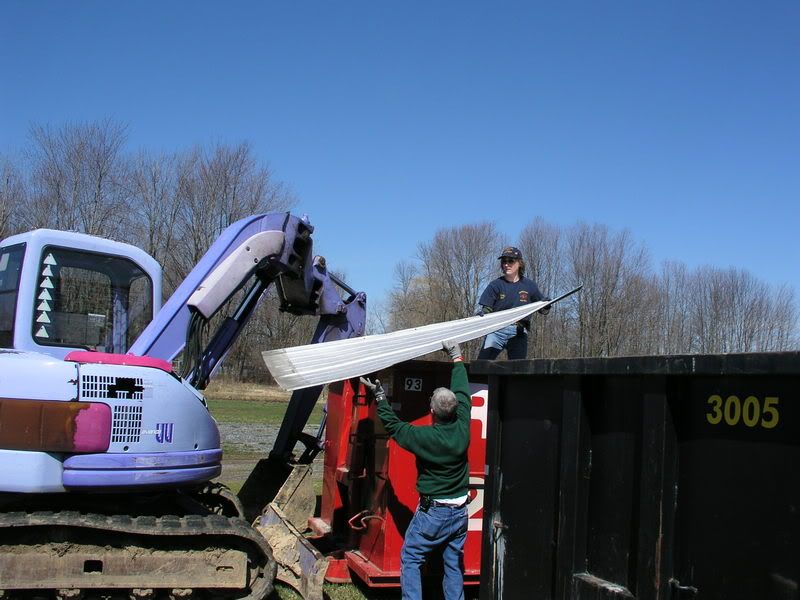
during
http://i145.photobucket.com/albums/r213/Nbulken/bridgeport barn razing/P4210088.jpg
(isn't 'Barney' a cool tool?)

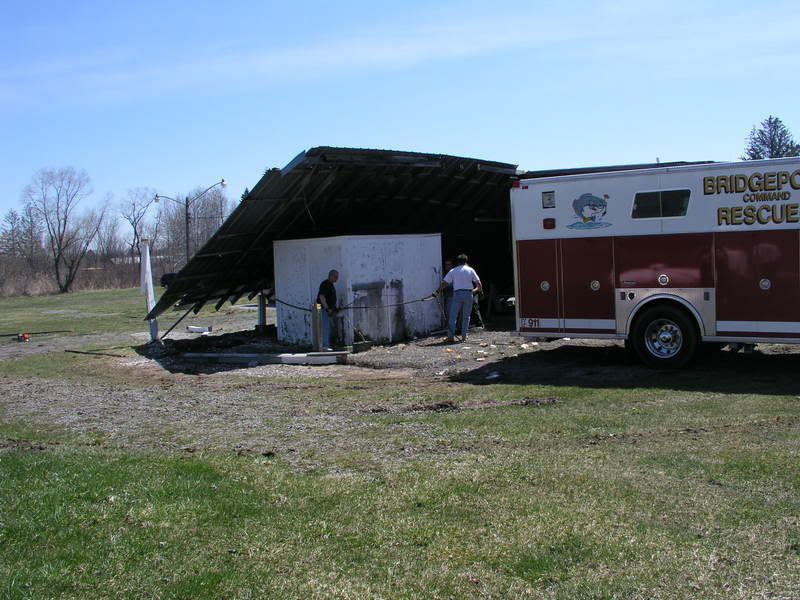
creative use of the heavy rescue truck (brought down the roof at left with a chain)
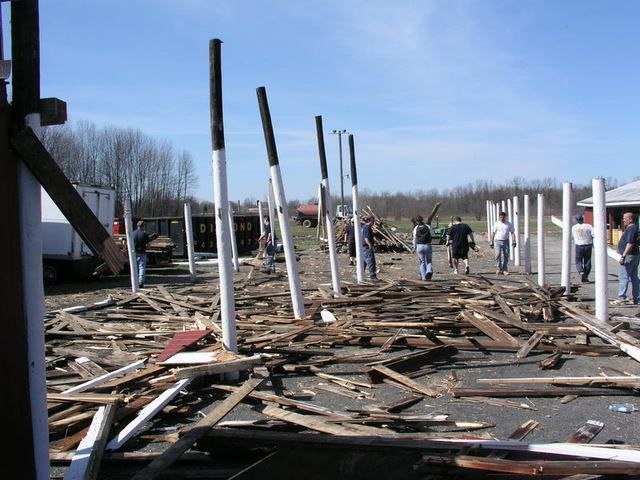
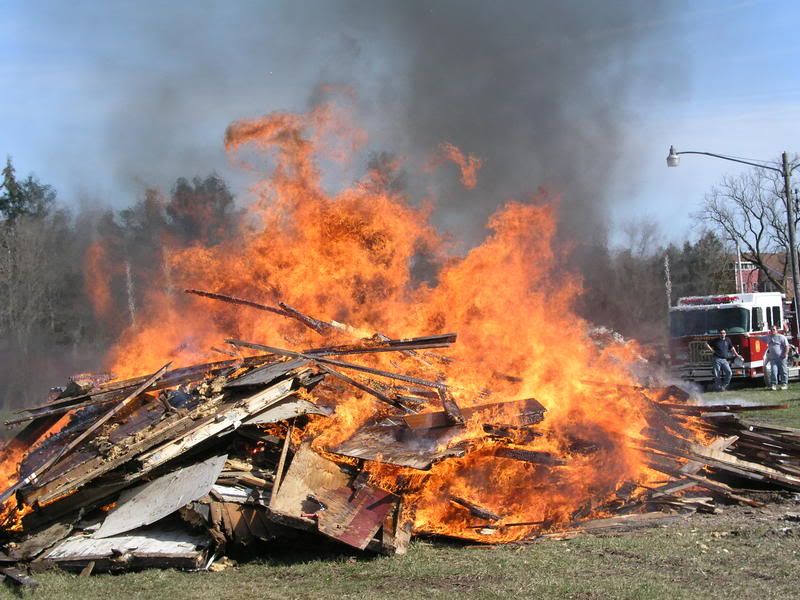
thanks to the dozer we went from that
to this
and to this:
Mark Kosmowski
Member
- Messages
- 1,456
- Location
- Central (upstate) NY
I helped Ned assemble what should have been the last of the roof trusses today. I don't want to steal away his progress report, but will mention that it is as important in framing to make confirmatory measurements during assembly of sub-components as it is for fine woodworking.
Ned Bulken
Member
- Messages
- 5,529
- Location
- Lakeport NY and/or the nearest hotel
Yup....
when we started with truss assembly all three of us, Myself as the main culprit, Grizz and Mark managed to nail together the first truss and skipped one crucial step... we forgot to measure the long chord from bird's mouth to bird's mouth, which needs to ideally be 12' 1".
several are 12' 3", one is 12' 1" one is 12' 11/2" and then there were the really bad ones: 12' 6", 12' 7" and 12' 9" !
mutter mutter (TOS violation imminent, aooogah, edit edit edit ) *sigh*...
Mark was a huge help in keeping me from going off the deep end today when we noticed one of the trusses just didn't Look right. Mind you, we're assembling the 9th of 11 trusses, with the goal in mind of my getting them up in the air tomorrow. get the tape measure, and confirm that indeed it was as 'wide' as it looked.
I managed to keep my temper under control, and Mark and I finished building that truss (cutting things a bit at the peak joint) and double checking the chord measurement etc...
We built the other two remaining trusses then broke for lunch at the field days. When we got back, we re-measured all of the trusses, and I'm hoping that we can pull those 12' 3" ones in a bit when installing them. Steve, Todd, Steve C, think that will work or will I need to rip into the remaining 3 or 4 which are 12' 3" and rework them too?
Mark, again, thanks for understanding my frustrations. I would definitely have been slinging something around with great force had you not been there to calm me down.
We removed screws which were securing a cross brace from the peak gusset, and then cut the trusses in half and trimmed off the now scrap from the old gusset. I cut more plywood to replace the gussets, and tomorrow I'll get someone to help measure the chord and then rework those three trusses for good measure. I'll add some plywood to the new cross bracing to fill in the gap left by the trimmed back old gusset. I wasn't going to get into pulling off the nailed and adhesive bonded plywood from the truss.
Then I'll be working on the platform I want to build to facilitate working 12' up from the ground.
STOP!!
do not collect 200$
all of your trusses MUST be exactly identical, they should be assembled on your deck with each member placed in a positive placement jig that sets plate location, peak location and any type of collar tie location.....
1/2" variance is unacceptable, your finished roof will show the framing mistakes (unless you use thatch)
the 2x stock and plywood for your gussets is the cheap part of the roof!
rebuild every truss correctly to where each one will drop into the jig snugly before you spend the big bucks on roofing materials.....
sorry man......but now ain`t the time to cut corners, this is going over your and your familys heads......do it right!
do not collect 200$
all of your trusses MUST be exactly identical, they should be assembled on your deck with each member placed in a positive placement jig that sets plate location, peak location and any type of collar tie location.....
1/2" variance is unacceptable, your finished roof will show the framing mistakes (unless you use thatch)
the 2x stock and plywood for your gussets is the cheap part of the roof!
rebuild every truss correctly to where each one will drop into the jig snugly before you spend the big bucks on roofing materials.....
sorry man
......but now ain`t the time to cut corners, this is going over your and your familys heads......do it right!Ned Bulken
Member
- Messages
- 5,529
- Location
- Lakeport NY and/or the nearest hotel
at this point would it be 'easier' to just start fresh on the trusses? If tolerances are that critical then I'm sunk, the whole shop isn't that exact todd.
Cost isn't an issue, as you say plywood and so on is cheap. ability is what I'm lacking evidently.
Ok, when I get home tonight I'll just go rip apart the other 5 trusses and get them all redone to spec. 'yeah' hooray.

Cost isn't an issue, as you say plywood and so on is cheap. ability is what I'm lacking evidently.
Ok, when I get home tonight I'll just go rip apart the other 5 trusses and get them all redone to spec. 'yeah' hooray.
ned, aren`t a couple of em` on target? if so use those to SCREW jig boards to your deck the important parts of your "jig" are
1) top plate width
2) peak and rafter plane
i don`t know what you can salvage from what you`ve done? or if it`s worth the time to salvage the lumber?
i`m taking for granted that both end walls measure the same across the top plate?
if this is true(i hope) then build your trusses to fit that measurement at the birdsmouth.....as you install the trusses push or pull the walls to hit your birds mouth then use floor joists to hold the spacing.....make sense?
Ned Bulken
Member
- Messages
- 5,529
- Location
- Lakeport NY and/or the nearest hotel
Todd,
yep, several are spot on, having been 'caught' before I finished building all of the trusses. All of the 'halves' of the trusses are the same, I made them all in the same spot on the floor of the barn, so they all 'match. The issue is that I didn't do the same for when I joined the two halves together. SO. the roof planes will be consistent, I just have to fix the top gusset and that joint at the peak.
I'll stop and pick up some more adhesive and cut up some more gusset parts, then it is just rip them apart and get cranking on the repairs, plus the jig on the floor.
Mark Kosmowski
Member
- Messages
- 1,456
- Location
- Central (upstate) NY
You guys are saying that after we made the first one (measuring to ensure that the notch - notch width was correct - again what we should've done) we should have used that as a template and made the others to match?
Why do good ideas only occur after bad executions?
Why do good ideas only occur after bad executions?
You guys are saying that after we made the first one (measuring to ensure that the notch - notch width was correct - again what we should've done) we should have used that as a template and made the others to match?
Why do good ideas only occur after bad executions?
my appoligies guys i forget that not everybody has been building stuff for most of their lives
.....if in doubt ask, if you don`t get detailed enough answers kick-scream-n-yell untill somebody listens......there are lots of knowledgable folks here who know the ins and outs of building most things from cars-n-bikes to sheds-n-skyscrapers so don`t be shy! there`s no such thing as a stupid question.....Mark Kosmowski
Member
- Messages
- 1,456
- Location
- Central (upstate) NY
Here's the update from what I helped with this weekend. Not a lot has happened in the past week or two due to weather, work schedules and FFW member meetings.
This weekend we tore apart all of the trusses not within 1" of the 12'1" nominal (notch to notch distance - the span of the walls with sheathing). We then took the best assembled piece (12'3/4") and added stop blocks at the inside of the notches and the outside of each truss half right at the apex where the truss sections meet.
We figured that these four points need to be fixed for each truss and that future trusses may now be identical. Hopefully this plan will yield success. As always, feel free to chime in with ideas and suggestions.
Mark Kosmowski
Member
- Messages
- 1,456
- Location
- Central (upstate) NY
Yes, "notches" should be translated as "bird's mouth" like you said. I'm still learning all the special words for fine woodworking, much less framing.
Ned, put some pics up to make the ravening crowd here happy, would ya?
Ned, put some pics up to make the ravening crowd here happy, would ya?

Ned Bulken
Member
- Messages
- 5,529
- Location
- Lakeport NY and/or the nearest hotel
I'm in the field at the moment, but I'll snap a photo tonight when I get home. Yes, we've got the 'good' truss on the deck right now, with a board screwed in to the deck in each bird's mouth to register the correct span, plus one each on either side of the peak of the truss. That way I can simply drop in two truss halves, make sure they're aligned right, trim if nescesary (not ruling any more errors on my part at this point) then glue/nail them together with the freshly cut gussets.
Ned Bulken
Member
- Messages
- 5,529
- Location
- Lakeport NY and/or the nearest hotel
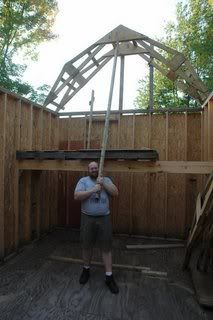
With my boys and wife's and Mark K's help I have Important progress to report:

and...

and Mark was a huge help!
My modem is down at the house, so Mark was generous enough to let me use his computer tonight.
The tech shows up tomorrow, so I'll be back online from my car during the day, (and this evening, before I go to sleep tonight)
Thanks again Mark!
and...
and Mark was a huge help!
My modem is down at the house, so Mark was generous enough to let me use his computer tonight.
The tech shows up tomorrow, so I'll be back online from my car during the day, (and this evening, before I go to sleep tonight)
Thanks again Mark!
Stuart Ablett
Member
- Messages
- 15,917
- Location
- Tokyo Japan
Alright guys!
Now hurry up and get it dried in!
Now hurry up and get it dried in!