Speedster Build

Paul Douglass

Member
Messages
4,991
Location
S E Washington State
I'm not sure this is the correct forum but I'll start here. I love threads that show progress of projects people are working on, i.e., the "Organ Build Forum". I thought I would attempt one in my Speedster build. Even if no one is interested, it helps me think through processes and learn from my mistakes.

This is my current project. It is a Wood Magazine set of plans I purchased several years ago. It is a relatively simple toy build compared to some so it is good for a beginner.
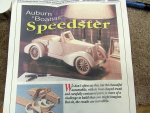
IMG_2020.jpg

The first thing made is the chassis. Basically a board with holes for dowels and axles to be inserted in.

Then I moved on to the Grill/hood assembly. I already posted pictures of this on my Gee Wizzzzz thread where I goofed and had to do a repair

http://familywoodworking.org/forums/showthread.php?32291-Oh-Gee-Wizzzzzzzzzz

I'll add those pictures here.
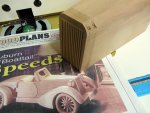
IMG_2013.jpg

IMG_2015.JPG

The grill was made using a 1/8" straight router bit on m router table. Took me 4 tries before I got what I wanted.

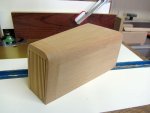
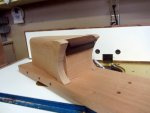
Yesterday I made the firewall, firewall sides and dash. I didn't like the dash in the plans. I was just a strip of wood rounded over with a 1/2" round over bit. I made mine a little more shapely but still trying to keep it easy.
IMG_2019.JPG

I wish that I had thought to do more with the "firewall" like make it thinner under the dash so when you open the door you don't just see a block of wood sitting there. But too late. And I'm a beginner.

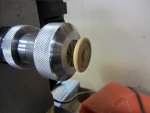
Now I am working on the steering wheel and column. In the plans it is just a 1/4" dowel with a disk of wood on the end. I'm trying, "trying" to do better. I turned the column my lathe and attached a disk. Put it back on the lathe to turn the wheel.
IMG_2017.JPG

Now I need to figure out how to do the inside of the wheel. I was going to cut it out on the scroll saw, but with column attached that is out. I think that leaves me with drill it out and them sand, sand, sand.

IMG_2018.JPG

I already know my biggest short coming with any build I do. It is thinking ahead and doing things in the right sequence. Hence the column attached to the wheel too soon. I did it because I used to column to hold the wheel in the lathe as I turned it. I should have figured another way to turn the wheel. Live and learn.


So that is how far I have gotten.
 
:lurk:

The way I do whorl for drop spindles (which are not entirely different than your wheel) is:

  1. Rough cut on the bandsaw
  2. Drill the center hole
  3. I made an inside jam chuck (basically a shallow cone) for the drive side and trap the piece between that and the cone center on the tailstock
  4. rough turn most of the waste away
  5. I've already turned the spindle to size, in your case this would be a piece of wood in your collet chuck like you had the dowel sized to the inside of the hole.
  6. Jam the wheel/whorl onto the spindle (I make it pretty tight so a little mallet tap off the lathe to seat)
  7. Finish turn the wheel with light cuts.

I think that would do what you wanted because you could just tap the wheel back off of the spindle and cut it.

If you turned the wheel post with a little button on the end that would make a nice center for the wheel I think and provide a decent place for glue contact.
 
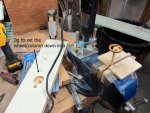
Thanks for the info Ryan. I had to look up "whorl", had no clue what that was. Here is how I did it. I remembered I had a dremel tool with a nice router base for it. You can see it sitting on the back of the vise. I made a jig to put the steering column and wheel down into and them held the board in the vise. I had to hold the column in with some hot glue so the wheel wouldn't turn as I routed it. I routed out the center part, then did some sanding to smooth it all. Worked out pretty simple and didn't take that long. I stained the outer rim of the wheel just for kicks. Didn't turn out too bad.

IMG_2024.jpg
 
Thanks for the info Ryan. I had to look up "whorl", had no clue what that was. Here is how I did it. I remembered I had a dremel tool with a nice router base for it. You can see it sitting on the back of the vise. I made a jig to put the steering column and wheel down into and them held the board in the vise. I had to hold the column in with some hot glue so the wheel wouldn't turn as I routed it. I routed out the center part, then did some sanding to smooth it all. Worked out pretty simple and didn't take that long. I stained the outer rim of the wheel just for kicks. Didn't turn out too bad.

View attachment 80817

Not sure you could do it a whole lot faster and nicer than that :thumb:
 
Well, I have run into a snag. The next item on the list is the windshield frame. I may have to skip this for a while and come back to it. I just do not like the frame the plans call for. It is way to thick and massive looking to me. All speedster pictures I look at have very skimpy windshield frames. Got to think this over, but I know I don't like what is being called for in the plans. You can see it in the first picture I posted at the start of this thread. Don't you agree?
 
I like this type of thread too Paul. I like to see every tool and jig involved in someones process. And i agree that even if its boring to others, its a good organizational tool that u can reference along the way.

I bet they did the windshield frame that way to give it some strength. But if u had it held together by an actual windshield of sorts (thin piece of acrylic glued to the frame maybe?) you might be able to get away with some really thin material there thats more proportional to the speedster.

Good luck :) lookin forward to seeing what u come up with.

Sent from my SAMSUNG-SGH-I747 using Tapatalk
 
Cool project Paul. Love all the detail in your post. Great pics.

I agree on winshield pretty clunky in the plan pic.

One thought i had was perhaps consider trying out making a very thin laminated piece of wood then look at steam bending to get shape. I dunno to get the part strong and light looking and round without relying on wood grain strength going to be challenging.
Great project though.

sent from s4
 
Well, I have run into a snag. The next item on the list is the windshield frame. I may have to skip this for a while and come back to it. I just do not like the frame the plans call for. It is way to thick and massive looking to me. All speedster pictures I look at have very skimpy windshield frames. Got to think this over, but I know I don't like what is being called for in the plans. You can see it in the first picture I posted at the start of this thread. Don't you agree?

Things are looking great Paul and very interesting to watch your progress. As for the heavy duty windshield, I think you are right in that it does appear a bit heavy, BUT my concern would be that it is the uppermost part of the car which makes it most vulnerable to breakage by a "tiny tot" if dropped. I suspect that may be why it was designed to be sturdy.

You "toy" threads are kindling a fire in me causing me to think that line of woodworking "wood" be fun. Unfortunately, at this time I don't have any grandchildren or even a small lathe..................... hmmm.
 
Last edited:
Al, the grand children just provide me with an excuse to build these toys and things. It is really for the Grandchild in me. But if you need to give the toy to someone, isn't there a child around you could adopt as a Grandchild. They are wroth having....:)
 
What about going with a piece of metal rod bent to shape for the windshield?

I am giving this some thought, my only hesitation is do I want metal on what is suppose to be all wood. No matter what I decide, the fact that I want to change it, means I had better wait until I have the area it is going to be attached to is in its final shape so I will know what surface I will be attaching to. Don't know if that makes sense, but I know what I mean. :rolleyes:

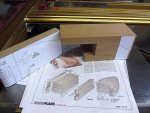
I didn't get a whole lot done today because of the amount of time I spent pondering and measuring just to try to save a little wood. As you can see in the picture below, the plan calls for the trunk area to be made from a solid block of wood, made up of pieces glued together. To me that was wasting wood and adding unnecessary weight. Well every ounce counts, doesn't it?? This is how I ended up gluing my block up. Hope I didn't miss figure or I will end up cutting air instead of wood.

IMG_2030.jpg

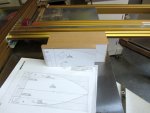
This is the pattern to follow from the top down.

IMG_2028.JPG

Now if I'm wrong I wasted good wood trying to save a little!
 
Last edited:
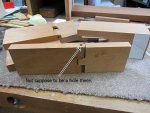
Well, got up this morning and finished routing out the hinges on the doors and sides. That went fine. then I had to drill down through, them from the bottom up, with them lined up together for the hole the dowel is inserted into to hold then as the hinge pin. Yep I screwed it up. I was so intent lining the pieces together that I didn't pay attention to which way I had the sides, up or down. Drilled from the top down..... :doh:

Guess I will make two more sides...

IMG_2031.jpg
 
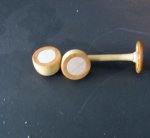
Okay a little update. Finally made some progress after correcting my mistakes. First while I was collecting my thoughts about those dumb mistakes, I decided to try my hand a making the headlights. That was fun, I enjoy working on the lathe. Here is what I came up with:

IMG_2039.jpg

Then I got back to the trunk/doors and had better success this time. Here they are sitting in place on the "chassis" waiting for me to start sanding. The part that looks wet, is, with mineral spirits used to remove the patterns.

IMG_2040.jpg
 
Top