Speedster Build

Thanks Al, yes I know about them. One of the only places I've found in the US that sells the size wheel I need. I may have to resort to them.

And, for all the hordes of you that are sitting on the edge of you chairs, impatiently waiting for my next progress report, sit back and relax, it may be a little while. I'm finding small spoke wheel making is a tad more involved and difficult then I envisioned. I've had no success so far with my practice runs, but have managed to iron out a few bugs in my jig. I will not give up,,,,,,,,,,,,,,,yet. I know I can do this. :huh::dunno::pullhair::tantrum::bang:
 
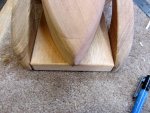
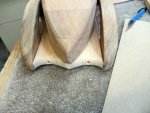
Did a little more work on the Speedster today. I decided to do a little more shaping on it. Looking at pictures of this vintage speedster types, they have a lot of metal and flowing lines. I decided to break from what the plans call for (again) and shape the board that is the chassis /frame some. Instead of just a squared off back, I made some curves and it doesn't show up in the picture but, I did some sculpturing on top of the board and it is shallow in between the body and the fender curving up to the body and the fender.

Before
IMG_2131.jpg

After
IMG_2132.jpg

I also drilled a couple holes in the end do I can mount a bumper. Got some wood soaking, going to see if I can bend it.

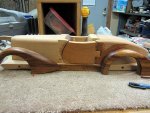
Along the side, between the front and back fenders, I added some cowling (?) that flares out toward the rear fender. This is made out of the same wood I used to make the fenders. In the picture I wiped some Mineral Spirits on it to get a better idea what it will look like.

IMG_2135.jpg

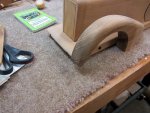
Then I rounded over the very front and drilled holes of attaching a front bumper.

IMG_2134.jpg

That's all I accomplished. Is it beginning to look like a "Batmobile"? No I have not given up on the wheels yet!
 
Last edited:
TailLights

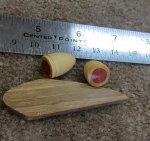
I just finished these up this A.M. and I feel pretty good about how they turned out. These are the taillights. The red lenses are made of blood wood. To make them "glass-ie" looking I finished the lenses with CA glue. I think I will do the same for the headlight lenses.

IMG_2141.jpg
 
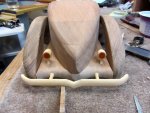
rear bumper and stands for the tail light. This is what they look like in place. Nothing on this car is permanently glued on yet. I will be able to dismantle it all and do some final sanding and shaping before I reassemble. Not sure what I will finish it with yet.

IMG_2143.jpg

Looks like I need to make a license plate.
 
This is my first attempt with the new jig set up. This is just practice and made from pine, I have better wood for the real thing. Still need to work out some things and build some chucks, but I now know I will be able to do it.

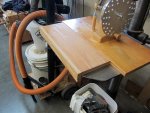
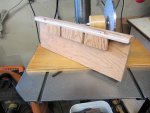
I needed to build something to make it easy to line up my jig so the bit was centered with the bit. So I made this plywood piece that I can slip on the press table. It fits very snug so it doesn't move.

IMG_2153.jpg

This is the back of it. Like I said it fit snug.

IMG_2154.JPG

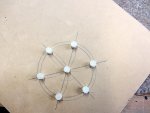
Then I had to have a jig to keep the hub centered while I put
the spokes in. This was very simple and worked great. Put the hub on the
middle peg and the wheel rim over the outside circle of pegs.

IMG_2152.JPG

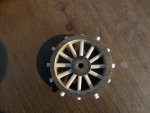
And walla, my first try. Some of the spokes are a little off because I didn't get the pin in the upright hole just right. That will not happen with a little practice.

IMG_2151.jpg

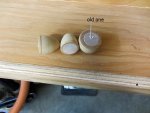
I also made a couple new headlights, more bullet shaped like the taillights

IMG_2155.JPG
 
Last edited:
Terrific work going on there Paul! :thumb: So, what are you planning on next, a V-8, V-6, in-line 6? You've taken all of us on a nice ride with this project.:thumb:
 
Thanks for the comments, they are much appreciated. I really don't know where to store all the jigs, I'm coming up with, but to me devising jigs is half the fun of building. What is next? Well I hope I stay interest in these models, but I have a tendency to get into something and after a few, decide to move on to something else. I'd like to build another speedster, after looking at the Auburn Speedsters on the internet, man those are beautiful cars. I like to pick one and build a model of it that is very detailed. Course, there is the problem of what to do with the things I build also, they have to go somewhere and space is not unlimited. Then there is my better half always asking why I don't build something useful! :rolleyes: Oh, well, a person has got to do what he has to do!
 
Very cool wheel Paul.
You sure got me scratching my head. Had to go back to your jig thread and figure it out, well try. :)

So i have some questions to make sure i understand properly. Do you make the wheel as a single piece drill it then cut out the hub and rim and then put spokes in on your jig or do you make them up as stand alone pieces ?

Very interesting thread. Thanks for sharing it with us. Btw what exactly was wrong with the headlights, i think we are our own worst enemies and critics. I thought the others were perfect. Guess i cannot get a job as quality inspector with my standards :)

Cant wait to see the whole vehicle finished. And you sure could offload the car on Etsy in my view if space is an issue.

The way I am doing it is, turn the wheel blank to the outside diameter I want the rim. Mount it on jig with the indexing wheel and drill the holes for the spokes in the rim, i.e., I drill spoke holes 3/4" to 1" deep. Then I take the wheel blank off the jig, and use a hole saw mounted in the drill press to cut the rim off at the inside diameter of the rim I want. Then I cut the hub out of the remaining wheel blank with a hols of the outside diameter I want it to be. Mount the hub on the jig with the indexing wheel and drill the holes around it about 3/16" deep. Take the hub and rim over to my little jig with the dowel in it and push the spokes in. I use that jig to make sure the hub is centered inside the rim as I push the spokes in. I tried to drill a wheel blank all the way down through the rim into the hub, them cut the inside diameter of the rim and the diameter of the hub, but the bits wonder too much as they get to the hub area. Maybe on a smaller size wheel I could do that.


Ryan, yep, I can see where the song fits!
 
Last edited:
Top