OK, let's see if these help.

Click on View>Toolbars and you get a window that looks like this. It probably won't have as many toolbars in the list because a lot of what you see comes from various plugins I have installed. To make new toolbars for the left side, click on the New button. If you want to make two bars like I did, go through the process twice. Then open the following toolbars: Camera, Construction, Drawing and Principal. Then, while holding Ctrl, click on the tools you want and drag them over to the new toolbars. I made two of them and alternated dragging the tools into the two toolbars and left out tools I don't use.
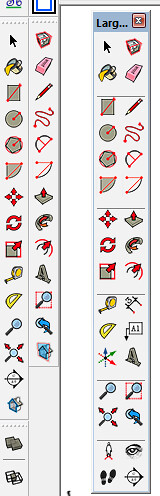
You can see my two custom toolbars on the left compared to the Large Tool Set on the right. The custom toolbars don't include the dividers and, again, you can see I've omitted tools I don't use, at least from the toolbar.

I leave Tooltips turned on but I untick Large Icons. I can see the small icons just fine and that helps to reduce the required real estate for toolbars.

This is the screen I use for the video tutorials. Since I switched to SU2014, I am using the Large Tool Set for this screen. I also have this screen set to 1280 wide so it matches the video format.
Across the top I have the following toolbars displayed: Shadows, Standard, Styles, Views (Listed in alphabetical order).

My normal working screen has a lot more toolbars displayed. I have the main window set so it is a little narrower than the available width of my screen so I can keep the various other windows I use out but out of the drawing space. There's still more than enough room for drawing and I don't need to worry about covering up some of my model when I open the windows. Windows that aren't needed can be collapsed by clicking on their title bar.


