Restoring the Great Pumpkin

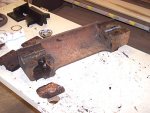
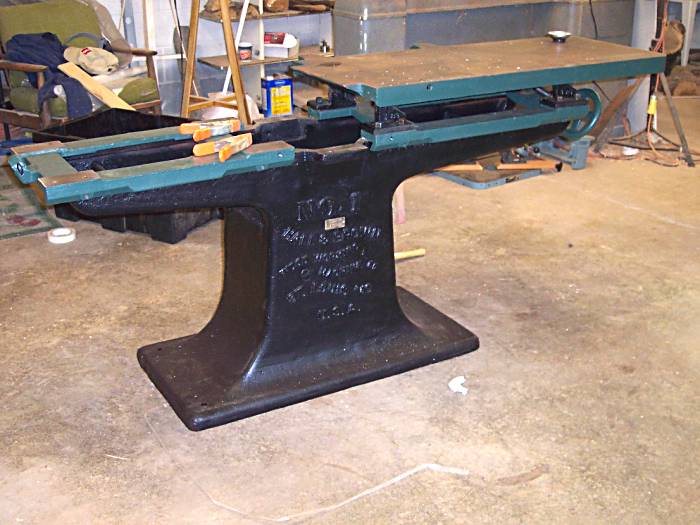
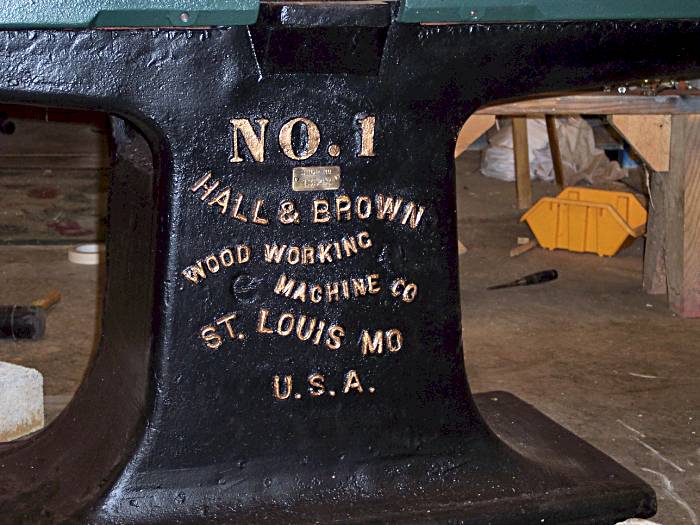
Thinking about motor mounts for the Great Pumpkin. Tossed a couple of ideas around. I don't have a lot of machines on mobile bases but I was think as heavy as this is and as big as it is, it might be nice to able move it without resorting to the lift. And it would be nice to be able to move it out in the open space if I had a lot of jointing to do.

motor_mount_idea.jpg


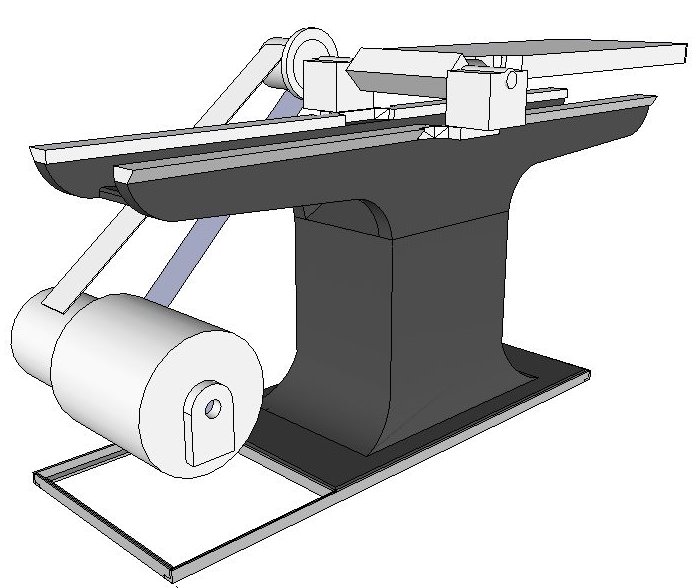
If I go with a base I can mount my motor on it. Take heavy angle welded together and add casters. Then just extend the frame out, add a nice looking wood slab and bolt it to the frame. Then bolt the motor to it. Looks like it should work to me. Anyone see anything I am missing?
 
Jeff, IMHO you angle iron will not cut it, you need to go with tubes.

I made one for the Green Meanie, and it works VERY well, and is real low to the ground too, which helps with stability.

gm_base1.jpg


gm_base2.jpg

Some pics of the base, welded up........

gm_jacks_1.jpg

This thing is rock solid.

gm_jacks_2.jpg

and when I turn even one of the jack screws down, it don't go no where!!

gm_how_low1.jpg

Like I said..............

gm_how_low2.jpg

Low rider :thumb:

I really think with the weight of the Pumpkin, you will need more than angle iron, even heave duty angle iron will flex.

Just my opinion, mind you :wave:
 
A quick update, the first table is out of the electroylsis tank and is painted. Will flip it over and clean the top and hopefully put it in place today. Second table is in the tank and will coming out this afternoon. Should have the table back in place by the end of the week.

I have racked my brains and finally come to the conclusion that the round head I have can not be adapted to this jointer AND keep the rabbiting feature. The cutter head diameter is just to small at 3.25 dia. I would need a head closer to 4" and even that might be tight. Or a head with long shafts for babbitt and those don't seem to common.

All pillow blocks I have found are too tall. They come up above the cutter head. Standard off the shelf bearings are too large by the the time you machine the blocks for the bearings you end up at or above the cutter head. Even if I don't use the rabbiting feature the bearing sticking up above the table seem like a bad idea and perhaps even a safety hazard.

The only thing that might work is bronze bushings or needle bearings and I just want to go through the hassle of dealing with thrust bearings and all the designing and time it would take would take. Not to mention the costs.

Bottom line is this. I am going to use the existing square head. ("play sound effects" gasps. sounds of shock and dismay, people fainting!). I will design a guard for it, probably a pork chop style. I will buy/build a set of push blocks and simple NEVER EVER feed a board without using these. No fingers on the board near the head. No one but me will ever use this machines. That will be fun telling my FIL he can't use it!

I am a poor working smuck that doesn't have several hundred dollars to have throw at the problem. I had thought about this before I bought the machine because I knew there was a chance that I would have to run the square head on it. So, time to move on to the next step in the restoration.


Jeff
 
Well Jeff, you got to do, what you got to do.

I'm sure you will do it right, and it will be as safe as possible, besides, down the road, who knows what will come along, might find a solution for the whole problem one way or another.

Cheers!
 
jeff, something i haven`t seen discussed anywhere is adding limiters to a square head? effectively making a round head......might be worthy of some thought?.....tod
 
jeff, something i haven`t seen discussed anywhere is adding limiters to a square head? effectively making a round head......might be worthy of some thought?.....tod

It is worth a lot of thought now that it's the only viable option. That has been on the list of things to do but not will move to the front of the list. Two of the sides this would be rather simple to do. It's a two blade cutter and the empty sides have a T-slot. Not sure on the other side because the the blades are really large. But I really haven't looked at it seriously.

The cutter head will be getting some attention in the next few days and while cleaning it up and I will be able to study and think on that more.
 
TA DA!

assemby1.jpg


Not finished but getting closer. Thought you might want to see the colors. 21 hours labor so far. Not bad, eh? :thumb:
 

Attachments

  • assemby1.jpg
    assemby1.jpg
    57.8 KB · Views: 7
Last edited:
G'day folks,

i am new, very, but back to what i wanted to say. i was wondering why you hadn't made a wooden frame, lined it with tank or pond liner and made your own temporary electrolytic tank?

The trick would be lowering and placing a solid chunk of metal without puncturing the liner, slow and easy.

Incidentally, it is great to see your restoration work Jeff, bliss even.

Terrific site.

Tom
 
Last edited:
First, Welcome Tom!

Now to the tank. Something like this??

Electro+tan1.jpg


I made this one with cider/concrete blocks and plastic sheeting for lining. It leaked. Everyone I made like this leaks. But I still use them from time to time.

After cleaning this base with a wire brush I would do it again rather than make a tank. It took me 2-3 hours to have it ready to prime. It would take that long to make a tank and then' it would leak. Now if I had a pond liner, that would work better. Except for that fact this method qualified for a "Dirty Jobs" episode it wasn't th at bad. Rough on an old mans back!! But I would do it again. Just because I could have it primed in a half a day.
 

Attachments

  • Electro+tan1.jpg
    Electro+tan1.jpg
    43.9 KB · Views: 5
Last edited:
well that would be bound to leak, ya cheapskate (pardon my familiarity). Still one has to try the cheapest possible and work down.
Save your back you only have one.
Maybe i am more obsessive, for the tank would clean away all those nooks and crannies that were left and i would know that the rust nasties would be under there working away whereas a good bzzt, a light brush down, a coat of orthophosphoric acid and it's ready pure and unsullied waiting for its new coat.

(If you use bzzt and acid as your solution, try to remember when you have something cooking else, for arguments sake, a nice little dovetail saw may well end up looking like a large razorblade - sigh).

Back to reading, i have a whole new site to go.

Edit:

Oh boy, what shear, unmitigated fun you have and are having Jeff. Well done!!!
 
Last edited:
A few more photos of what I got done today. Someone asked (not here) if I was going to do the letters in Gold Leaf. I was thinking white but I had some gold spray paint so I though why not try it. Well I love it!

d5-partial_assy.jpg


A close up

d5-scroll-work.jpg


The top came out pretty good. The photos actually look better than they do in real life. There are a lot of pits and some that were under the fence are pretty deep. I polished it up and waxed it up and tried it out. Board almost slid out of hand it's so slick. :)

d5-top.jpg


Once I get the other table on I will try to determine how flat they are and if I going to be forced to have them ground.

Jeff
One tired iron monger!
 

Attachments

  • d5-partial_assy.jpg
    d5-partial_assy.jpg
    74.1 KB · Views: 6
  • d5-scroll-work.jpg
    d5-scroll-work.jpg
    68.1 KB · Views: 3
  • d5-top.jpg
    d5-top.jpg
    40.7 KB · Views: 7
Last edited:
bet doing that lettering with a small, fine brush made yer wrists ache esp after a hard day.
Go and have a bath and relax and feel good about what you have done, hey?
 
Well, now I see the small brush :doh: 
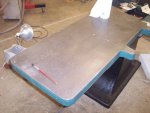
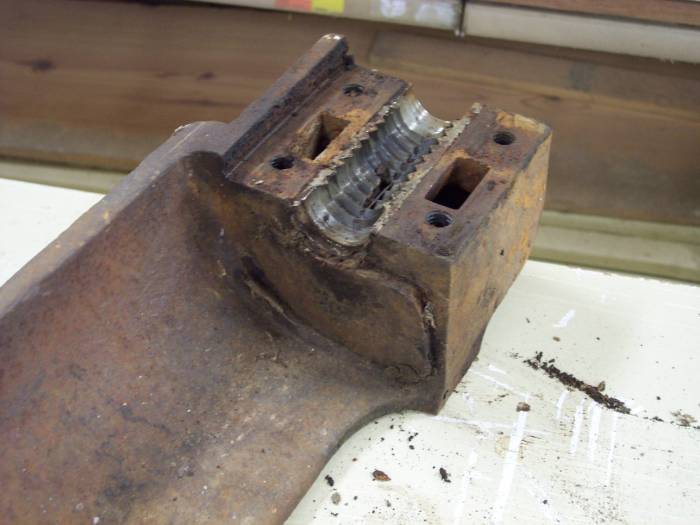
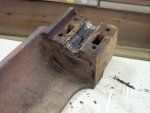
I was busy looking at the nice big jointing surface :thumb:

I've seen it done with a pad of sorts, as the lettering stand off the base by a fair bit, I've seen a square of plywood, wrapped with say a cotton rag, the the rag is painted, and the square is padded on the letter in, just touching the tops of the letters, I've been wondering if that method would work for Kermit, just waiting for you to try it first :D

Cheers!
 
Wow, looks great!

How did you do that lettering? :huh:

Stu, I tried a different method one time that worked pretty well, and it was kind of a reverse of what you described. I sprayed two coats of Gold on the whole area that had lettering, then when it was dry, as a precaution, (since I really didn't have any idea if it would work or not), I sprayed the letters with a clear coat to seal the Gold. When the clear was dry, I sprayed the whole area with black and then used a cloth pad and a small short bristle brush to wipe the black off the letters. The final wipe down was with a cloth pad very lightly damp with mineral spirits.

I might have just got lucky, but it came out real nice, (MUCH better than if "I" had tried to brush paint on the letters most likely).
 
Last edited:
Yup, a small artists brush. Actually not the one in the photo. That one I used on the big letters. Painting them was actually not that hard, at least for me and I am not artistic. But is a royal pain the back sitting on the floor. I should have lifted it up on blocks or something. My back aches today.

The painting is far from perfect and the castings is very rough in many of those letters. But it really doesn't show unless you get right up on it looking. And the good thing is a rag and some thinner will remove any mistakes you make.
 
These photos of the bearing box are before I started cleaning. It's now primed and sitting in place. I knocked out the Hanging Chad so I could wire brush and clean the joint. I have it just about ready to repair.

d6-babbit_box1.jpg


d6-babbit_box3.jpg


Once the bearing box is repaired and painted all that's left is the fence. It's in the tank right now. It will be done! Well I still have to rig up a motor of course.

Closing in on it. Not that much noticeable difference. Adding a few small item and have both tops installed. Still have to polish the outfeed table top and repair the babbitt bearing box. Say that 3 times fast. And that is just red oxide primer, it's not staying that color! :rolleyes:

Literally had to bring it in from out of the rain and just sat it in place.

d7-assy.jpg
 

Attachments

  • d6-babbit_box1.jpg
    d6-babbit_box1.jpg
    54.4 KB · Views: 7
  • d6-babbit_box3.jpg
    d6-babbit_box3.jpg
    37.7 KB · Views: 5
  • d7-assy.jpg
    d7-assy.jpg
    76.2 KB · Views: 11
Last edited:
Top