Restoring the Great Pumpkin

Jeff, I've been following along, but I can't get any pics after Stu's post of his base. Any idea on where they are???

That makes no sense. Something on your computer or your ISP is limiting the photos cause they show up fine here. I have had that happen on occasion, usually if I right click on the missing image a menu will show and one of the options is view image. It will open the link to the image.

If that doesn't work go to my web site, I am quicker about updating here but I update it every few days.

EDIT: I just went back and uploaded all the images. You should be able to see the thumbnails at the bottom now???
 
Last edited:
Thanks Jeff! Man, those pics are great!:thumb: I love the gold lettering. Really a sharp looking machine.

Oh, Stu...Someone has to get the blame!!! Guess the pics just went the wrong way round the world!!!
 
Thanks Ed. I have to admit I wasn't so sure about the color choice but once the Gold went on I was impressed! I got the idea from someone else, so the colors are not original with me. Gold was planned to be white but after trying it, no way was I going with white!

Tod, Bearing boxes repairs are next. I have cleaned the boxes and broken pieces and primed around the broken area. Hoping tomorrow to do the final cleaning and any needed grinding/filing/timing to make the pieces fit flush again. Then I am going to epoxy (J B Weld?) them in place. Should be able to hide the repaired surface pretty well. If all goes well I will just need to clean them up and paint and install. The babbitt is good on these so no pouring babbitt, bandsaw may be another story though.

Jeff
 
Last edited:
Bearing box repairs

Just finished up repairing the bearing boxes on the G.P. Went fairly smooth and my fingers are not epoxied to anything so it appear to be a success. Only 24 hours will tell for sure.

I probably showing too many photos but you don't have to look at all of them. ;)
This is one of the blown out sections in the bearing box. This was my biggest concern when I bought it. As it turns out, it wasn't the big deal I was thought it would be. Of course I don't have it running yet either! :rolleyes:

Photos show a before, during and drying. No afters yet. The broken piece not would just fit back in place perfectly. Of course! So I had to so some griding to make it all fit properly. This is the end that will show and fortunately was the cleanest break. It took very minimal grinding on it and the bolt would even fit the threads. I am sure with just a little sanding/griding and probably a little filling it will look like it was never broken. Wish I could say that about the other end!

d8-bbrepair1.jpg d8-bbrepair2.jpg d8-bbrepair3.jpg d8-bbrepair5.jpg

Here is the other end. It is behind the cutter and won't show. But it was a nasty break. Took lots of grinding to get it back together. I don't know how it every came apart! There was some big gaps and trying to fill the holes turned out to be very messy as you can see. No doubt I will have to chisel the wood block off. But with some sanding it will look OK. And it is hidden behind the cutter head so it really won't show. But I still hate sloppy work.

d8-bbrepair6.jpg

Got the fence put together only to notice some primer still showing. Got a little too anxious. Oh well, a few minutes with a paint brush will touch it up. Obviously still have to clean up some bolts. But I wanted it anchored down on there. I think that fence alone weighs 100 pounds or more. It's a monster!

d8-fence.jpg
 
It's finished! I have done all I can do till I get a motor for it. Well, almost. I do have some wicking felt order and will need to install that along with the oil but that is it. It's time to get the blades shortened then I can do the set up of leveling the tables and adjusting heights and all the other adjustments that need to be done.

But till I get the motor here and restored I am done! And I am tired. My Lab is nasty!! And give me a dary or two rest and I will ready to start on the bandsaw. :D

d9-finished1.jpg d9-finished2.jpg

So far the total is 43 hours labor over 13 days. Add an hour for installing the felt once it get here, so that is 44 hours. A lot less than I would have guessed!

jeff
 
Put a little oil on then when I assembled them and it turns smooth as silk. The bearings were cast with some shim stock between the cap and base so that any wear could be taken up. I will probably have to adjust the shim pack once it is finally running.

Yes, I am ready to cut some wood! I am tired of working on machines and ready to build something with wood. But it's may be a few more weeks before she comes to life.. I have to build a phase converter first. Assuming I am going to use one of the motors given to me. Then I have to find some appropriate looking switches for the Jointer. So still a bit of time left before she is done.
 
Jointer is looking really fine Jeff :thumb:
Your hard work is going to pay off.

Back on page 2, you mentioned Cummins Beige was not available unless mixed.

Any noteworthy Truck Shop usually keeps that color if they do any engine work at all.
But looks like you done settled on your final color:thumb: :D
 
Jeff, that really turned out nice. That's a very impressive piece of machinery and the work you did on it is equally impressive! Any chance you could get a video clip posted on youtube when it's running? I'd love to see and hear it running!
 
A little late to the Party Steve. :wave: Don't think I want to change the color now. Pretty happy with it the way it is. ;)

Ed, I probably could. I don't have a video camera but I know a few people that do. My camera will shoot video but I don't know how good it is. When I get it done I will have to look into that.

Jeff
 
Wonderful Jeff. Absolutely well done, especially when one looks at what you started with and what you have now. Kinda like Cinderella :)
 
It's finished! I have done all I can do till I get a motor for it. ...
View attachment 8251

Pardon my ignorance on the topic of "big old arn", but.... isn't that fence kind of short? (Lengthwise, I mean). It only appears to extend about 4" past the cutter head. Do you need to adjust how you hold a board when working with such a fence?

My understanding of jointer use is that as you feed a board you transfer your pressure to the outfeed table and hold the board down there as you feed it... But there is hardly any fence to hold the board against!?

In contrast, my 6" Jointer -- a Delta x5, 2yrs old, and most definitely not old arn -- has more fence on the outfeed table than on the infeed. I've got 14" on the infeed side, but almost 19" on the outfeed side of the blade.

:huh: :dunno: :huh: :dunno:
...art
 
Been meaning to measure before I answered. There is 12" after the cutter head of fence. By todays standards that is little short. My 60's J-Line has about 19" of length past the cutter head.

I have not got this one running yet but I don't see why it would be a problem. After all your pushing it straight through and unless your using the full width of the cutter head it's not going to hurt anything if moved away from the fence a bit.

Also this one has one of the original hold downs and it has provisions on the table to mount the hold down so it can push the part against the fence too. Of course the guard I am going to build should take care to that part.
 
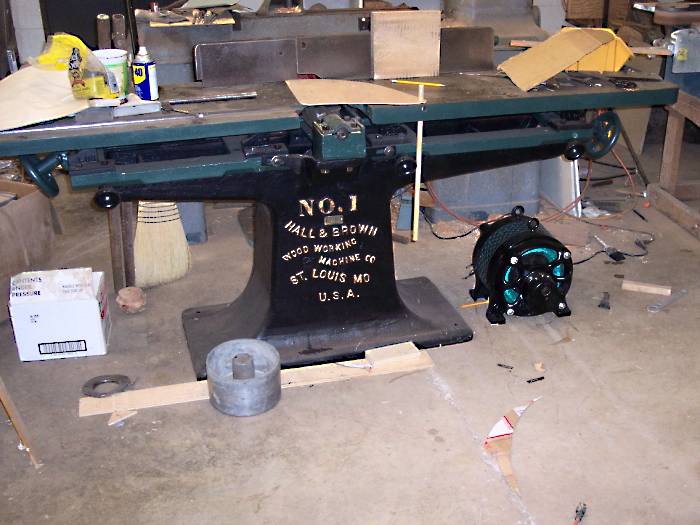
I am finally back to work on the Great Pumpkin. Hoping it will make some chips in the next few weeks. The list of things-to-do is actually very short. The motor has been the main hold up. That and getting 3 phase power in the shop. The is is done and sitting in place.. well sort of. Gives me a chance to eye-ball it for a few days to decide how I want to mount it.

day6-motor.jpg


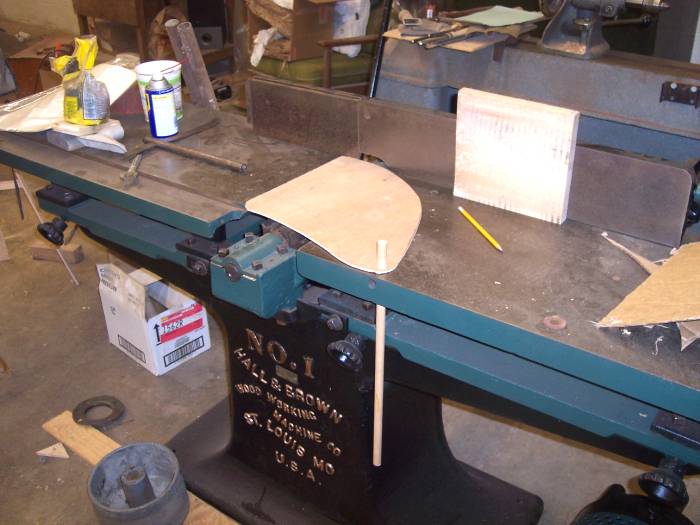
Tonight, despite the fact this heat is just wearing me out, I made myself go to the Lab and do some work. I decided to play with paper dolls and try to make a blade guard. Since I am keeping the square head the guard is not an option, it is a must!

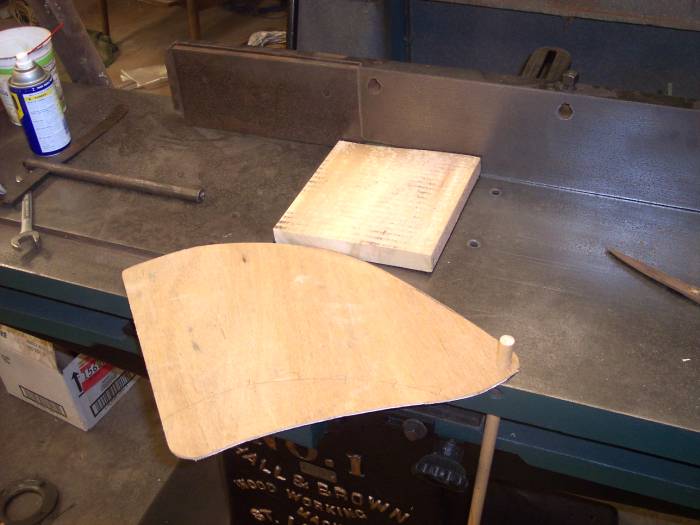
I made a couple of cardboard dollies and found one I liked. So I graduated to luan dollies.

This one looks pretty promising. I have a hole in the table that I assume was for a pressure bar when doing moldings? It's in an excellent place for the guard and even had a thread hole for a set screw.

day6-guard1.jpg


day6-guard2.jpg


day6-guard3.jpg


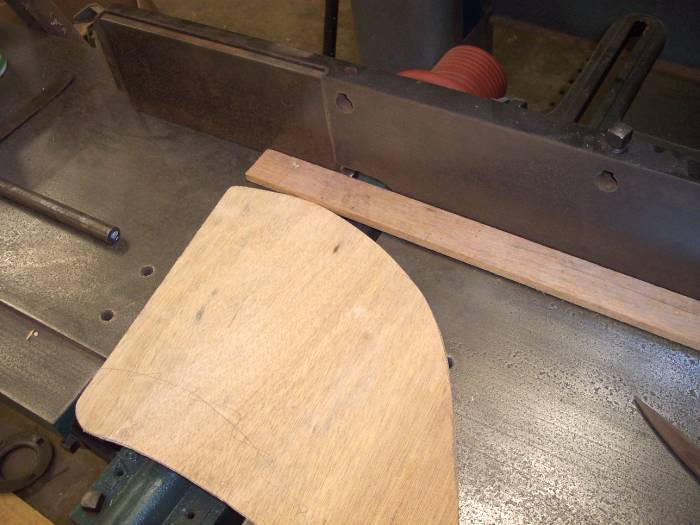
I have a small gap present when I run a narrow strip through there. I may try one more and try making the radius larger and see if that helps close that gap. Even so, it's pretty small and wouldn't be easy to stick a finger in there. And I plan on using push blocks all the time!

I didn't allow for a method of holding the guard in place. That will be either an extension spring or a counter weight. I am giving serious consideration to a counter weight just because they are old school (and simple). But the spring is simple and nothing to go wrong with it except if it breaks.

Jeff
 
Last edited:
Top