Carry On

Not the worst mistake to ever happen in woodworking, but I can understand your unwillingness to look at it every day. I might have tried to sand it out, but that would require sanding all four pieces of the frame equally to keep the profile consistent all the way around the frame.
 
Not the worst mistake to ever happen in woodworking, but I can understand your unwillingness to look at it every day. I might have tried to sand it out, but that would require sanding all four pieces of the frame equally to keep the profile consistent all the way around the frame.

Sanding it out was my first thought - but.

It is very deep - 1/32 - but Cherry burns deep.

Sanding all around is a definite possibility. If I was so strapped for money and I didn't have a supply of Cherry on hand - I would route and sand.

I don't really mind the re-make. I just don't like scrapping something like this, particularly in the way that this happened. It really was a stupid thing.
 
update Carry On August 24

Well - it's been a little while, but, this is not the only thing being worked on in my shop these days. I am also building a cabinet. So this project is a side line project.

I remade the lower frame piece that I screwed up. Glad I did that.

You gotta keep in mind that the CNC is only PART of the process - not all of the process.

I miter cut the miters on the Hitachi SCMS
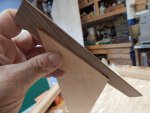
Carry on Aug 24 -2.jpg

Then I cut a spline slot on the table saw.

I made the splines on the table saw, band saw and Performax 16-32 drum sander - and a little bit on the 2" wide vertical sander.

And also a pile of hand sanding.


Carry on Aug 24 -1.jpgCarry on Aug 24 -3.jpg


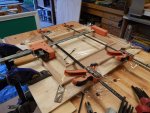
The Glueup was a bit of a challenge. I needed to make a bit of a fixture to help me out. I make fixtures as I need them.

YES - I was VERY VERY messy - WAY too much glue.


Carry on Aug 24 -4.jpg

I did scrape some of the excess glue before completely dry.


Carry on Aug 24 -5.jpgCarry on Aug 24 -6.jpg

I reshaped the text base to fit into the pocket in the frame and I repainted the text base and the letters.

I stained it with General Finishes Warm Cherry.

I placed the text in the text box and placed the whole thing there just for this pic. Everything was then disassembled and set aside to dry for a couple of days.

I need to cut a rabit in the back for the glass, picture and backing to fit into.

Then I am going to use rattle can spray poly for a finish.

After the finish I will assemble it and hang it on my wall.
 
Carry On Finished - September 13

Finished,

Normally - or at least I was for a while a "purist" and I didn't color or stain anything, but, I realized that I am not a purist. That does not mean I do not appreciate or like the natural color of woods - I do - I really do, but I also like it stained and colored.

So, with that said, I used General Finished "Warm Cherry" stain, on this and I like it.


Carry on Finished-5.jpg

Here is is hanging on the wall in the Nautical Hall in my house. I call it Nautical Hall because I plan to deck out the hallway with lots of nautical stuff. This is the first.


Carry on Finished-3.jpgCarry on Finished-2.jpg

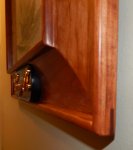
I decided to "space" the picture away from the wall a tiny little bit, just to make it look "floating" a little. I think it looks cool that way.

Carry on Finished-4.jpg

I mounted it to the wall with a french cleat.

The backing is 1/2 thick Birch plywood. Nothing special, just some Borg stuff.

I wanted to play with some transtint, and fade out from inside to outside. It didn't come out as good as I would have liked.

I also v-groove engraved the sailboat into the middle.

Like I said it's just the back, so nothing really spectacular.


Carry on Finished-1.jpg

Just goofing around here, I but the back in backwards and took pictures of it.
 
Top