Sir, scarfing is wrapping the plywood up in a long woolen muffler.
 That response is indicitive of either a twisted mind or a very creative and playful father.
No actually, a scarf joint is a long beveled joint which creates a nearly long grain glue surface. The typical scarf joint is cut at somewhere between a 1:8 slope and a 1:12 slope. The longer the slope the better the joint.
A plywood scarf is typically cut with feather edges. The slopes run off to an edge similar to that of a chisel.
There are some other types of scarfs, too. Nibbed scarfs have a sort of shoulder instead of a sharp edge. A stepped scarf is also sometimes used to join plywood together. The stepped scarf consists of a series of mating steps which for long faying surfaces good for gluing.
Here are some images I found.
A Scarf joint cut in plywood.
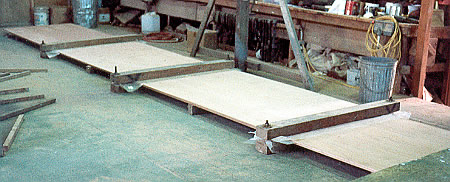
Plywood scarfed, glued and clamped. this for the sides of a 25' long boat.
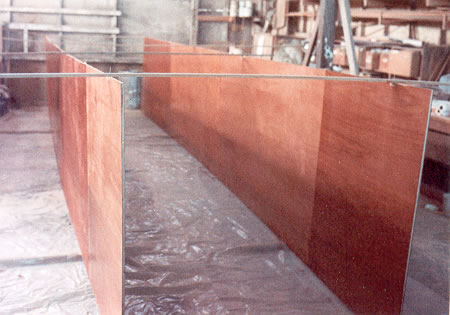
After the clamps come off.
There are pegged or keyed scarfs and swallowtail scarfs and... But those are used for solid wood and not plywood.
The common feather edged scarf is the easiest to make especially in plywood because the plies give you guidance. Boat builders will frequently stack up a number of sheets with the edges set back the right distance. Then they'll cut the scarf joints on the pieces at once.
The trickiest part of the scarf joint is clamping it while gluing. The joint will want to slide apart. If the project can tolerate it, a board can be screwed down right through the plywood into the work surface below. Just make sure there's some plastic between the plywood and the clamping board and work surface so you don't glue the plywood down.
Hope that helps explain it.


 too much!