how would you plane or dimension thin wood?

larry merlau

Member
Messages
18,741
Location
Delton, Michigan
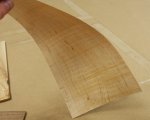
i have a peice or qulitted maple that is around 4" wide and 1/4" thick in the thickest point that needs to be made flat enough to use as a veneer lamination.. but dont know how to get it there the safest. have shellix head planer and drum sander or can have a power belt sander do it..
 
How long it's it Larry?

I'd use my drum sander (partially because I feel compelled to keep finding reasons to justify its existence but also because it takes the most controlled bite), but you have to watch short pieces with it. If it's less than about 12" you'll need to fatten it down to a board somehow (thin double sided tape maybe) to keep it from being sucked up. If you don't have a flat reference side I'd start with sticking it a small sled and some shims under the workpiece to knock off the highest spots and then flip it to finish.
 
Another vote for a drum sander but, at a quarter inch thick I'd be tempted to resaw it first and get twice as much material. I have also use double stick tape to tape thin material to the carrier board before going through the sander.
 
Last edited:
I've gone as thin as 3/32" with my Performax drum sander. You saw those lamination strips I used on the 'circle table.' They were resawn, then sanded.
 
I use a known flat piece of wood or chipboard with melamine as sled. I plane first one side of the wood and then I stick it to that sled with double sided tape, that prevents it moving and lifting, it has worked for me without going to hassle of making a proper sled.
The only drawback if you want is that you have to achieve the final thickness by removing wood from only one side. I got pieces down to 3mm thick with no problem

Obvioulsy, depending on the thickness be carefull when removing the piece from the sled. I have got
 
Late to this party, but I've made thin veneers on my drum sander for many years. I can get to as little as 1/16", but usually stop at 1/8" for bentwood laminations or a little thinner for veneers.
 
When I had the Performax/Jet drum sander, I was able to get very precise thickness. I now have a Woodmaster, which is NOT as precise on thickness (since the abrasive is attached with Velcro, and the feed belt is spongy rubber). I think Larry has a sander like mine.

I stilll would probably use the sander, but I would test the flatness of the belt and make many shallow passes (the woodmaster has a reverse feed switch so you can run something back and forth.)
 
I would resaw it to make 2 pieces --- conserve that quilted bounty

I then would run it through the drum sander.

On the drum sander I use a "carrier".

The carrier is just a board that I sanded flat and parallel in the drum sander - then I used 80 grit sticky back sand paper on one side.

I place the thin wood on the grit side of the sand paper and run the drum sander to barely sand the high places.

I keep the feed on max or near max.

I just did a series of pieces last week down to 1/8 " without a hitch
 
Jim. robert and glenn your using double sticky tape to hold it to the carrier? and charlie yup on the woodmaster.. not going to resaw it its not worth it for that step..
 
Jim. robert and glenn your using double sticky tape to hold it to the carrier? and charlie yup on the woodmaster.. not going to resaw it its not worth it for that step..

I'm also late, but I echo these comments, and yes, Larry, I used double-sided tape to stick it to a sheet of plywood and then fed it through the planer. I've done 1/8" thick on my DW735, regular straight bladed planer.
(but not figured wood, I confess, no experience there)
 
I find highly figured wood chips out in a planer.

I have tried all sorts of methods. Brand new knives - wet the wood - alternate grain direction - nothing works for me.

In the sander it will not chip out.

I didn't use double sided tape.

I used adhesive backed sandpaper stuck to the carrier.

I just placed the thin wood on the sandpaper - that way, I could turn it over easily, and run several strips on one carrier.
 
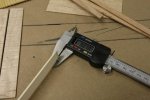
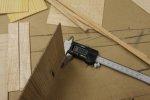
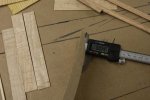
Larry I would use a Drum sander with a piece of 1X6 under your working piece, with around 4-6" longer then your working Piece. That is how we did it at the mill when sanding thicker veneers for door parts (.062-.250") Works well just don't forget to add the thickness. and measure with Calipers! have fun!
 
Home made thick and thin veneers

I am by no means an expert at this but here are samples of what you can do in a home shop with a little practice:

Miscellaneous sizes/shapes in the consistant range of .068" to .070"
miscthins.jpg

With proper setup and process you can see the cherry veneers (stack in the middle) are really consistant:
miscthin2.jpg miscthin3.jpg

American Holly strips:
holly.jpg

Walnut veneer:
walnut.JPG

Thin veneers of tiger maple (0.029"):
tigermablethin.jpg

At 0.029" easily bendable in any direction:
tigermapletwist.JPG

The attachment is a strip of wenge. Rob
 

Attachments

  • Wenge.jpg
    Wenge.jpg
    55.2 KB · Views: 17
I didn't use double sided tape.

I used adhesive backed sandpaper stuck to the carrier.

I just placed the thin wood on the sandpaper - that way, I could turn it over easily, and run several strips on one carrier.

Cool tip. Less problematic than tape. I'm gonna give that a try.
 
You all sure do over complicate things. I don't see any need to use a backer board to run it thru the drum sander. At work we routinely run pieces thru the drum sander down to just under 2 mm thick with no problems what so ever. This is done on a supermax 25" wide dual drum sander.
 
When I had a Performax (Jet) drum sander with cloth belt directly on the drum, and thin sandpaper as the feed belt, each pass was precise, and an extra pass took almost nothing off. I dared run the drum close to the feed belt.

Now that I have upgraded(?) to a Woodmaster 5 hp 38" sander, the belt is attached to the drum with spongy Velcro, and the feed belt is a thick rubber mesh, so I can get significant wood removal for three passes without adjusting the depth/height of the sander. With this kind of machine, you don't want to risk the very expensive feed belt, so the minimum thickness isn't very minimum - hence the backer board is to keep the expensive sandpaper away from the expensive feed belt, in case something goes wrong. (There are advantages to the Velcro sandpaper and the rubber feed belt, but very thin, precise thickness sanding is not one of them).
 
Top